Since the first Digimon hatched in 1997, Digimon tamers from all corners of the world have contested one another for the throne of the strongest. That throne has taken many forms over the years, whether in something as humble as being king of playground v-pet battling, or as lofty as the title of
D-1 Grand Prix champion. Now it belongs to one tamer standing at the top of
Digimon Story Cyber Sleuth's leaderboards, and many thousands of competitors beneath them are fighting to inherit their rank. Less than a month ago
Sleuth launched internationally, introducing many new tamers to the Digital World, and to our endless battlefield. With so much young blood in the scene, there are more opportunities than ever to find skilled opponents and rise up to that ideal.
The guide below relies on data from the
Japanese Cyber Sleuth wiki and
Draken70's incredible FAQ for
Cyber Sleuth. It's a "part 2" of sorts that presumes you're familiar with the
building perfect Digimon
guide. As with part 1, it's based on my notes from when I was doing
team building and competition in the Japanese Ranked mode of
Cyber Sleuth. I've also spent a considerable time building myself up in the English game now that the different versions of
Sleuth
have synchronized leaderboards, and have used that experience to help
write this guide. (My rank at the time of this writing is 736 out of the
world, with an overall win ratio of 89%.) It's divided into several sections, is primarily taken up by the Digimon threatlist, and those sections can be read in whatever order you prefer.
You can skip straight to the threatlist and come back to the other sections later, if you feel so inclined.
All in all this guide took about five months to compose, so I'm glad to finally have it done with. If you want to jump to a section, just search the bracketed six-digit code given in the index next to the section title.
Index
1. How Do You Win in Cyber Sleuth? [WINNER]
2. Abnormal Status & Equipment [EQUIPM]
3. Investing in Speed VS HP [XSTATS]
4. Game Mechanics & Dealing Damage [MECHAN]
4.1 The Nine Elements [9ELEM]
4.2 Healing Skills [CLERIC]
4.3 Buff & Debuff Skills [MEGAMI]
4.4 Offensive Base Caps [999999]
5. On the Subject of Netdecking [YUGIOH]
6. The Threatlist [LILITH]
7. Closing Topics [ENDFAQ]
1. How Do You Win in Cyber Sleuth? [WINNER]
There
are two ways to win in Ranked. The first is to KO all of the opponent's
Digimon within the 30 minute time limit. The second is to hit the time
limit and have more
overall KOs per game. The winner of a match is
not
based on who has more Digimon surviving at the end of the round, but on
who scored more total kills during the allotted time. Thus it can be
said that the overarching goal of the match is to optimize damage output
while minimizing losses to secure a higher kill count.
The proliferation
of powerful stall teams in ranks 1000~1 has given rise to an
alternative win condition; for the opposing team to run out of Skill
Points. This may sound counterintuitive, but the team that runs out of
SP first is the one that that becomes unable to act at all. SP is
intrinsically tied to all meaningful offense and defense. If you can
force the opponent to the point where they have no SP and no way to
restore it, while your SP is being restored through functionally or
truly unlimited means, then you have already won by rendering the
opponent helpless to stop you from knocking out all of their Digimon. This is the defining reason why Physical or Spirit Drain are recommended on almost every Skill listing.
2. Abnormal Status & Equipment [EQUIPM]
The effectiveness of status in
Sleuth has been greatly overreported. I cannot stress enough the
importance of outfitting your Digimon appropriately. More times than I
can count, I have had opponents repeatedly waste SP trying to cast abnormal status on my team, not realizing that my party members are
fully immune to every status effect they have loaded out. The average
Digimon has 2 equipment slots available, while the maximum possible is
3. Some Digimon are only balanced out by having 0 equipment slots. These
slots should be, in almost all circumstances, devoted exclusively to
blocking staus problems. The preference list corresponds to the order of
priority for status
you would prefer to inflict on the opponent;
- Sleep Barrier DX
- Panic Barrier DX
- Stun Barrier DX
- Dot Barrier DX
- Paralysis Barrier DX
- Bug Barrier DX
- Poison Barrier DX
- Death Barrier DX
The reason that Sleep is on top is that it interferes with
sequential turns. Sleep is guaranteed to work for one turn; at the end
of that turn the Digimon either wakes up, or stays asleep. This process can repeat for any number of turns until the Digimon finally wakes. Digimon
cannot act on the same turn that they wake up, so this is your cue to
re-inflict the status problem. Panic is higher priority than Stun
because it can interfere with
multiple sequential turns, forcing
the Digimon to randomly attack for upwards of three turns in a row.
Meanwhile the Stun status lingers longer than its actual effect, delaying the opponent's next turn and not lifting until they get that turn.
You
cannot inflict a status effect on a Digimon that already has that
status, and Stun's only effect is to push a Digimon back in the turn
order once. Since Stun does not wear off until that Digimon gets a turn,
preventing Panic is more important as you can weather the Stun and
carry on, but Panic can leave your Digimon incapacitaed for most of
their time in play. Eliminating opposing status problems from your gameplay can be as simple as only running Digimon that have three equipment slots. The 1 and 0 equipment slot Super Ultimate Digimon are
incredibly overhyped and easy to incapacitate.
Dot wears off after two turns, and
as demonstrated below can be blocked by other means. (The exception is
that Dot gets priority prevention on clerics, who need access to their Skills.) Paralysis has a random
chance to stop a Digimon from acting, and could potentially be ranked
higher than Dot, but leaves the possibility of not affecting a Digimon
at all. None of the other status problems do turn manipulation which
makes them much less potent, and everything above Death but below Stun
can be dealt with via Restore. While attractive, instant Death is never
guaranteed and only attached to a % chance to inflict it, making it both
unreliable and impractical when not connected as a side-effect of
something else. (There is one Digimon devoted entirely to causing instant Death.)
In situations in which status problems can be blocked by other means, the other equipment worthy of consideration are;
- Attach A items (grants either +250 HP or +25 to another stat, or +9% Evasion)
- Disks (either +100 HP +10 to another stat, or +10 to two stats)
- DX Guards (Reduce damage from one attribute by 20%)
- CAM USB (Increases Xros Combo probability by 10%)
The Master Disk gives +50 HP and +5 to every other stat, with a
cumulative effect greater than any other Disk, but an individual effect
lower than any of them. Master Guard reduces all attribute damage by 5%.
Generally speaking, specializing towards blocking an especially
problematic attribute is more effective, as one can choose to have a 60%
resistance by stacking three DX Guards of the same element. (Useful
with regard to Phantom Pain et al.)
3. Investing in Speed vs HP [XSTATS]
The
dominating dilemma when deciding how to allocate your bonus stats is
whether to invest in Speed or Hit Points. This is best exemplified by
Japan's quad-annual DIGIMADO tournament series; in the November 2015
tournament, the top two tamers were Jitenryuu (@Griffomon) and Sasakani
(@sasakani_cool). Sasakani allocated their team's bonus stats to
nothing but Speed.
Had Jitenryuu followed suit, this would have effectively frozen the
Speed tiers as they were on the level of their base stats such that the
only bonuses that would have mattered would have come from equipment and
Support Skills. Instead, Jitenryuu divided his bonuses among the
offensive stats Attack and Intelligence, with some allocation to HP and
only moderate investment in Speed. These boosts were supplemented by
stat boosting equipment, and left Jitenryuu with a well-rounded team
that accepted his opponent gaining an overall increase in turns in
exchange for greater offensive power.
By the time of
the December 2015 tournament, a paradigm shift had occurred such that
Jitenryuu (who also won this tournament) was investing nearly every
Digimon on his team fully in HP. Only his Plesiomon, Dianamon, and
Belphemon RM had any bonus stats put into Speed, with Diana being split
50/50 between HP and Speed, Rage Mode focusing primarily on SP and with
only a +4 to Speed, and Plesio being the only member fully invested
(+100) in the stat.
Why? What was it that Jitenryuu discovered that compelled him to drop virtually all support for every stat except HP?
In the first place, investing in HP is
necessary
on some Digimon because in many matchups defensive stats functionally
do not exist. The prevalence of Piercing damage in the metagame means
that damage cannot be reduced except via attribute strengths and
weaknesses, so having enough hit points to simply tank attacks is
oftentimes the most viable way to deal with them. However, this means
allowing specific high base Speed Digimon to get in as many as two to
three turns to your every one. (These Digimon do not have Piercing
Skills.) Ultimately the higher your Speed relative to the opponent, the
less often the opponent will be able to move, but the lower your HP the
sooner you will have to resort to using your cleric(s). The moment those
healers' Spirit Points run dry, you are only a few turns away from
losing the match. With higher Speed, you will have to resort to using
those healers less often, in turn losing more slowly than if you had
instead invested in HP. But increases in Speed can also be nullified by
the immediate loss of party members, as if even one of them goes down
you're then losing as much as a third of your offensive potential.
(Since in high Speed setups, you're opting for a "death of one thousand
cuts" strategy with below average offense inflicted many times per
rounds of action.) The takeaway from this is a balance between the two
stats, but skewed towards HP. On a practical level, every Digimon should be considered to have +1000 HP and +100 Speed as a default recommendation in absence of any other specific allocation, but these are not necessarily the only ways you can viably distribute your stats.
Another way to look at the issue is from that of
Digimon's former rival,
Pokémon. In its current system
Pokémon allows trainers to have a total 510 Effort Values on their Pokémon to boost their stats, with a cap of 255 in any one stat. Most commonly this is used to put 255 EVs in Speed and 255 in either Attack or Special Attack. But if
Pokémon only allowed you to have 255 total EVs instead of 510, would you cap your monster's offensive stat, or their Speed? That's the kind of problem the 100 bonus stats system creates for Digimon tamers.
4. Game Mechanics & Dealing Damage [MECHAN]
To accomplish our core goal of either eliminating all of the opponent's Digimon or scoring more overall KOs, we need an engine to deal damage with. There are three methods of damage dealing in
Cyber Sleuth; physical damage through the Attack stat, magical damage through the Intelligence stat, and Piercing damage using either Defense or Intelligence. Between physical and magical attackers, Intelligence is the more beneficial to focus on because it doubles as both your magical offense and magical defense stat, so your offense scales with your defense. Magically-inclined Digimon can safely ignore Attack, but physically-inclined Digimon still have to focus on Intelligence even when they aren't going to use it offensively. So from a game mechanics perspective, magic damage is inherently better than physical damage. It's a similar issue to the first generation of
Pokémon games, where the Special stat functioned as both an offensive and defensive stat, centralizing gameplay around Pokémon with high Special.
Attack-oriented Digimon aren't entirely out of the running, as a greater background issue in
Sleuth makes all defensive stats irrelevant; the existence of Piercing damage. Skills with the Piercing property completely ignore defensive stats, whether that's Defense or Intelligence. This is what has made Lilithmon and Belphemon so prominent in the Japanese metagame, and ironically it's the property that allows Attack-oriented Digimon to thrive even when the game is biased towards Intelligence. With a handful of exceptions where it figures into specific Specials, no one can safely invest in Defense when the stat is irrelevant in the vast majority of situations.
There are effectively two types of critical hit in
Sleuth, normal critical hits and Xros Combos. Critical hits double damage output, while Xros Combos cause the damage, healing, or buff effect of a Skill to be increased. Xros Combo can only be trigger while one has Digimon in the timeline with turns adjacent to the Digimon that would initiate the combo.
4.1 The Nine Elements [9ELEM]
There are nine elements in
Cyber Sleuth, each of which has at least four generic Inheritable Skills associated with them. These all follow overall templates, with physical Skills having higher base power than magical Skills, and Skills that target more enemies having an overall higher SP cost but lower base power. For our purposes, all Skills are at their highest tier, III. Each element has one physical and one magical Skill, one Skill that hits all enemies (but is only either physical or magical depending on which element you're looking at), and one status-inducing Skill. These SP costs are all a fraction of what you'll normally pay for Special Skills, making them cheap methods of dealing damage by exploiting elemental weaknesses.
Physical Skill III (9 SP): Physical attack, 105 elemental damage, single target, 95% accuracy.
Magical Skill III (9 SP): Magical attack, 95 elemental damage, single target, 95% accuracy.
Multitarget Skill III (Physical) (10 SP): Physical attack, 75 elemental damage, targets all enemies, 95% accuracy. Only Fire, Thunder, Earth, and Wind have this Skill.
Multitarget Skill III (Magical) (10 SP): Magical attack, 65 elemental damage, targets all enemies, 95% accuracy. Only Water, Plant, Light, and Dark have this Skill.
Status Inducing Skill (Magical) (10 SP): Magical attack, 30 elemental damage, inflict associated status. The associated status effects are Panic (Fire), Sleep (Water), Poison (Plant), Paralysis (Thunder), Stun (Earth), Dot (Wind), Death (Dark), and Bug (Neutral). The Light elemental status effect prevents the use of the victim's Support Skill during the turn that it connects. While the other status effects are guaranteed, Death only has a 10% chance to connect.
Physical attackers should use physical elements, and magical attackers should use magical elements. Note that some status problems behave slightly differently in multiplayer than they do in the main game; Dot automatically wears off after the afflicted Digimon gets its second turn. The Neutral element is unique in that all of its Skills are 5 points more powerful than elemental Skills of the same level, meant to compensate for being unable to deal 2x or 3x damage. On average, your damage from Neutral skills will always be higher than damage from an element that an opponent is neutral or strong against, but dramatically weaker than one they are weak against.
Heavy Strike III (9 SP): Physical attack, 110 Neutral damage, single target, 95% accuracy.
Power Energy III (9 SP): Magical attack, 100 Neutral single, single target, 95% accuracy.
Mach Rush III (10 SP): Physical attack, 80 Neutral damage, targets all enemies, 95% accuracy.
Character Reverse (10 SP): Magical attack, 30 Neutral damage, single target, inflict Bug.
Neutral also has two additional Skills meant to manipulate SP use, which deal a small amount of damage and absorb a percentage of the damage dealt as SP to the user, meaning it is the only attack which can return more SP to the user than it costs to use without the assistance of Support Skills.
Physical Drain (3 SP): Physical attack, 50 Neutral damage, single target, absorb 10% of the damage dealt to the opponent as SP.
Spirit Drain (3 SP): Magical attack, 40 Neutral damage, single target, absorb 10% of the damage dealt to the opponent as SP.
The Drain Skills are both highly recommended for sustaining your offensive in multiplayer, and you will see them recommended on nearly every Digimon in this guide.
4.2 Healing Skills [CLERIC]
Final Heal (16 SP): Single target, high HP restore.
Final Aura (40 SP): High HP restore for entire party.
Revive (30 SP): Revive one party member with 50% HP.
Perfect Revival (60 SP): Revive all party members with full HP.
Restore (8 SP): Remove all status effects from one party member and restore some HP.
Dispel (8 SP): Remove debuffs from one party member and restore some HP.
There is also an Anti-status skill for every status in the game except Support End, all of which cost 4 SP and restore a small amount of HP. The Anti skills can be used in place of a regular Heal even if said party member isn't afflicted by the status effect, but this rarely comes into play during multiplayer and is more useful in-game.
4.3 Buff & Debuff Skills [MEGAMI]
The core stats Attack, Defense, Intelligence, and Speed all have their own Charge and Charge Field Skills. Additionally, the derived stat Evasion/Agility has a single target Charge, but not a Charge Field. All basic Charge skills cost 6 SP and target only a single party member, while all Charge Field skills cost 20 SP and target all allied party members. Both types of Skill buff their respective stat by 10%. There's also Charge and Charge Field skills for your critical chance, which is your probability to score a critical hit.
Unique buffs include Accel Boost (6 SP) which doubles a single Digimon' damage output on their next turn only (wears off if they do not attack), and the Cross Counter/Reflect Mirror Skills which cause an automatic physical attack during the opponent's turn every time the user is hit with a physical/magical attack for the remainder of that battle. (Reflect Mirror is called Mirror Reflection in the North American and European versions of
Cyber Sleuth.) Status Barrier (16 SP) makes one party member immune to all status effects until they are KO'd, while Safety Guard (32 SP) causes the target from to be left with 1 HP where they would have been KO'd once after it is used. Xros Combo chance has two unique buffs which cost 4 SP and 8 SP, Chain Plus increasing the combo chance for one Digion by 50%, and Chain Max increasing it by 100%.
Accel Boost deserves special mention as one of the more efficient methods of dealing damage. In any situation where you
know you'll be doing two consecutive turns of the same attack Skill with the Digimon you've put Accel Boost on, using Boost saves you as much as 14~36 SP by simply doubling the output damage of the next Skill that you use. It means spending an additional 6 SP rather than 20~40 in exchange for having to delay your Skill use until the next turn, and is key in conserving Skill Points over the course of a game so that you remain live and able to react later on while the opponent is run dry.
For debuffs, every stat (including critical chance) has a corresponding Break and Break Field skill that reduces those stats for the enemy by 10%. Like with buffs, these will wear off after five turns if they are not reapplied. If they are reapplied, the effect will stack to 20%, 30%, and so on. Chain Minus and Chain Lost are the opposite of the Xros Combo buffs, decreasing the probability of iniating a Xros Combo. Lost completely prevents that Digimon from initiating until its effect wears off.
Only 20 Skills can be held at one time, cumulative across Special and Inheritable Skills. Each Digimon can equip a maximum six Skills between those two categories, meaning Digimon with multiple Specials cannot equip as many Inheritables as those with only one Special.
Any Digimon which can guarantee 2750 damage or greater with a single Skill can instantly kill any Digimon in the game regardless of their bonus stats or equipment, as this is the maximum HP possible on a single Digimon. It is currently believed that this output is only possible on a Lilithmon using Phantom Pain while Xros Combo'ing or criticaling with a 2x attribute advantage and Lord Knightmon's Cruelty Unparalleled Support Skill active.
4.4 Offensive Base Caps [999999]
The maximum predetermined damage of any single Skill is 150, five hits of 30 damage each, three to six hits of 30 damage each (180 maximum and 120 average), or 115 damage to an entire party. Moreover, an attribute weakness results in double damage, and an elemental weakness makes it go up by 1.5x. (The 1.5x elemental multiplier is applied after attribute advantage is calculated, hence why this becomes 3x the base damage in gameplay.) Thus the final damage for single and multiple hit skills after 2x or 3x weakness multipliers caps at 300~450 (540 for Alphamon), and 230~345 for party attacks. (These are the caps before Attack, Intelligence, and Defense are applied; final damage can vary by as much as 200 points.)
There are also modifiers which can increase a Digimon's base Attack or Intelligence by 10~15%, and Skills which under specific conditions will boost the final damage by 15%. Inheritable skills cap at 105 damage to one foe with 95% accuracy.
Base 150 Skills
Omega Blade (30 SP, Light, Imperialdramon Paladin Mode)
Base 145 Skills
Rostrum (25 SP, Neutral, 15% Death, Leviamon)
Wolkenkratzer (30 SP Earth, 35% Stun, 9% Accuracy, Duftmon Leopard Mode)
Base 140 Skills
Royal Saber (25 SP, Light, 30% chance to buff own DEF by 10%, Dukemon)
Demon's Disaster (25 SP, Dark, Chaos Dukemon)
Garuru Tomahawk (20 SP, Neutral, always hits, Metal Garurumon)
Base 130 Skills
Tomahawk Steiner (20 SP, Physical, Neutral damage, 15% chance of Panic, Boltmon)
Justice Knuckle (20 SP, Physical attack, Neutral, 1% chance to increase own attack by 50%, Justimon)
Geo Grey Sword (20 SP, Physical, Fire, increase own attack by 10%, Shine Greymon)
Garuru Cannon (30 SP, Magic, Water, Omegamon)
Base 115 Multitarget Skills
Mugen Cannon (20 SP, Physical, Thunder, 80% Accuracy, Mugendramon)
Base 110 Multitarget Skills
Breath of Wyvern (25 SP, Physical, Wind, take 20% HP in recoil damage, Dynasmon)
Base 105 Multitarget Skills
Divine Atonement (30 SP, Magic, Light, Lucemon Satan Mode)
Odin's Breath (25 SP, Physical, Water, 10% chance to inflict Sleep, Sleipmon)
Skills that get around the 150 limit use a Digimon's Intelligence or Defense as the base power, or multiply one of those stats by either two or three.
Skills Which Cannot Miss
Garuru Tomahawk (20 SP): Physical attack, 140 Neutral damage to one foe. Always hits. (Metal Garurumon)
Holy Arrow (15 SP): Magic attack, 100 Light damage to one foe. Always hits. (Angewomon)
Smiley Bomber (15 SP): Physical attack, 110 Fire damage to one foe. Always hits. (Mamemon)
Energy Bomb (15 SP): Magic attack, 100 Thunder damage to one foe. Always hits. (Metal Mamemon)
Shining V Force (15 SP): Physical attack, 100 Light damage to all foes. Always hits. Increase own SPD by 10%. (Ulforce V-dramon)
Final Elysion (25 SP): Magic attack, 115 Light damage to one foe. Always hits. Cancels negative effects on itself. (Dukemon)
Judecca Prison (25 SP): Magic attack, 115 Dark damage to one foe. Always hits. Cancels basic stats down from itself. (Chaos Dukemon)
Aussterben (25 SP): Magic attack, 80 Light damage to all foes. Always hits. (Duftmon)
Full Moon Blaster (20 SP): Physical attack, 135 Light damage to one foe. Always hits. (Mirage Gaogamon)
In addition to basic Physical or Magical Skills, some Special Skills are instead Piercing. Piercing uses Intelligence or Defense as its base power on a case-by-case basis. Attack is
never used to calculate Piercing damage.
Piercing Attacks, Sorted by Multiplier
Phantom Pain (50 SP): Piercing attack, Dark damage to one foe equal to triple the Intelligence stat. 35% chance to inflict Poison. (Lilithmon)
Gift of Darkness (60 SP): Piercing attack, Dark damage to one foe equal to triple the Defense stat. (Belphemon RM)
Argent Fear (50 SP): Piercing attack, Fire damage to one foe equal to
triple the Defense stat. 30% chance to inflict Stun. (Lord Knightmon)
Brave Tornado (40 SP): Piercing attack, Fire damage to one foe double the Defense stat. (War Greymon)
Black Tornado (40 SP): Piercing attack, Dark damage to one foe double the Defense stat. (Black War Greymon)
Dimension Scissor (40 SP): Piercing attack, Plant damage to one foe double the Defense stat. Critical hits occur more easily. (Gran Kuwagamon)
Konpaku Shingeki (40 SP): Piercing attack, Earth damage to one foe double the Defense stat. (Titamon)
Chaos Flare (40 SP): Piercing attack, Dark damage to one foe equal to double the Defense stat. Absorbs 20% of the damage as HP. (Beelzebumon Blast Mode)
Lightning Spear (40 SP): Piercing attack, Thunder damage to
one foe equal to double the Intelligence stat. Critical hits occur more
easily. (Cherubimon Vice)
Sorrow Blue (40 SP): Piercing attack, Water damage to all foes equal to Intelligence stat. 25% chance to inflict Sleep. (Plesiomon)
Eternal Nightmare (50 SP): Piercing attack, Dark damage to all foes equal to Intelligence stat. 50% chance to inflict Sleep. (Belphemon SM)
Grand Cross (30 SP): Piercing attack, Light damage to all foes equal to Intelligence stat. (Lucemon (Child))
6. On the Subject of Netdecking [YUGIOH]
Before
we finally get to the threatlist, I want to point this out. After being
shown an American tamer online playing a carbon copy of his team, 9/26
DIGIMADO
Cyber Sleuth champion Jitenryuu
had this to say;
"I'm
glad to see someone's using an imitation of the party I played at the
Cultural Exchange for net competition. I'm doubly happy because that was
the first time I seriously thought about my party!"
He went on to
give a message directed at international tamers;
"I
don't know whether this Japanese-language advice can be transmitted to
foreigners imitating [me], but [I will give it anyway]. I emphasize that
this party was composed short-term for the abnormal circumstances of
the Cultural Exchange's rules, in net play its assault will be weak. In
[net play] conditions, it's good to have evasion and resurrection
skills. Aside from just one's tools, many things change in netplay."
Jitenryuu received his imitators in a very mature way, encouraging them to modify his strategies for the new environment. This is the attitude with which I believe we should approach netdecking, copying someone's team. Particularly when you're new to the scene, netdecking is a useful way to learn about different strategies and internalize them for yourself, and it's a better option than throwing a fit and taking your ball home with you.
In my own case, I don't think I really
understood how to play until I was crushed by Hiroki_tomo on his way from rank 43 to rank 2, and subsequently worked out how the strategy works from their perspective. Should tamers come across a strategy they can't beat, I encourage them
try it for themselves. Learning from our opponents is how we improve. And at higher levels, the small pool of available Digimon and the huge size of the playerbase means that teams will inevitably repeat. There's no point in trying to cling to specific teams as unique or individual when less than 50 Digimon see regular play in the first place.
7. The Threatlist [LILITH]
Only about 20% of the 242 Digimon present in
Cyber Sleuth are seen online. This is a combination of certain Digimon centralizing play around themselves, and of specific strategies not yet being proven. When it comes to recommended builds, keep in mind that these are recommendations and not absolutes--I am deliberately recommending more Skills than you can actually keep on each Digimon, because there's multiple ways to run them.
Note that level progression in
Cyber Sleuth is
fixed. Digimon have set base stats at level 1, and at each level up
they receive +0 to +2 points to each stat (multiplied by 10 for HP),
with each increase being predetermined. In multiplayer all Digimon are
scaled to level 50, so you can generally calculate their final stats by
adding 49 to their base stats (490 for HP). Since some Digimon receive
+2s along the way, these calculations may be slightly off from what the
game tells you in the Field Guide; the most reliable way to calculate
multiplayer stats is to look up the Digimon in your Field Guide and
adjust the display level to 50 to see what its stats are. The stats used below are for level 1, but even at level 50
the stats scale so that a one-hit knock out at level 1 is still a OHKO
at level 50.
One
touchy subject with regards to the issue of any metagame is the subject
of a banlist, or additional regulations preventing the use of specific
Skills and/or equipment. I will
not give any opinion on whether
or not such a thing should be implemented in this article, nor will you
find me saying that X or Y Digimon is "overpowered." My intention is to
simply describe the
Cyber Sleuth metagame as it is, born wild and
free into a world where the only rules are 150 Memory, and everything
is legal as long as you win. This is not the place to discuss what
"should" be, only to discuss what "is."
Some
readers have requested a tier list, something that at this time I do
not have the data to present. It's difficult to come up with a
definitive
usage-based tier list right now. Usage tiers are the kind some players will recognize from
Pokémon;
they strictly reflect how popular a choice each monster is on teams, so
that for example a Digimon that only sees play on 25/25,000 teams will
naturally be ranked lower than a Digimon that sees play on 15,000/25,000
teams. This runs off of the assumption that the more used a Digimon is,
the better it is perceived to be, and that a majority consensus will
eventually be reached on what the strongest Digimon are. Because the
game is so young, this data is not currently available, and thus you
will not see a definitive tier list given here either.
A note on terminology
Various
Digimon materials around the world disagree on what to name each Digimon and its level. In all of our other writings
Tamer Union
uses approximated Japanese names as an absolute standard, and this is
being maintained for individual Digimon. (Hence "Demon" instead of
"Creepymon," and "Cherubimon" instead of "Kerpymon.") The major point of
contention is whether to use the levels Baby I > Baby II > Child
> Adult > Perfect > Ultimate > Super Ultimate, or to use
Fresh > In-training > Rookie > Champion > Ultimate > Mega
> Ultra. This is not helped by the fact that Super Ultimate is
considered the standard in fan speak, while practically no one says
"Ultra" despite it being the official term used in
Digimon World DS and
Cyber Sleuth.
A related issue are Special Skill names; the Skills have been inconsistently translated in the English Sleuth, with some using dub names and some not, and some using
the wrong dub names.
(Grace Cross Freezer being called Metal Wolf Claw stands out. Metal Wolf Claw is actually the dub name for Cocytus Breath, and GCF is normally called Giga Cross Freezer in English.) To bypass this whole issue, I'm going by Japanese terminology for Digimon, levels, and Skill names
except for generic Inheritable Skills.
The Seven Great Demon Lords
Also censored to the "Seven Deadly Digimon" in the official localization, these Digimon have some of the most extreme evolution requirements in the game, and occupy some of the most important offensive niches available. Some tamers swear by the Demon Lords as the bread and butter of Ranked, and you certainly do see a
lot of them online. But while they can each be threatening in their own way, I've observed that you usually see them being used by tamers that are still wet behind the ears, and very few of the high ranked tamers will ever touch them. Ultimately the Demon Lords are just Digimon that happen to have very skewed stats and high Memory costs. Their exaggerated setups make them somewhat harder to utilize in different roles than the Royal Knights.
And despite the name, there are actually nine Digimon in this group. Ten if you include Lucemon (Child) from NFE.
 |
| あたし...爆発~ |
Lilithmon (22 Memory)
Recommended Builds: +1000 HP
Recommended Skills: Spirit Drain, Perfect Revival, Safety Guard, Restore, Shine Laser III (DIGIMADO) / Accel Boost, Character Reversal
Recommended Equipment: Master Barrier Sleep Barrier DX / Dot Barrier DX /
The most noted of the group has been one of the primary offensive Digimon for the better part of a year in Japan. It was only recently that she came into question. Lilithmon brings two important aspects to the table; overwhelming offense via Piercing damage that is only surpassed by the
other big members of the SGDL, and the second best method of SP restoration in the game. Phantom Pain deals Piercing Dark damage equal to triple Lilithmon's Intelligence to a single target, and has a 35% chance to inflict Poison.
Your capacity to oneshot opposing Digimon with Phantom Pain has been greatly exaggerated; without an elemental bonus it can only score a one-hit knockout on Data Digimon with a level 50 HP lower than 1250, which only encompasses about 7% of all usable Digimon. (In fact, the only fully evolved Digimon in the game she's guaranteed to get a kill on are Sakuyamon and Duftmon. Both are Data-Light, giving them a 3x weakness to Phantom Pain.) Moreover, while Lilithmon isn't necessarily in a "bad" Speed tier--tied with four other Digimon for sixth place--Phantom Pain is coupled with a turn delay and she still doesn't get turns regularly enough versus most of the metagame to justify building your entire strategy around her. That said, if left unchecked Lili-chan is one of the single most powerful offensive engines available, and a significant part of competitive play is made up of mitigating her impact on a match.
Her Support is Lust, which converts 10% of the damage received from any physical attack into SP for the attacked Digimon. This lets you passively gain back the Spirit Points needed for Special Skills without actively needing to use Phys/Spirit Drain, but it depends on Lilithmon being in play to use and so can't be relied on as your entire SP restoration engine. Lilithmon also has the highest natural SP of any Digimon in the game, making her ideal for doing double duty as both a cleric and offensive magical attacker. The only danger in letting her be a cleric is that it opens a new route for her role as an attacker to be curtailed.
Belphemon Sleep Mode (22 Memory)
Recommended Builds: +1000 HP
Recommended Skills: Spirit Drain, Safety Guard, Status Barrier, Restore, Accel Boost, Gaia Element III, Character Reversal
Recommended Equipment: Master Barrier / Panic Barrier DX / Dot Barrier
Sleep Mode is a weird Digimon. His HP is great, his SP and INT are usable, and he's in the unremarkable 95 Speed tier (tenth overall) alongside the likes of playable-but-unappealing Digimon like Kuzuhamon, Ophanimon, and Chaos Dukemon. How is it then that Sleep Mode earned his place as one of the most nightmarish opponents to stare down in the early
Cyber Sleuth meta? The answer is twofold. His Special Skill is Eternal Nightmare, which deals Piercing Dark damage equal to his INT stat to all enemies, and has a 50% chance to inflict Sleep on every target it hits. His Support Skill is Sloth, which grants full immunity to Sleep to the entire team and a 30% chance to induce Sleep when using the normal attack command.
The reasons why Sleep Mode does not actually dominate in online play are clarified under the Royal Knights section, but early on SM earned an Ulforce-like reputation as a Digimon that simultaneously grants its team an overwhelming advantage and locks the opponent out of gaining that advantage as well. The theory was that you needed to run SM to prevent SM from just rolling over you. Nowadays a greater awareness of how to play around status effects has left Sleep Mode taking five on the bench, but being a strictly better version of Plesiomon at a higher Memory cost means there's still room to experiment with SM. His outmoding hasn't stopped Belphemon from wreaking havoc in a new form entirely though...
 |
| Get used to this animation, because it's the only thing he does. |
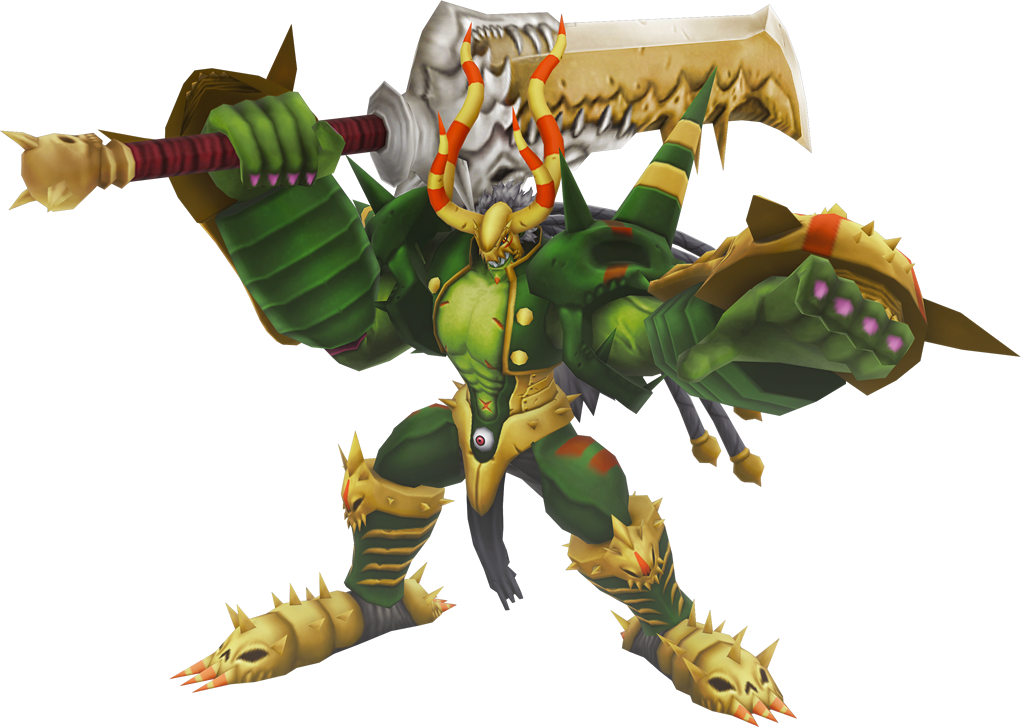
Belphemon Rage Mode (25 Memory)
Recommended Builds: +96 SP +4 Speed (DIGIMADO)
Recommended Skills: Shock, Saint Knuckle III, Anti-Dot, Anti-Sleep, Revive (DIGIMADO) / Physical Drain, Accel Boost, Character Reversal
Recommended Equipment: NoneOne of five Super Ultimate Digimon in the game. Rage Mode is only available as a mode change from Sleep Mode, and it serves an entirely different role from its cuddly counterpart. Rage Mode is a pure physical attacker, boasting the highest physical attack in the game at a 184 base. Gift of Darkness deals Piercing Dark damage equivalent to three times Rage Mode's Defense stat, which gets around the usual problem of physical attackers not being able to invest in their primary offense without giving up something defensively.
Just as Lilithmon needs to devote +1000 to HP because of how disproportionately distributed her stats are, Rage Mode needs to have +96 in SP in order to be able to maintain his offensive. At level 50, Rage Mode has enough SP to use Gift of Darkness
once; with +26 SP he can use it twice, and with +96 it can go out three times will leaving just enough SP to make use of Physical Drain to get it back. While GoD has a lower base output than Phantom Pain, Rage Mode's high HP makes him more survivable than Lilithmon, enabling him to get in more hits per game in the long run.
An important point is that in the process of mode changing, Rage Mode loses out on his only accessory slot. Sleep Mode could equip a Master Barrier or other item to protect itself from status, while Rage's incredible offense is balanced by having zero innate immunity to status problems. He should be the first Digimon you throw Status Barrier on the moment he's out. Rage Mode also effectively has no Support Skill; Howl of Wrath gives a 30% chance to instantly kill a Digimon that is Perfect-level or lower when executing a normal attack, which is only relevant versus four or five Digimon within the metagame.
Of note is that if you are trying to raise Belphemon, it's easiest to do so from Digitamamon rather than Wisemon. No matter what, you'll need to invest in bonus stats via either farm training or items to meet the evolution criteria.
Barbamon (22 Memory)
Recommended Builds: +1000 HP
Recommended Skills: Spirit Drain, Perfect Revival, Status Barrier, Safety Guard, Restore, Character Reversal, Accel Boost, Gaia Element III
Recommended Equipment: Master Barrier / Sleep Barrier DX / Dot Barrier DX
Barbamon has the
actual highest Intelligence of any Digimon, tied with Lucemon Satan Mode at 170 INT. Pandaemonium Lost inflicts 80 Dark damage to all opposing Digimon, and absorbs 20% of the damage dealt as HP. His passive is Greed, which increases the effect of HP & SP absorption skills by 20%. This is 10% less than Evil Heart further down, which is just one reason why Barbamon never caught on in the Japanese meta. It's not a particularly effective Skill at keeping either stat high, and Pandaemonium Lost isn't especially impressive in terms of damage output. That said, Barbamon is the best user of all magical elemental skills.
Beelzebumon (22 Memory)
Recommended Builds: +1000 HP
Recommended Skills: Physical Drain, Accel Boost, Restore, Character Reverse, Crescent Leaf III, Shock
Recommended Equipment: Sleep Barrier DX / Master Barrier
Beelzebumon is designed to optimize physical damage. His Support is Gluttony, which at the end of each turn (after Poison damage and passive HP restoration is applied) decreases the current party member's HP by 5% of their maximum, and increases their Attack by 5%. The Attack boost lasts for five turns assuming another Attack boost is not layered on top. If another Attack boost is applied, the turn counter resets and the effect stacks, same as any stat boost. His Special is Double Impact, a physical attack that deals 20 Dark damage to a single target eight times. Each shot has 90% accuracy, and it's meant to capitalize on the boost from Gluttony and Accel Boost. You can patch up the damage taken from Gluttony by swapping in Cherubimon Virtue, so that beginning with each party member's second Gluttony turn the HP decrease will be nullified by Meditation's 5% HP increase. Beelzebumon is otherwise unremarkable, but has a very useful upgrade in...
Beelzebumon Blast Mode (25 Memory)
Recommended Builds: +33 SP, +38 HP, +29 Speed / +33 SP, +67 Speed
Recommended Skills: Physical Drain, Character Reverse, Crescent Leaf III, Restore, Accel Boost
Recommended Equipment: Sleep Barrier DX / Master Barrier
The main difference between vanilla and Blast Mode is that in the transition Beelzebumon jumps from the seventh Speed tier to the fifth. (120 base Speed is very important to have.) However, in practice the only Digimon that's regularly used that outspeeds him is Ulforce, and the more important aspect of this is that it ties Blast Mode with several of
Cyber Sleuth's prominent turnlockers, Sleipmon and Mirage Gaogamon.
Blast Mode trades Gluttony for the
much more easily utilized Blaster, which acts as a blanket 10% Attack increase to the entire party while also increasing the amount of HP recovered by absorption effects by 30%. Like with Cherubimon's Evil Heart, Blaster rebalances the issues with Barbamon's Support by making it specific to one stat and in turn increasing its potency. Blaster is much easier to use than Evil Heart though, as Evil Heart is restricted to being utilized with just two generic Skills, while Blaster can combo with Dynasmon's Dragon's Roar, Barbamon's Pandaemonium Lost, Rosemon's Thorn Whip, or Blast Mode's own Chaos Flare. Dynasmon is the one that benefits the most, as he absorbs a whopping 50% off of the damage dealt by Dragon's Roar.
Blast Mode's Special is Chaos Flare/Corona Destroyer, which deals Piercing Dark damage equal to double Blast Mode's Defense to one foe. With his Special requiring 50 SP to use and Blast Mode coming out to 120 SP at level 50, he'll likely want to invest in at least +30 SP. (Doing +33 leaves him with just enough for Physical Drain after three Flares.) Chaos Flare/Corona Destroyer at its base will deal 336 damage, beneath the outputs of Lilithmon and Rage Mode but without many of their crippling weaknesses. Since Blast Mode is in a very favorable Speed tier, investing in Speed will actually let him keep up with (and overcome) the resident turnlockers, but investing in HP is always desirable because of the constant threat Piercing has in multiplayer. At 1100 base HP scaled to 1490, Beelzebumon can safely tank two Phantom Pains, four Gifts of Darkness, or two Brave Tornados. At maximum you would want to invest +38 in HP, allowing him to survive three Phantom Pains and three Brave Tornados.

Lucemon Falldown Mode (25 Memory)
Recommended Builds: +1000 HP
Recommended Skills: Spirit Drain, Accel Boost, Perfect Revival, Safety Guard, Restore, Gaia Element III, Character Reversal
Recommended Equipment: Master Barrier / Sleep Barrier DX / Dot Barrier DX /Falldown Mode is as unimpressive for a Perfect as base Lucemon is impressive for a Child. His stats are above average, but nothing that he does is as devastating as Aero V-dramon or Etemon. Dead or Alive deals 110 Neutral damage, with a 10% chance to inflict any status problem, followed by a 5% chance to inflict Death. His Support is Pride, which increases damage dealt from all Skills by 5%.
Lucemon Satan Mode (25 Memory)
Recommended Builds: +1000 HP
Recommended Skills: Spirit Drain, Perfect Revival, Safety Guard, Restore, Shine Laser III, Accel Boost
Recommended Equipment: None
Our second Super Ultimate Digimon, Satan Mode's main draw is Gehenna, his Support Skill. Gehenna acts like a magical inversion of Lust, converting 10% of the damage from magical attacks into HP. This cuts down on the time spent healing, and effectively acts to reduce the opponent's final damage output provided that you can survive it to begin with. His stats are all scaled accordingly for his Memory cost, with a 1100 HP base, 110 SP, and 170 INT--tying with Barbamon. Unfortunately that Memory cost is still prohibitive relative to what you're getting out of it. Divine Atonement is a magical attack that deals 105 Light damage to all enemies, the primary advantage of which is that it means you don't have to staple a tier III Light Skill to him to deal 2x damage to other Dark type Digimon. Satan Mode can effectively fill the same roles as Barbamon, being one of the most powerful generic magical attackers in the game.
Demon (22 Memory)
Recommended Builds: +1000 HP
Recommended Skills: Spirit/Physical Drain, Perfect Revival, Safety Guard, Status Barrier, Restore, Accel Boost, Character Reversal
Recommended Equipment: Sleep Barrier DX / Master Barrier / Dot Barrier DX
Demon is a disappointment. His Attack and Intelligence are perfectly balanced, which in
Sleuth is a wasted distribution; it would be better to have those Attack points split between INT and SP or SPD than to put points into a stat Demon can't use effectively. Flame Inferno is a magical attack that deals 90 Fire damage to all enemies, and his Support is Wrath, which increases a party member's Attack and Int by 25% when their HP is below 25%. So you gain a marginal boost in core stats for a single turn at endgame, before the opponent clears you out.
Leviamon (22 Memory)
Recommended Builds: +1000 HP
Recommended Skills: Physical Drain, Accel Boost, Character Reverse, Crescent Leaf III, Restore, Shock / Panic Wisp / Idle Bubble
Recommended Equipment: Sleep Barrier DX / Master Barrier
The reason to run Leviamon is that his Support skill almost always increases damage output by 15%. Envy confers that boost versus targeted Digimon whose level is Ultimate or above;
Japanese Ultimate, what Americans think of as Mega. This encompasses nearly every Digimon you will see in Ranked except for Aero V-dramon. That translates Leviamon's Support into a permanent 15% final damage increase. As will be demonstrated with Etemon's Monkey Suit, final damage modification is much more powerful than core stat modification.
Aside from this, Leviamon has playable physical stats but is in the 89 Speed tier alongside Lucemon (Child), and his Rostrum Special is nothing to write home about--145 Neutral physical damage to a single target, 15% chance of inflicting Death. The damage output is useful, but the last part of the Skill is easily nullified as will be seen in the Royal Knights section.
The Thirteen Royal Knights
Like the Demon Lords, the name is a misnomer; there are actually fourteen or fifteen members in the group. The Royal Knights all have their own specialties, and like the SGDL have some of the highest individual stats in the game. Where the Demon Lords are offensive, many of the Royal Knights skew towards a combination of utility and attacker roles, with Supports that buff damage or modify certain gameplay mechanics.
Ulforce V-dramon (22 Memory)
Recommended Builds: +1000 HP / +100 Speed
Recommended Skills: Physical Drain, Panic Wisp, Revive, Restore / Shock / Idle Bubble, Accel Boost, Crescent Leaf III
Recommended Equipment: Master Barrier / Panic Barrier DX
This is the Digimon that everyone thinks of when you bring up the Royal Knights in multiplayer, although it's not actually the most dangerous of the thirteen. The star of
V-Tamer 01 has a particular reputation for destabilizing an already fragile metagame. While he can never be discounted in teambuilding, there have been plenty of successful multiplayer teams that don't run him, and in fact Ulforce is at times a detriment. Any Digimon with a 22 Memory base is automatically restricting you into a certain type of team building that favors running six or fewer Digimon. (It's possible to get around this, but you'll be running weaker 16 Memory Digimon to do so.) Losing an entire party member is huge cost to make use of these other Digimon's abilities, though the results can be quite overpowering. What Ulforce specializes in is being one of the most unparalleled utility Digimon in the game; he's tied with Ravemon for the second highest Speed, meaning he'll regularly get turns even against the format's most prominent turnlockers, interrupting their strategy. This makes him excellent at utilizing status effects, and though he doesn't have the SP or INT to be an all-purpose cleric, he can make use of the basic Revive and Restore in the early stages of a match.
His Support is the most notable thing about him. Godspeed causes all allied Digimon to always move first at the
beginning of the game. The only proper counter to it is another Godspeed
Digimon with a higher base Speed. Since the vast majority of Digimon
don't or can't actually invest in Speed, running a Godspeed Digimon is
the only way to absolutely secure the first turns of the game. Ulforce is commonly paired with Lilithmon, allowing her to score a free kill right at the start of the game. Some tamers like yiu715 have gone so far as to pair Ulforce with
multiple Lilithmon in their opening party, and run a second Ulforce to bring in should the first fall so that they can keep benefiting from Ulforce's high Speed throughout the match.
Ulforce can only equip four Inheritable Skills, as he has two different physical Specials. Shining V Force deals 100 Light damage to all enemies and never misses, while increasing his own Speed by 10%. Ulforce Saber deals 65 Wind damage to a single target twice, which when you have a 2x or 3x attribute advantage can score a one-hit kill. Shining V Force is typically Ulforce's "early setup" move, as repeatedly buffing his Speed lets him get additional turns and eventual kills with Saber. Remember that the stat buffs wear off five turns after activation, but you can reset the counter and stack the effect by triggering it a second time. Both Skills cost 25 SP, so one loses nothing by playing one over the other.
Sleipmon (22 Memory)
Recommended Builds: +1000 HP
Recommended Skills: Spirit Drain, Character Reverse, Revive, Restore / Panic Wisp / Shock, Gaia Element III
Recommended Equipment: CAM USB / Dark Guard DX / Speed Attach A
God saw the Earth beginning to settle, and threw a rock at it. That rock is Sleipmon. Mystic Protection singlehandedly turned the Japanese metagame on its head; their Support reduces the chance of receiving abnormal status by 50%, and can be stacked. This particular strategy was originally introduced to me by Hiroki_tomo, one of the 25 tamers currently tied for 2nd place on the international leaderboards. Having two Sleipmon in play completely blocks abnormal status with the exception of Support End, which is not treated as abnormal status. Support End is the only effective counter to Sleipmon, but even that can be answered with their\ most common partner, Marine Angemon. Only having a single equipment slot is hardly a setback to Sleipmon, as the fact that you will almost always play two at once makes them functionally immune to status without any equipment whatsoever.
Like Ulforce, Sleipmon's Inheritable list is restricted by having two Specials. Bifrost is a
magical attack that deals 120 Light damage to a single target, and increases their Speed by 10%. (The English Skill description mistranslates this as a 10% chance to increase Speed by 10%.) The fact that Bifrost is magic-based is easily forgotten and critically important, as Sleip is a better magical attacker than they are a physical one. Odin's Breath is a physical attack that deals 105 Water damage to all foes and has a 10% chance to inflict Sleep. Being a mixed physical-magical attacker has its ups and downs in Digimon, but Sleipmon hits a perfect intersection of the two. Typically you open with Bifrost on each Sleipmon to boost their Speed, ideally taking out a Digimon with multiple Bifrosts that then cause Sleipmon to move up in the turn order.
Odin's Breath is ideal for when the opponent has one or more Fire-element Digimon in play (i.e. either War Greymon) and multiple Digimon to target, especially if their Defense is lower than their Intelligence. Sleipmon is moderately better at dealing magical damage than physical (by 15 points) hence the choice of Spirit Drain. While Odin's Breath cannot be relied on for reliable status inducing, it's the fact that it does so passively while having little difference damage-wise from Bifrost that makes it such a good Special.
A usage note; it's unusual to lead with the Sleipmon party. The advantage of it is that it frees you up to run a highly aggressive opening party and sacrifice them to the opponent, wasting their SP and preferably three or more of their Digimon. When they finally overcome it, the double Sleipmon + Marine Angemon roll in to wear the opponent's exhausted Digimon down to nothing. That said, depending on what kind of aggression you run, there are matchups where it's better to immediately swap into the Sleipmon team on your first turn. Knowing when to tuck your aggro away for later is an important component of playing Sleipmon effectively.
Dynasmon (22 Memory)
Recommended Builds: +1000 HP
Recommended Skills: Physical Drain, Character Reverse, Panic Wisp, Shock / Idle Bubble
Recommended Equipment: Master Barrier
Dynasmon is a hybrid status inducer and physical attacker with a significant amount of bulk attached to him. At +1000 HP it takes Lilithmon three non-Xros Combo non-critical Phantom Pains to bring Dynasmon down. After a Character Reverse, she can just forget about it. Add to the fact that he's in the magical 120 base Speed tier, and you have a recipe an enduring utility-attacker that can keep up with the faster Digimon of the format. Dynasmon's first Special is Breath of Wyvern, which veteran fans will remember as the attack that kept flooring the
Digimon Frontier kids. It deals 110 Wind damage to all enemies, then Dynasmon takes 20% of his current HP as damage from the attack.
This is not his primary means of spreading damage. Most of the time you'll have Dynas instead sending out his secondary Special, Dragon's Roar, which deals 55 Fire damage to one foe twice and absorbs 50% of the cumulative damage dealt as HP. His Flying Dragon Support buffs Fire and Wind damage by 10%, helping Dynasmon to continually restore his HP throughout the match. When stacked on top of existing party healing skills this makes Dynasmon hard to take down, though he's very vulnerable to status problems himself and has to rely on either a Master Barrier to cut the probability of one proccing, or a support Digimon throwing out Status Barrier to protect him.
Lord Knightmon (22 Memory)
Virus-Dark
Recommended Builds: +1000 HP
Recommended Skills: Physical/Spirit Drain, Character Reversal, Revive, Crescent Leaf III, Panic Wisp/Shock/Idle Bubble
Recommended Equipment: Master Barrier
Tied with Duftmon for the third highest Speed in the game, Dynasmon's life partner brings something very simple to the table; a lower-cost Rage Mode that preserves any existing advantage you gain. Their Support is Unparalleled Cruelty, which buffs the damage you deal by 15% when you have the attribute advantage. While the Lord of all Knightmon is actually equally effective as a physical and magical attacker, their most iconic Special is physical based. Spiral Masquerade deals 30 Dark damage to one foe four times, and has a 30% chance to increase Lord Knightmon's Speed by 20% after it's used. Their second Special is the one that will see the most use--Argent Fear deals Piercing Fire damage equal to triple Lord Knightmon's Defense stat, with an added 30% chance to inflict Stun. With a base Defense of 90 scaled up to level 50, Lord Knightmon will be dealing around ~420 damage at base. A 2x attribute advantage and Unparalleled Cruelty brings that up to ~950 damage. Both stats are only moderately lower than the projected output on Gift of Darkness, at an 80% cost reduction when comparing their available Skill Points and the relative SP costs of their Specials.
Unlike Belphemon though, Lord Knightmon cannot simply invest in SP and spam their Piercing Special. Belphemon starts with a high base HP to justify his Memory cost, a luxury that Lord Knightmon does not have. Without SP investment, Lord Knightmon is reduced to draining the opponent every two turns or relying on an external SP engine like Lilithmon or Marine Angemon to fuel them.
Since Lord Knightmon's physical and magical stats are equally average, they can excel at using supplementary physical or magical tier III skills. I prefer Leaf III to deal with Marine Angemon. That plus Character Reversal + Cruelty Unparalleled will deal half of Marine's uninvested base HP, and Lord's Support enables other team members to finish it off. Even a +1000 HP Marine Angemon will lose 75% of its health to Crescent Leaf III + Phantom Pain, and Ocean Love can't restore enough hit points for Marine to fully recover in time for the next blow.
Duftmon (22 Memory)
Data-Light
Recommended Builds: +1000 HP / +50 HP +50 Speed
Recommended Skills: Support End, Physical Drain, Character Reversal, tier III magical element, Panic Wisp/Shock/Idle Bubble, Restore, Status Barrier, Safety Guard
Recommended Equipment: Master Barrier / CAM USB / Speed Attach A
Duftmon is in a difficult position, being tied with Lord Knightmon for the third highest Speed while also having a base HP lower than Lilithmon's. His Support is its own kind of indirect SP engine, reducing Skill Point consumption by 20% so that you're capable of using more instances of each Skill on the whole. Strategist pairs well with his own parameters since it reduces all of his Specials from 25 to 20 and he has a base 125 SP to work off of, and increases the net yield from Drain Skills by further decreasing their up-front cost. When combined with something like Cherubimon Vice's Evil Heart, Strategist can be one of the Skills best oriented towards playing a long game and maintaining superior offense to the opponent throughout a match. His high Speed singles out Duftmon as an effective support unit as well as status inducer, though not
the best available.
Unlike his Mode Change, Duftmon is magically inclined, and is actually a better magical attacker than his counterpart is a physical attacker. A 120 base is still nothing close to the monstrous Lilithmon or Barbamon, but it can get the job done just fine. A tier III element Skill will shave off 25-50% HP from any Digimon weak to Duftmon by attribute. But even with all these positives working his favor, it's hard to recommend Duftmon over...
Duftmon Leopard Mode (25 Memory)
Data-Earth
Recommended Builds: +1000 HP / +100 Speed
Recommended Skills: Support End, Physical Drain, Character Reversal, Panic Wisp/Shock/Idle Bubble, Restore, Status Barrier, Safety Guard
Recommended Equipment: Master Barrier / CAM USB
Leopard Mode is the only Digimon to be costed like a Super Ultimate Digimon, even though he isn't one. Go figure! His self-titled Support Skill raises both Evasion and the probability of scoring a critical hit by 5%, and buffs Speed by 10%. The last part is the important bit. At a 155 base, Leopard Mode is
the fastest Digimon in the game, and his Support facilitates him getting more turns per game than any single Digimon, even compared to Ulforce. (There are setups to outdo Duftmon LM, but it's impossible to do with just one Digimon.) This makes him an ideal utility Digimon, on par with Aero V-dramon.
A Mode Change would imply that LM is a lateral transition from Duftmon, but in truth he sees a massive bump in overall stats in exchange for +3 Memory. He can reap the full benefit of having five Inheritable Skills too, as Wolkenkratzer is his lone Special. It deals 145 Earth damage to a single target with a 35% chance to inflict Stun if it connects, but 95% accuracy.
Generally Wolkenkratzer will take a backseat to Support End. Duftmon is one of four Digimon to learn the Skill naturally, and easily the most prominent user of it. No one is better at Support End than the fastest Digimon in the game, and his immense priority in turn order gives Leopard Mode an edge in shutting opponents down. It's a tricky Skill though, as Support End is only as good as the Supports that it's shutting down, and it's easily treated with Restore or Ocean Love.
Of course, all this assumes that you have the room for Leopard Mode. 25 Memory is a huge commitment in
Sleuth. The difference between Duftmon and Leopard Mode is the difference between running EBEmon and Vademon.
Cranniummon (22 Memory)
Vaccine-Earth
Recommended Builds: +1000 HP
Recommended Skills: Spirit Drain, Character Reversal, Panic Wisp/Shock/Idle Bubble, Restore, Accel Boost
Recommended Equipment: Master Barrier / CAM USB
Cranniummon is a theoretically better version of another Royal Knight you'll see further down on the list. His Support is similar to that of the Etemon line's; Iron Wall Fortification reduces all incoming damage by 10%, but earns that +4 Memory cost by applying to both physical and magical damage. Cranniummon's Special is End Waltz, which is a
physical attack. Take note of this, as his stats aren't actually well suited to utilizing it at first glance. Generally you would like to be in the ballpark of 100 points in your offensive stat of choice, while Cranniummon his 80 Attack and 90 Intelligence.
The reason for this is because Cranniummon isn't an attacker at all, but a utility Digimon designed to be a defensive wall. He has the second highest base Defense of any Digimon in the game, clocking in at a whopping 145 DEF, 5 below Granlocomon. Unfortunately, his HP isn't quite as impressive as it could be, and so he falls flat versus a lot of Piercing options. He
can survive two to three hits from any of the Piercing Virus Digimon, which is enough to justify being a wall, but it's a question of what you're going to do with that wall. His second Special is God Bless, which nullifies all damage received until the next turn. This is of questionable utility. While the cost is the same 25 SP as we're accustomed to from most Specials, God Bless assumes that you will be in a better position by being on your next turn instead of your current one, when in reality the timeline is likely to be identical and all God Bless can do from a tactical perspective is make the opponent waste Accel Boost if they have no valid targets to attack.
That said, there is serious potential in stacking
multiple instances of Iron Wall Fortification. The issue with this is his 22 Memory cost, and that Cranniummon is in the 85 Speed tier. An overall 20-30% damage reduction from stacking three Cranniummon may ultimately be negated by the opponent gaining an overwhelming number of turns.
Gankoomon (22 Memory)
Data-Fire
Recommended Builds: +1000 HP
Recommended Skills: Physical Drain, Character Reversal, Panic Wisp/Shock/Idle Bubble, Accel Boost
Recommended Equipment: Master Barrier / CAM USB
Has the highest base HP of any Digimon in the game. Gankoomon is another type of wall; his Support prevents an attack from killing your Digimon if their HP prior to the attack is above 50%, instead leaving them with 1 HP.
Rockman EXE fans will recognize this as the Undershirt ability, while
Kingdom Hearts players will see it as Second Chance. The Support is the main reason to run him, as it prevents many of the major players of the format from getting in one- or two-hit KOs, but falls flat versus turnlock teams that specialize in dealing damage gradually over multiple sequential turns. Since Supports become inactive the moment the party member providing them falls, a caveat to this is that you do need to keep
Gankoomon alive specifically if you want to maintain that effect on your other party members. If the opponent has the option to kill Gankoomon or reduce another Digimon to 1 HP, they'll choose Gankoomon almost every time.
His first Special is Jishin! Kaminari! Kaji! Oyaji!, a physical attack with deals 35 Fire damage to one foe four times. As a multihit attack, JKKO is significantly more powerful with a type advantage and/or Accel Boost than without, and reaps huge benefits from Fire-boosting Supports like Dragon's Roar. His second Special is the less often used Chabuda Gaeshi, which deals 100 Earth damage to all foes with an increased critical rate but only 70% accuracy. The increased critical and 25 greater base power is questionably worth a 25% drop in accuracy from Awesome Quake III, hence it rarely sees play compared to JKKO.
(
Jishin Kaminari Kaji Oyaji is an old Japanese proverb describing the four things you should fear; earthquakes, lightning, dangerous fire, and your dad. It's sometimes translated as "the father is feared as much as the worst natural occurrences," but came into new popularity after the Tohoku Earthquake in 2011 as a way of emphasizing the "natural disaster" part of it.
Chabuda Gaeshi is a metaphor that refers to flipping the Chabuda, a traditional Japanese table associated with family dinners. The Skills were translated literally as Earth!Thunder!Fire!Father! and Flip Table in the English localization.)
Examon (22 Memory)
Data-Wind
Recommended Builds: +9 SP +910 HP
Recommended Skills: Physical Drain, Character Reversal, Panic Wisp/Shock/Idle Bubble, Accel Boost
Recommended Equipment: Master Barrier / CAM USB
There is exactly one reason tamers use Examon, and that is Dragonic Impact. This Skill is a physical attack that deals 100 Fire damage to all opponents, but the important aspect of it is that it is the
only Skill to inflict knockback, an "extra" abnormal status like Support End. Knockback causes every Digimon inflicted with it to retreat to the backrow and be replaced by the three Digimon furthest back in the tamer's party order. Knockback is extremely important because it gives you information about the opponent's party beyond what the limited team preview can provide. Two uses of Dragonic Impact will tell you what their entire party is, and this information is considered so powerful that despite being a fairly middling move in terms of damage, Dragonic Impact costs a whopping 50 SP. At level 50 Examon can only use it twice; with +6 SP they can use it three times, and with +9 SP they can use it three times and get a Physical Drain in afterwards to start recovering their pool.
Examon's other Skills are passable but not impressive. Their Support is Calesvol, which increases Accuracy and Evasion by 5%, and Critical by 10%. The Accuracy boost isn't a significant enough to counter Evasion boosting compared to using Always Hits attacks, and the Evasion boost isn't significant enough to matter compared to dedicated Evasion teams. Their offensive Special is Pendragon's Glory, which deals 135 physical Wind damage to one foe. In terms of an offensive Data attribute, Examon is surpassed entirely by Gankoomon, and several other non-Royal Knight Digimon.
 |
| "Localize -next 0rder-!" |
Dukemon (22 Memory)
Virus-Light
Recommended Builds: +1000 HP
Recommended Skills: Physical Drain, Character Reversal, Panic Wisp/Shock/Idle Bubble, Accel Boost
Recommended Equipment: Master Barrier / CAM USB
The second Viral Royal Knight, Dukemon's Support would be amazing if it were on a Digimon that cost 4 less Memory and could be reasonably stacked. As it is, All Rounder increases the core stats Attack, Defense, Intelligence, and Speed by 5%, and this plus his stat distribution singles out Dukemon as a Digimon that does nothing badly but also nothing well. Like the idealized knightly image Dukemon is derived from, he's exceedingly well-balanced in all respects, which is a nice way of saying he can't commit to any one stat in particular. He comes equipped with both a physical and magical Special, has equal Attack and Intelligence, functionally identical HP and SP pools, and the only aspect of him that remotely swings Dukemon in any direction is that defensively he's better at taking non-Piercing physical attacks than non-Piercing magical ones.
Royal Saber is his physical Special, dealing 140 Light damage to one foe with a 30% chance to increase his own DEF by 10% after each use. Final Elysian is his magical single target Special that deals 115 Light damage to one enemy and always hits. After use, Final Elysien cancels any negative status buffs placed on Dukemon. This is what makes him truly worthwhile. In a game where Evasion boosting gives you an approximate 50% chance to hit the opponent, having a reliable Skill with the "Always Hits" property that also resets status debuffs can be a game-changing ability. Dukemon really embodies that idea of two knights going at one another in single combat--unfortunately for him,
Cyber Sleuth by nature has you bringing six to eleven Digimon to the fray. Better luck next game.
Omegamon (25 Memory)
Vaccine-Light
Recommended Builds: +1000 HP
Recommended Skills: Physical Drain, Character Reversal, Panic Wisp/Shock/Idle Bubble, Restore, Accel Boost, Revive, Perfect Revival
Recommended Equipment: Master Barrier / CAM USB
The third of five Super Ultimate Digimon we'll see, Omegamon is somewhat of a disappointment compared to his Jogress components. His Support is Holy Knight, which buffs the party's Speed by 10% and increases the damage from Fire and Water attributes by 10%. The Speed boost helps compensate for Omegamon being in the 95 Speed tier, and the damage buff can be stacked with Dynasmon or War Greymon's Supports. It can also be useful alongside Gankoomon's multi-hit Fire Skill, Jishin! Kaminari! Kaji! Oyaji!
The main purpose of Holy Knight is that it prevents you from discounting his Special Skills. Grey Sword is a physical attack that deals 115 Fire damage to all enemies, while Garuru Cannon is a magical attack that deals 130 Water damage to a single target. Both have identical SP costs, but Omegamon has dramatically higher Attack than he does Intelligence, which in a situation where the opponent's DEF and INT are identical favors the use of Grey Sword. If the opposing Digimon has significantly lower INT than they do DEF, then Garuru Cannon may do the job, but as a whole you'll usually find yourself spamming Grey Sword with Omegamon.
What you should take note of is that Omegamon is
extremely inefficient on SP, almost comparable to Belphemon Rage Mode. Without any SP investment and no supporting engine, he can only use either of his Specials three times. Many tamers get around this via Accel Boost, since it lets him functionally get the same damage output as if he did it six times but for the price of three. As a whole though, Omegamon is an unremarkable multitarget attacker. He's not bad, but he doesn't amaze like the War Greymon duo do.
Magnamon (22 Memory)
Free-Earth
Recommended Builds: +1000 HP
Recommended Skills: Physical Drain, Character Reversal, Accel Boost, Revive
Recommended Equipment: Master Barrier / CAM USB
We are scraping the bottom of the barrel.
Magnamon's stats are effectively an entire level lower than everyone else in the Royal Knight group, and they're not exactly finely tuned either. They are in the same 85 Speed tier as Cranniummon, they have the HP of Platinum Scumon, and an unreliable Support. "Miracle" actually needs a miracle to proc; it has a 10% chance to reduce received damage by 30% every time an allied Digimon is attacked, and all you can really do with this is hope that the Gambler's Fallacy isn't a fallacy at all.
Like Dukemon, Magnamon has one physical and one magical Special, but in his case his stats are slightly skewed towards physical. Shining Golden Solar Storm deals 75 magical Light damage to all enemies, and increases Magnamon's DEF by 10% after use. (Yes, it's called S-Golden Solar Storm even in Japanese. "Extreme Jihad"
was officially "sealed away" in Magnamon's
Digimon World Re:Digitize Decode character profile and the Reference Book
removed it entirely in favor of SGSS in 2015. But Magnamon's signature move will always
be its infinitely more offensive version
in our hearts.) Meanwhile Plasma Shoot is a physical attack that deals 35 Fire damage to all enemies three times, which is the one very good thing about him. Like with Gankoomon, the damage output of Plasma Shoot multiplis in effectiveness when paired to Accel Boost. But unfortunately for Magnamon, you can get the same effective output from playing the much lower-costed Seraphimon, and can do so will reaping an additional 15% bonus from Justice Genome while also having a very sturdy cleric on hand.
Jesmon (22 Memory)
Recommended Builds: +1000 HP
Recommended Skills: Physical Drain, Character Reversal, Revive, Restore, Accel Boost, Panic Wisp / Idle Bubble / Shock
Recommended Equipment: Master Barrier / CAM USB
The last Royal Knight to appear ruffled more than a few feathers when he debuted in 2014, and turned out to be an awkward Jesuit/Jesus analogue with more swords than a Ren Faire. Uninspired though the design may be, there are bigger issues with this Digimon. Jesmon is a physical attacker, with Tekken Seibai ("Judgment of Blades") dealing 30 Neutral damage five times to a single enemy, and an Attack stat which lets Seibai develop into a two-turn kill on physically frail Digimon. The damage output on Seibai pales in comparison to Jesmon's real utility. His second Special, Schwertgeist ("Sword Ghost"), nullifies all damage dealt to Jesmon until his next turn comes up, while also giving him the effects of both Mirror Reflection and Cross Counter
Schwertgeist is very useful in-game for a handful of postgame bosses that require you to survive something like ten consecutive one-hit-kills, but in multiplayer it's another story. The Skill costs 50 SP, yet is only really useful versus multitarget Skills (which are rarely played) and doesn't actually enhance your survivability in a desperate situation because lasting until your next Jesmon turn doesn't put you in any inherently better position than using your current turn to do something else. The opponent can get around the counter feature by simply attacking Digimon other than Jesmon and allowing you to throw away your SP.
I will be frank; I have
never seen anyone use Schwertgeist in multiplayer, have an opportunity to use Schwertgeist in multiplayer, or play a game against a real human opponent where Schwertgeist would have improved their ability to win that match. I have likewise never seen Jesmon as a whole do anything other than mildly annoy a team and maybe cast Revive before getting unceremoniously dropped to 0 HP. Schwertgeist directly contradicts your objectives in Ranked because it favors having fewer turns than the opponent, it costs an exhorbitant amount of SP to use, and functionally Saftety Guard fills the same role for 18 less SP. Jesmon is an example of a Digimon where being used often doesn't guarantee that you're inherently compelling.
Alphamon (22 Memory)
Vaccine-Null
Recommended Builds: +1000 HP
Recommended Skills: Physical Drain, Character Reversal, Accel Boost, Crescent Leaf III/Gaia Element III, Revive, Panic Wisp / Idle Bubble / Shock
Recommended Equipment: Master Barrier / CAM USB
Alphamon only makes it into competitive discussions because half the Royal Knights are horrifying metagame monstrosities that eat dreams for breakfast. Their Support Skill, Aloof Hermit, increases the damage
dealt to Royal Knight Digimon by 20%. Seeing as the general consensus is that most teams will be running
at least one Royal Knight if not two, Aloof Hermit isn't enough of a persuasion for tamers to not run any members of the group, and Alphamon's other Skills pass a general evaluation, playing Alphamon is a relatively unintrusive counter that will ideally not hurt your team building too much.
Their stat distribution is another "unfortunately balanced" example, split exactly even on 105 Attack and Intelligence. This means that (of course) Alphamon has both physical and magical attacks at their disposal. Ouryuken deals 30 Light damage to one foe three to six times, which combos well with Aloof Hermit but not enough that it could actually threaten the other Royal Knights significantly. Meanwhile Digitalize of Soul deals 95 Neutral magical damage to all foes, with a 5% chance to inflict instant death. This is technically a good use of instant death since it's a passive additional effect that doesn't require you to go out of your way to use, but you can ignore that portion of the Skill in most matches.
How much Alphamon contributes to your team is dependent on how many opponents you encounter that run Royal Knight Digimon, as well as what your offensive versus those Digimon looks like. Aloof Hermit is far more threatening when stacked onto multi-hit attacks, but not on anything as weak or as random as Ouryuken. Jishin! Kaminari! Kaji! Oyaji! with a 2x attribute advantage and Accel Boost plus Aloof Hermit will reduce most Royal Knights down by 30~50% of their HP.
Nature Spirits
Hereon out we move to Digimon's traditional
Fields; Nature Spirits, Deep Savers, Nightmare Soldiers, Wind Guardians,
Metal Empire, Virus Busters, Dragon's Roar, and Jungle Troopers. (ME and JT will not actually be appearing.) I will
only list the most notable Digimon from each group, as the vast
majority of these Digimon have not been played nor perfected on competitive teams. The SGDL and Royal Knights
each deserved special mention for being able to fill some kind of niche
and having tamers all actively
trying to use each member. The remaining
Digimon to cover are not so fortunate, and so only Digimon that see or
have seen some kind of serious play will be discussed. If you want to
try one of the Digimon not listed, then work it out for yourself
how they should be played. You might bring them to prominence trying
something new.
Mirage Gaogamon (18 Memory)
Data-Wind
Recommended Builds: +1000 HP / +100 Speed
Recommended Skills: Physical Drain, Character Reversal, Accel Boost, Crescent Leaf III, Restore, Agility Charge
Recommended Equipment: Agility Attach A, Agility Attach A, Agility Attach A
There is only one true Evasion team in
Cyber Sleuth, and it is triple Mirage Gaogamon.
This is the team played by the tamer that is currently set to overtake the international leaderboards. I first encountered Hiroki_tomo running this team back when the game was Japan-only, and I made the mistake of thinking that it was a joke team. Mirage Gaogamon's Support is tame enough on its own; Feint buffs the team's Evasion by 7%, modifying a derived stat to make it so that you'll occasionally miss. But when you stack that with three Mirage Gaogamon, Feint now gives a 21% boost to each Digimon, and each Mirage Gaogamon has three equipment slots, so if you fill those with Agility Attach A to get another +9% Evasion boost per Attach...that's a 48% boost to Evasion. Triple Mirage Gaogamon says "flip a coin, if tails, you don't get to play the game" and it's one of the best teams I've ever seen.
There's a strong argument that triple Mirage Gaogamon is its own best counter, as Mirage is in the magic 120 Speed tier that outspeeds almost anything but Dianamon, and every Mirage will usually be getting two turns to your one. The only way to bypass Evasion boosting is to use Specials with the "Always Hits" property, and Mirage Gaogamon has one of the best ones, Full Moon Blaster. It deals 135 Light damage to one foe; compare Metal Garurumon's Garuru Tomahawk (140 Neutral) and Dukemon's Final Elysion (115 Light). Really, it's a blessing that Agility Charge Field does not exist, because this with the base Agility Charge is bad enough.
Chance elements introduce unpredictability
which enhances the strategy and fun of a game. One missed attack can
completely change how either tamer responds to one another; like having
to adjust one's real-world battle plan to account for dangerous
fluctuations in weather. Mirage Gaogamon takes control of the chance
elements and ramps them up to the point where failure becomes
predictable.
Like any Data-attribute, Mirage is vulnerable to Piercing Virus Digimon (Blast Mode, Lilithmon, etc.) but the turn delay after using their Specials may be too much of a setback for them to truly compete with a whole team of Mirages. The most reliable means of dealing with it is to use Always Hits attacks.
Banchou Leomon (18 Memory)
Vaccine-Earth
Recommended Builds: +1000 HP
Recommended Skills: Physical Drain, Character Reversal, Accel Boost, Crescent Leaf III, Saint Knuckle III
Recommended Equipment: Sleep Barrier DX, Panic Barrier DX, Stun Barrier DX
The ultimate Digimon of the Nature Spirits Field is equipped for a showdown. The main feature of Banchou Leomon is Last Stand (mistranslated as "Backwater Camp") which increases damage both dealt and received by 20%, enabling an aggressive play style that dramatically increases one's ability to score a KO while also leaving them exposed to opposing aggression in turn. Banchou Leomon is good at exacerbating an already favorable attribute matchup, but not so great at recovering from an unfavorable situation. His main method of dealing damage is Flashy Banchou Punch, a physical Special that deals 130 Light damage to one foe with a 50% chance to inflict Stun on-hit. The built in Stun is effective at building up a favorable gamestate, but because it isn't a guaranteed hit you can't rely on it to passively probe if the opponent has an immunity while also dealing damage. Aside from this, Banchou is best used as a generic physical attacker, equipped with tier III physical Skills to maximize damage output versus a variety of different matchups.

Deep Savers
Plesiomon (18 Memory)
Data-Water
Recommended Builds: +1000 HP / +100 Speed DIGIMADO)
Recommended Skills: Spirit Drain, Safety Guard, Perfect Revival, Final Aura, Restore
Recommended Equipment: Dot Barrier DX, Panic Barrier DX, Sleep Barrier DX
Plesiomon is a rare combination of cleric and status inducer. Their Special is Sorrow Blue, which deals Piercing Water damage to all foes equal to Plesiomon's Intelligence, with a 25% chance to inflict Sleep after connecting. Plesiomon's Support, Deep Sea Sleep, further adds on a 10% chance to inflict Sleep when executing a normal attack. Plesiomon is at the core of dedicated Sleep teams, and the probability to inflict Sleep can be further abused by having his supporting attackers use Cross Counter and/or Mirror Reflection, which causes them to normal attack every time they're hit with a physical/magical Skill. Unfortunately, there are numerous means to block Sleep in
Sleuth, whether that's by equipment, double Sleipmon, or running Sleep Mode. As a status inducer, Plesiomon works like a lower-costed but correspondingly lower-probability and lower-impact version of Belphemon SM. Just being more compact can be its own benefit, and since Plesiomon is a naturally bulky Digimon, he can still do almost as much damage sponging as Sleep Mode.
Marine Angemon (18 Memory)
Vaccine-Water
Recommended Builds: +1000 HP / +100 Speed
Recommended Skills: Spirit Drain, Safety Guard, Perfect Revival, Restore, Shock/Panic Wisp/Idle Bubble, Hydro Water III, Status Barrier
Recommended Equipment: Dot Barrier DX, Panic Barrier DX, Sleep Barrier DXMarine Angemon's Special and Support are both named Ocean Love, reflecting the fact that they may as well be the same Skill because you'll be doing the same thing with Marine almost every turn. Ocean Love (Special) restores HP to your entire active party and recovers any abnormal status placed on them. Ocean Love (Support) restores 5% of one's maximum SP at the end of their turn. These two Skills chalk up to being the single most efficient SP engine in the entire game, and solidify the idea in place that Support End
has no effect on Marine Angemon. If you do mange to Support End them, Marine will simply Ocean Love to recover from the effect. Marine being in play automatically turns the match into a stall war, with the tamer that runs out of SP first being the loser. You can restore as much as 35 SP in a single turn off of a Physical/Spirit Drain, giving Marine players a distinct advantage against non-Marine tamers. Of all the clerics, Marine is the most suited to playing long games and making use of the extremely costly Perfect Revival, because Marine's SP pool is functionally bottomless. Many tamers run a backup Marine Angemon in addition to their main, and oftentimes just the sight of the second one after putting in all the effort to KO the first can lead the opponent to forfeiting.
Ocean Love is actually an old standby of the
Digimon Story series, and something that's seen extensive use in multiplayer all the way back since the very first game on the Nintendo DS. You will learn to either love or hate Marine Angemon for these Skills, and this primarily depends on whether you are playing him or playing against him. In a pinch (or when you're already dominating) you can use a tier III magical element to get some offensive mileage out of Marine Angemon. The one thing Marine has to be aware of is physical Digimon running Crescent Leaf III, which will easily cut down 50~75% of Marine's HP in a single turn.
 |
| Dianamon should be #195. Instead, the slot doesn't exist. |
Dianamon (20 Memory)
Data-Water
Recommended Builds: +1000 HP / +500 HP + 500 SPD (DIGIMADO)
Recommended Skills: Restore, Status Barrier, Perfect Revive, Safety Guard, Spirit Drain
Recommended Equipment: Master Barrier / Dot Barrier DX
The international metagame has developed essentially without Dianamon. Sayo's partner is currently only available to Japanese tamers, locking the rest of the world out of one of the best Sleepers available. Until the entire Seven Great Demon Lords DLC is distributed, we're restricted to talking about Dianamon strictly as a threat rather than as an asset.
Her Special is Goodnight Moon, a magical attack that inflicts 125 Light damage to a single target, and always inflicts Sleep if the target is not immune. Her Support, Moonlight Glistening Sword, increases the damage dealt from Water and Light Skills by 10%. Possessing a 125 base Speed, Dianamon is the fifth-fastest Digimon in the game, possessing Intelligence and SP pools that surpass the vast majority of magical attackers and clerics (including Seraphimon!) and has unnaturally high Defense for such a magically-skewed Digimon. All this comes packaged to an economic 20 Memory, very low for a Digimon of her parameters.
So how does one approach Dianamon? You can beat Dianamon by beating Sleep. The first method is to equip Sleep Barrier DX, but Sleep strategies also crumble before double Sleipmon, and simply having a fast cleric with Restore or access to Marine Angemon's Ocean Love can undo any Sleeps she sets up. In terms of scoring a KO, note that in spite of her high defensive stats she has
the worst HP of any fully evolved Digimon. Base 400. Lilithmon has base 550 and is considered unplayable without +1000 HP, which tells you just how susceptible Dianamon is to Piercing damage. It's not a question of "if" Blast Mode or Lilithmon can KO her, but a matter of when.
Nightmare Soldiers
Sakuyamon (18 Memory)
Data-Light
Recommended Builds: +1000 HP
Recommended Skills: Spirit Drain, Revive, Heaven's Thunder III, Grand Rock III, Restore (DIGIMADO) / Spirit Drain, Safety Guard, Status Barrier, Restore, Revive/Perfect Revive, Character Reverse
Recommended Equipment: Sleep Barrier DX, Panic Barrier DX, Stun Barrier DX/Dot Barrier DX / INT Attach A, INT Attach A, Panic Barrier DX (DIGIMADO)
As a cleric Sakuyamon is unconventional, being of the Data attribute rather than Vaccine. This gives her certain problems in specific matchups against the metagame's primary damage dealers, which are invariably Virus types. But as a utility Digimon designed to remove status buffs and cure status, she excels in preventing powerful Vaccine Digimon from gaining momentum via Charge Field Skills and passive buffs. Her Special, Kongoukai Mandala, deals 70 Light damage to all enemies and cancels any buffs on them. This is instrumental for locking down Sleipmon, Ulforce V-dramon, and other Digimon that do in-battle rather than innate Speed boosting.
Her Support is powerful but hard to make use of because of her attribute. Clever Sense increases the entire party's Intelligence by 15%, giving magical attackers a better offensive, and improving overall magic defense versus Skills without the Piercing property. Boosting Intelligence also increases the potency of healing effects, which is one reason why Sakuyamon is occasionally run as a cleric, or at least paired with Seraphimon.
Kuzuhamon (18 Memory)
Data-Dark
Recommended Builds: +1000 HP
Recommended Skills: Spirit Drain, Safety Guard, Status Barrier, Restore,
Revive/Perfect Revive, Character Reverse
Recommended Equipment: Sleep Barrier DX, Stun Barrier DX, Dot Barrier DX Kuzuhamon is a Dark swap of Sakuyamon; the major differences between the two are that Kuzuhamon is in a much lower Speed tier (95 base vs 115 base), Taizoukai Mandala is Dark instead of Light, and her Support is different. Clear Mind grants the party full immunity to Panic. This lets you block one additional abnormal status on
at least Kuzuhamon, eliminating Dot via equipment. When used in combination with Boltmon you can have automatic immunity to Stun and Panic, blocking Sleep, Dot, and Paralysis or Bug via equipment.
Diablomon (20 Memory)
Free-Dark
Recommended Builds: +1000 HP / +100 Speed
Recommended Skills: Physical Drain, Revive, Character Reverse, Shock, Cross Counter, Mirror Reflection
Recommended Equipment: Sleep Barrier DX, Panic Barrier DX
There are two reasons to run Diablomon. The first is for Catastrophe Cannon, his Special; it's a physical move that deals 80 Fire damage to one foe three times, then prevents Diablomon from acting on his next turn as a result of the subsequent recoil. (Even if you swap them out and swap them back in later, the recoil turn will still take effect.) With Diablomon tied with four others for being the sixth fastest Digimon and his frankly
insane 180 base Attack being second only to Rage Mode, some tamers have had success running multiple Diablomon as a kill strategy where they plan to take out one Digimon with each use of Catastrophe Cannon. Diablomon being Free means he's removed from the game's primary attribute triangle, which assists in dealing consistent high damage that rivals the game's Piercing damage. The trade-off to this is that Light elements can walk all over him, with Sleipmon's Bifrost capable of 3-hitting Diablomon. You also only get 5 uses of Catastrophe Cannon before Diablomon is tapped out on SP, though theoretically by the time you run out of Catastrophe Cannons you
should have scored fifteen KOs if you're running three of them.
The second reason to run Diablomon is his Support, Destruction God. This grants the party a 10% chance to inflict instant death when executing a normal attack, and like with all other Supports...it stacks the more Diablomon you have in play. At least one high ranked tamer has used a strategy of running six Diablomon equipped with Cross Counter and Mirror Reflection to abuse this, giving each Diablomon a 30% chance to inflict death every time they're attacked, completely bypassing the existence of HP and most of the gameplay. However, like with most status strategies this is vulnerable to being blocked by double Sleipmon, and certain Piercing attacks that don't work off of either Attack or Intelligence can likewise bypass it.
Black War Greymon (20 Memory)
Virus-Fire
Recommended Builds: +1000 HP / +100 Speed / +27 SP +73 DEF
Recommended Skills: Physical Drain, Character Reverse, Shock, Accel Boost, Crescent Leaf III
Recommended Equipment: Sleep Barrier DX, Panic Barrier DX
Compared to War Greymon below, Black War Greymon is a little more selective in the situations where you'll find him useful. He's a Piercing attacker in an attribute that's already replete with access to Piercing damage. Yet the redundancy is a little more excusable in the original distribution of Cyber Sleuth, which didn't have Vice or Blast Mode for Black War to contend with. Black Tornado is the main reason to run him; it deals Piercing Dark damage to one foe equal to double Black War Greymon's Defense, and Bwar is better suited to it statistically than his Vaccine cousin further down. Black War has 120 DEF versus vanilla War's 105, and those 15 points make a significant difference in final damage calculation.
Bwar's Support is a little less stellar--Dragon's Rage boosts Attack by 15%, which can only really be exploited in combination with a Digimon that's actually going to be using physical attacks like Lord Knightmon. And in fact, the one time I saw Bwar run in a way that made sense and actually worked in practice, it was alongside Lord Knightmon and Lilithmon as one of Hiroki_tomo's openers. Bwar has 5 less SP than War Greymon, so you may want to consider going +27 SP to get three uses of Black Tornado out of him and have room left over for Physical Drain. His secondary Special is Dark Gaia Force, which hits all enemies for 100 physical Dark damage, and after use has a 30% chance to increase his Defense by 20%. This is chiefly useful for spreading damage when the Digimon you've been targeting with Black Tornado up to now is low on HP, as it both takes out that Digimon, weakens the remaining ones, and can potentially strengthen your next uses of Black Tornado.
Minervamon (20 Memory)
Virus-Neutral
Recommended Builds: +1000 HP / +100 Speed / +68 Attack + 32 Speed (DIGIMADO)
Recommended Skills: Physical Drain, Mach Rush III, Character Reverse, Speed Charge Field, Restore, Accel Boost, Crescent Leaf III
Recommended Equipment: Master Barrier / Panic Barrier DX
Like Diablomon, Minervamon is confined to getting consistent KOs as her one role. Her Support is designed to facilitate this. Primal Trooper increases damage dealt from Neutral Skills by 15%, which synergizes with her Special. Strike Roll deals 140 physical Neutral damage to one foe, and has an increased chance to crit. While her Attack isn't anywhere near the level of Diablomon, 145 is still quite reasonable, and Minervamon can regularly shave 75% HP off of physically frail Digimon. Other than that, there isn't a whole lot to her. She's run because she makes big numbers.
Boltmon (18 Memory)
Data-Electric
Recommended Builds: +1000 HP (DIGIMADO)
Recommended Skills: Physical Drain, Panic Wisp, Idle Bubble, Shock, Texture Blow
Recommended Equipment: Sleep Barrier DX, Panic Barrier DX, Bug Barrier DX (DIGIMADO)
Boltmon's Immobility passive grants him full immunity to Stun, so like with Kuzuhamon above you can gain additional coverage over another abnormal status by running him. He's generally been picked up on by the competitive scene as a dedicated status inducer. (The idea is first attributed to DIGIMADO champion
Jitenryuu, but may predate him.) Texture Blow in particular is almost universally found on Boltmon.
His Tomahawk Steiner Special deals 130 Neutral physical damage to one foe, with a 15% chance to inflict Panic attached. This is primarily used as a means of taking out Marine Angemon.
Metal Empire
 Metal Garurumon (18 Memory)
Data-Water
Recommended Builds:
Metal Garurumon (18 Memory)
Data-Water
Recommended Builds: +100 Speed / +360 HP + 22 Speed +42 Attack (DIGIMADO)
Recommended Skills: Physical Drain, Speed Charge Field, Crescent Leaf III, Character Reverse, Shock / Idle Bubble / Panic Wisp
Recommended Equipment: Sleep Barrier DX, Panic Barrier DX, Stun Barrier DX / Attack Attach A, Attack Attach A, Sleep Barrier DX (DIGIMADO)
A team of triple Metal Garurumon can Speed boost once and gain three additional consecutive turns versus any team not running Ulforce. This is made possible by Metal's passive, Feral Impulse, which boosts the entire party's Speed by 15%. Stacked that becomes a 45% boost, which can lead to one gaining up to thirteen consecutive turns before the opponent. This may sound overwhelming, but it's not ncessarily worth all the investment; it only works optimally if you go +100 in Speed on each Metal Garuru, and their damage output is low. Metal Garurumon has the no-miss physical Special, Garuru Tomahawk, which deals 140 Neutral damage to a single target, and he has the magical Grace Cross Freezer that hits the entire opposing team twice for 45 Water damage. As a physically-inclined Digimon, he'll usually get more mileage out of Garuru Tomahawk unless the opponent has a particular strenght in defending against physical attacks and a weakness to magical ones, but the base output on Tomahawk is usually no better than 200 damage.
This usually translates to a 4~5 hit KO on Sakuyamon, or a much quicker downfall for Vaccines, but it still can't prevent Ulforce from stealing the first four turns of the game right off the bat and leaves one dangerously exposed to Virus-attribute Digimon. The constant abuse of Garuru Tomahawk also takes a heavy toll on SP usage, such that you end up with taking six turns and 120 SP to do what Lilithmon can do in one turn for 40 SP. The Metal Garurumon usually end up sacrificed as an opening aggro gambit to wear on the opponent's resources, usually translating to you losing three Digimon to take out two of the opponent's. (The ability to
choose which Digimon the opponent loses is admittedly very powerful.) This also consumes about a third of the time allotted.
Triple Metal Garurumon is one of the few counters available to triple Mirage Gaogamon, and it also hard counters Marine Angemon, capable of KOing the cleric four times over before it ever gets a turn. But it more resembles a utility team in how it's used than it does a team of attackers.
EBEmon (16 Memory)
Virus-Thunder
Recommended Builds: +1000 HP / +100 Speed
Recommended Skills: Physical Drain, Revive, Restore, Character Reverse, Shock / Idle Bubble / Panic Wisp
Recommended Equipment: Sleep Barrier DX, Panic Barrier DX, Stun Barrier DX
EBEmon is one of the few hard counters to the Dot status problem. Its High Resolution Support prevents Dotting from taking place, which provides an easy option for dealing with Boltmon; the moment you see the opponent's Boltmon come into play, you swap EBEmon in, negating Texture Blow and presumably locking the opponent out of abnormal status in general via equipment. Their Special is Brain Rupture, a magic attack that deals 115 Thunder damage to one foe with a 20% chance to inflict Panic on-contact. Aside from their low memory cost and High Resolution, EBEmon isn't that special. Just another utility play.
Virus Busters
Seraphimon (20 Memory)
Vaccine-Light
Recommended Builds: +1000 HP
Recommended Skills: Spirit Drain, Accel Boost, Perfect Revival, Restore, Holy Light III, Safety Guard
Recommended Equipment: Sleep Barrier DX, Panic Barrier DX / Dot Barrier DX, Panic Barrier DX
On paper, Seraphimon sounds like a dream come true. He's a highly effective cleric and damage sponge that can also deal moderate to heavy damage to the entire opposing party with Seven Heavens, a multi-hit Special that capitalizes on the full effects of his Support. Justice Genome passively boosts all Light damage by 15%, and becomes expontentially more effective with even a weak multi-hit attack. The result is that even though the base cumulative damage of Seven Heavens is only slightly greater than End Waltz (15 x 7 versus 30 x 3), it becomes explosively more poweful as 2x, 3x, and other bonuses are stacked on top of it. Seraphimon's 135 INT and 95 DEF are a rare combination for a cleric, and he has the highest base HP of the conventional healers.
So why is it that he doesn't see more play? The answer is that while Seraphimon is unusually effective in several different categories, none of these together make him more desirable than Marine Angemon.
Cherubimon (Vice) (20 Memory)
Virus-Dark
Recommended Builds: +1000 HP
Recommended Skills: Spirit Drain, Accel Boost, Perfect Revival, Restore, Holy Light III/Nightmare III, Safety Guard
Recommended Equipment: Master Barrier / Sleep Barrier DX
The fact that Vice is on this list and not Virtue is a testament to how badly Cherubimon wanted for a revision prior to Vice being rolled out as DLC. Vice is an odd combination of cleric/utility and attacker; their Support Skill is Evil Heart, which passively buffs SP absorption effects by 30%. Evil Heart doesn't
quite put Vice on par with Marine Angemon as an SP restoration engine, because the only Skills with SP absorption effects are the basic Drains, but it still makes for reliable SP gain comparable to Lilithmon or Lucemon Satan Mode.
The main use of Vice is for his Special, Lightning Spear. This deals Piercing Thunder damage to one enemy equal to double Vice's Intelligence, with an increased critical rate. Lighting Spear costs 10 less SP than Phantom Pain for about a 40% decrease in output, but the SP restoration and lower Memory cost on Vice somewhat justifies running him over the other options.
The issue with Vice is that there's no particular team that's dying for what he brings to the table. Teams that want a Piercing Virus will run Blast Mode or Lilithmon and call it a day. Teams that want SP restoration will run Marine Angemon. His attributes don't particularly address any issue strongly, which is why he only appears infrequently in multiplayer.
Mastemon (22 Memory)
Vaccine-Null
Recommended Builds: +1000 HP
Recommended Skills: Spirit Drain, Perfect Revival, Restore, Final Aura, Holy Light III/Nightmare III, Safety Guard, Status Barrier
Recommended Equipment: Master Barrier / Sleep Barrier DX / Dot Barrier DX
Mastemon is recommended as an invaluable tool for the main game of
Cyber Sleuth. Her Chaos Degrade has a very simple effect that dramatically shortens the game's protracted boss fights, cutting the HP of all enemies by 25%. But when you take that Special and try to add it to a multiplayer environment, it's suddenly much less effective than it was in-game.
Part of this is numbers. You get more mileage out of Mastemon when the opponent has higher current HP. 25% of 4 is 1 damage, 25% of 4000 is 1000 damage. One of those values is worth the 25 SP cost, and the other is not. Since Chaos Degrade works off of current HP, it becomes progressively less effective as the battle drags on, being at its most valuable during the very first turn of the game. Hence Mastemon gets invariably run as a cleric because once you take away her big Chaos Degrade turn, there's nothing left for her to
do.
The backup on this is Parallel World Strategist, which increases the damage dealt from Light and Dark Skills by 10%, and increases HP restoration effects by 10%. The latter effect is how she makes a good cleric, since you can now wall the opponent much more effectively with Final Aura. Her stat distribution is overly balanced, with Attack and Intelligence being evenly split 50-50 when it would have been better to take 50 points out of her Attack and apply them to INT instead. As a whole, Mastemon's Memory cost doesn't necessarily reflect what she's bringing to the team.
Imperialdramon Paladin Mode (25 Memory)
Vaccine-Light
Recommended Builds: +1000 HP (DIGIMADO)
Recommended Skills: Perfect Revival, Restore, Meteor Fall III, Texture Blow, Status Barrier (DIGIMADO) / Physical/Spirit Drain, Crescent Leaf III
Recommended Equipment: Master Barrier / Sleep Barrier DX / Dot Barrier DXThe final Super Ultimate, Paladin Mode is designed to be a diverse Digimon. All of his stats except HP and Speed start at 105, making him another attempt at an all-rounder. His Support is Salvation's Defense, which reduces received damage by 15% when you have an attribute disadvantage. This mitigates the impact of attributes on gameplay and helps keep around important party members for longer, but it also discourages you from playing the Character Reverse game.
Despite his stat distribution, Paladin Mode's only Special is a physical attack. Omega Blade deals 150 Neutral damage to a single target with a 10% chance to inflict Dot. Its SP cost is somewhat higher than others at 30, but the damage output on it is significant. This is the single most powerful non-Piercing attack in the game, and when you do have the attribute advantage it can turn into a one-hit kill. Paladin Mode's base SP pool is moderately higher than most Digimon, and his stat distribution does enable you to mix and magical physical and magical tier III Skills to suit the weaknesses of your opponent.
Dragon's Roar
 War Greymon (20 Memory)
Vaccine-Fire
Recommended Builds:
War Greymon (20 Memory)
Vaccine-Fire
Recommended Builds: +1000 HP / +22 SP +64 Defense +14 Speed/HP
Recommended Skills: Physical Drain, Character Reverse, Restore, Crescent Leaf III, Revive, Status Barrier
Recommended Equipment: Sleep Barrier DX, Panic Barrier DX, Stun Barrier DX
War Greymon is the only fully evolved Vaccine attribute Digimon that can deal Piercing damage. This is an
extremely important role; with +64 Defense he can one-hit KO any Lilithmon in the game, and is a guaranteed two-hit kill on Belphemon Rage Mode. Unfortunatley War Greymon is in the 91 Speed tier, and his base stats aren't optimized for what he's trying to do.
His main offensive option is Brave Tornado, which deals Piercing Fire damage to one enemy equal to double War Greymon's Defense. Warg is overly invested in Attack to be making use of this, especially compared to his Bwar cousin. His Support is Dragon's Roar, which increases the damage dealt from Fire Skills by 15%, further enhancing the output on Brave Tornado while also comboing well with Dynasmon and/or Omegamon. His other Special is Gaia Force, dealing 90 physical Fire damage to all foes with a 30% chance to increase his own Attack by 20%. Gaia Force buffing Attack rather than Defense is one reason why Bwar is more common online than Warg, as the individual parts of War Greymon are mismatched despite his good combination of attribute and Special.
Imperialdramon Fighter Mode (20 Memory)
Free-Neutral
Recommended Builds: +1000 HP / +100 Speed (DIGIMADO)
Recommended Skills: Physical Drain, Crescent Leaf III, Restore, Revive/Perfect Revive, Accel Boost, Speed Charge Field / Venom Trap, Restore, Saint Knuckle III, Attack Charge Field, Meteor Fall III (DIGIMADO)
Recommended Equipment: Sleep Barrier DX, Panic Barrier DX / Panic Barrier DX, Stun Barrier DX (DIGIMADO)
Fighter Mode is one of the most efficient damage dealing engines in
Sleuth, and he doesn't even have Piercing. His Special is Positron Laser, a physical attack that deals 150 Light damage to one foe. Not only does it hit the cap on how much base damage a Special is allowed, Positron
Laser also has the advantage of being exceptionally SP efficient, much
moreso than Brave Tornado. It can be used about six times at base, and benefits from a very good and easily stacked Support.
Fighter
Mode buffs Attack and Speed by 10% each; when stacked via putting out three
Imperialdramon, the cumulative 30% Speed boost becomes more playable than
Feral Impulse's stacked 45% boost because of Fighter Mode also granting a 10% Attack Boost, and Imperialdramon FM being in a higher Speed tier than Metal
Garurumon. What you lose in the exchange is 2 Memory per Fighter Mode. You
also lose out on another equipment slot, opening up vulnerability to
Shock or Sleep depending on how you configure your team. Fighter Mode also can't oneshot anything--being Free is a
double-edged sword, as it prevents you from overwhelming any particular
Digimon in a single attack, and not being able to play the Character
Reversal game leaves you more exposed to Piercing damage. Triple Fighter
Mode teams will also still run out of SP in short order versus high-HP
stall teams, though even versus multiple +1000 HP Digimon their
offensive lets them stay in the game long enough to Physical Drain their
way into additional Positron Laser turns.
Triple Fighter Mode can lead to damage output on par with Diablomon without the crippling side effects of losing a turn, but it also burns out quickly and is highly susceptible to conventional damage dealing strategies when directly compared to teams like Mirage Gaogamon. It lacks Skills with the Always Hits property, and
has to deliberately choose vulnerability to at least one abnormal status as a part of its normal gameplay. Whether that's worth the trade or not is up to the individual.
NFE
Unlike in
Pokémon,
there are legitimate reasons to use Not Fully Evolved monsters outside
of a tournament dedicated to them. NFE Digimon have lower Memory costs,
identical Support Skills to their fully evolved counterparts, and unique
Special Skills that you can't gain access to at higher stages. Their lower Memory cost allows you
to maximize the use of your party slots, in some cases playing almost
double as many Digimon as those that strictly use fully evolved Digimon. That
said, this is by far the smallest category for good reason, as very few
Digimon merit consideration, and those that should be considered are
confined to extremely specialized roles. The use of Perfects is much easier in DIGIMADO than it is in Ranked.
Lucemon (Child) (14 Memory)
Vaccine-Light
Recommended Builds: +1000 HP
Recommended Skills: Spirit Drain, Character Reverse, Restore, Gaia Element III, Perfect Revive/Revive, Status Barrier, Safety Guard, Accel Boost
Recommended Equipment: Master Barrier / Dot Barrier DX / Panic Barrier DX
At
just 14 Memory and a base stat total of 1085, Lucemon offers an
incredibly compact magical attacker that's on the same ground as the
weakest sixth-level Digimon. He also has one of the most
disproportionately distributed stat arrangements of any Digimon, which
lets him come out at 145 INT, above any Perfect-level but below the more
notable fully evolved magic users like Barbamon or Lilithmon. His
Special Skill is Grand Cross, which deals Light-attribute Piercing
damage equal to his Intelligence to the entire opposing team. The
Justice Genome Support Skill further augments this by increasing the
damage output from Light attacks by 15%, and at level 50 his INT scales
to 208, putting Grand Cross in range of ~240 damage. This will not
devastate anyone with one casting, but the trick to Grand Cross is that
the more it's used the greater a toll it takes on the opposing party.
One Grand Cross is nothing, but when the entire team has lost ~500 HP in
two turns, it's something to worry about. Being Vaccine-Light, Lucemon
has a particularly special matchup with the many Virus-Darks of the
game. Grand Cross will almost halve Lilithmon's HP with a single casting, and
in two casts take out 3/4ths of Belphemon Rage Mode's health.
Unfortunately,
at just 700 base HP, Lucemon is just barely above Lilithmon
defensively, and his base Speed (75) is so abysmal that he's not even in
the top 40. It's a fairly safe assumption to say that everyone else on
both teams will always move before Lucemon 100% of the time, and you
don't have a ton of room to invest in Speed considering how badly he
needs HP.
Andiramon (Perfect) (20 Memory)
Data-Neutral
Recommended Builds: +1000 HP / +50 HP +50 Speed / +100 Speed
Recommended Skills: Physical Drain, Character Reverse, Restore, Crescent Leaf III, Revive, Perfect Revival
Recommended Equipment: Sleep Barrier DX, Panic Barrier DX
Andiramon
has the dubious honor of being the fastest Perfect-level Digimon in the
game, at 105 Speed. This is higher than the majority of Ultimate Digimon,
tying them with Saber Leomon for 8th place in the Speed tiers.
Andiramon also shares their Support with Cherubimon Virtue, Meditation,
which restores 5% HP at the end of each Digimon's turn. Their Support is
Asipatravana, a physical attack with deals 55 Wind damage twice. The
damage output on Asipatravana is fairly pitiful, and really only merits
consideration over a level III physical Skill when you have at least a
2x attribute advantage, but it does have the benefit of only costing 15 SP. Of note is that Asipatravana gives Andiramon a
great matchup with Cranniummon and Banchou Leomon, where the Special
will skyrocket to 3x damage twice. However, neither is a particularly
common pick in Ranked.
Aero V-dramon (Perfect) (20 Memory)
Vaccine-Wind
Recommended Builds: +100 Speed
Recommended Skills: Physical Drain, Character Reverse, Restore, Crescent Leaf III, Revive, Status Barrier, Safety Guard, Perfect Revive
Recommended Equipment: Master Barrier
Probably
the most notable NFE Digimon, at 95 base Speed Aero ties with ten other
Digimon for the 25th-fastest in the game. The standard build for Aero
takes this a step further, fully investing his bonus stats in +100
Speed, which all but guarantees that Aero will go first. None of the
other Digimon in his Speed tier or higher can afford to invest enough in
Speed to surpass him, as they need to distribute their stats in
different places, guaranteeing that Aero will always get the very first
turn of the match against every opponent other than other Aero V-dramon.
This is critical, as Aero and his evolved form Ulforce share a
dominating Support Skill. Godspeed causes all allied Digimon to always
move first at the beginning of the game; the only proper counter to it
is another Godspeed Digimon with a higher base Speed. Since the vast
majority of Digimon don't or can't actually invest in Speed, running a
Godspeed Digimon is the only way to secure the first turns of the game.
That
said, unlike his evolved counterpart Aero is absolutely pidgeonholed
into a utility role. He's there to cast Status Barrier and Safety Guard
on your teammates, then tag out into something offensive until you need a
fast cleric to cast Revive or Restore later in the game. Another common
tactic, which he shares with Ulforce, is to use Aero exclusively to
grab the first move and then swap him out on his first turn for
something else while retaining the remaining two turns his Support gave.
Vademon (Perfect) (10 Memory)
Virus-Dark
Recommended Builds: +1000 HP
Recommended Skills: Spirit Drain, Character Reverse, Restore, Crescent Leaf III, Revive/Perfect Revival, Status Barrier, Shock/Panic Wisp/Idle Bubble/Texture Blow
Recommended Equipment: Sleep Barrier DX, Panic Barrier DX, Stun Barrier DX
Vademon
is viable for the same reason that EBEmon is viable. They share
EBEmon's Support Skill, High Resolution, which prevents the Dot status.
Unidentified Flying Kiss has a 15% chance to inflict Dot, down 5% and
half as powerful as Brain Rupture. The point at which you'll prefer
Vademon is highly specific; it really only matters for Memory
consumption, on teams that are aiming to use a full 11 Digimon. Since
EBEmon is already quite economic at just 16 Memory, and Vademon is in
one of the worst Speed tiers while having even lower overall stats, it's
rare that you'll actually find room for Vademon on a team let alone
want to bring him with you. But when you are sitting around with less
than 14 Memory available and an extra slot, Vademon won't actively hurt
you and does bring something to the table.
Etemon (Perfect) (12 Memory)
Virus-Dark
Recommended Builds: +1000 HP / +500 HP +50 INT
Recommended Skills: Spirit Drain, Character Reverse, Restore, Gaia Element III, Revive, Accel Boost
Recommended Equipment: Sleep Barrier DX, Panic Barrier DX
The
last of the NFE group is also one of Digimon's most iconic characters.
80 Speed puts Etemon below any of the top 40, and his low base HP and
all-around lackluster stats makes many question why this Digimon still
sees occasional use. The reason is that Love Serenade deals Piercing
damage equal to his Intelligence, with a 15% chance to inflict
Paralysis, and it targets the entire opposing team. At only 80 base INT,
Etemon will
need to invest in his primary offensive stat to deal
anything resembling Lucemon's, but no Digimon actually has room to
equip Paralyze Barrier DX, so it's the probability to inflict a
low-priority status problem on the entire team that really makes him
offensively. This is considered preferable to his Ultimate, Metal
Etemon, whose Banana Slip uses the normal damage formula (115 base) to
only a single target but has an 80% chance to inflict Stun.
Etemon's
survival in multiplayer is enabled by his SS, Muscle Monkey Suit, which
reduces all incoming physical damage by 15%. This lets him (and the
entire team) tank attacks that are otherwise one-shot kills, and has a
dramatically greater effect than simple base stat modification. Contrast
that to Gigadramon's Ironclad Defense, which blanket increases the
party's base DEF by 15%; final damage modification is much more powerful
than stat modification. A reasonable build for Etemon is +10
Intelligence, +900 HP.
Closing Topics [ENDFAQ]
Bots
There are
24 bot players that Bandai keeps running in order to keep the Battle Master trophy available. If it takes too long to find you another tamer to battle, the server will offer you a bot to play against. You can always identify these bots by their score (it's always identical to your own) and name (format is ###13_CHARACTERS, i.e. 007RIECHANMOEMOE or 001TYPHOONGIRLSN). Their Digimon are invariably gimmick teams with hacked stats, and their decisions are always instantaneous and pattern-based. Beating them will only grant you 10 points, and it's advised that you instead cancel the match and try again for a human opponent.
JPN vs USA vs CAN vs DEU vs GBR vs ESP vs AUS vs MYS vs PRT vs SOL...
As
of patch 1.03, the country of origin of a Digimon tamer is given nexted
to their PSN handle in Ranked mode. An important difference between the
Japanese and international English and Taiwanese
Cyber Sleuths
is that there are two Master Barriers in the Japanese game but only one
in the international game. (The second one requires you to complete the
Seven Great Demon Lords questline, which has not yet been distributed
internationally.) Thus you will sometimes see a Japanese Digimon
with only two equipment slots that is fully immune to all status
effects, but international tamers can only choose between either total
immunity to up to three status problems, or get a maximum 50% immunity
to all of them. (This is strictly talking about equipment, there are
some Support Skills that get around this.) Whether the addition of New
Game+ means that there are additional Master Barriers available via
running through the game multiple times is untested.
Intentional Disconnects, Stalling for Time, and Escaping
During
one of their turns, a tamer may choose to "escape" from an online
battle much as they would any in-game one, ending it with a voluntary
loss for themselves and a win for the opponent. Similarly, tamers will
sometimes be disconnected from a battle--occasionally this intentional,
i.e. the result of a tamer powering the game off or otherwise closing the
Cyber Sleuth
application. At other times, the disconnects are simply due to a
problem with the internet connection, about which nothing can be done.
Finally, while in a winning position (having scored more kills than the opponent) and with only a few minutes left on the
clock, a tamer may choose to use the full minute allotted for their
command time in order to run the clock out and preserve their victory
while giving the opponent no option for input. One does not even need to
input any commands within the time limit; letting it run to 0 will
cause their Digimon to automatically guard.
Stalling until time out under such circumstances will
cause the game to recognize you as the winner. But it's also admitting
that you couldn't beat the opposing tamer; given the ability to battle
forever, they would win, and you chose to stall because you could not
find a way out of the situation. Is this against our values? It can be argued
that to demonstratably surpass the other tamer, one
must account for the
time limit. It can also just as easily be argued that stalling itself is symptomatic of the opponent having outplayed the staller in question, as they are running the clock out in the full knowledge that if the opponent is given turns, it will turn the match around.
Escaping
is a valid means of forfeiting a match, in recognition that one has no
options. Disconnecting is no less valid, as it still grants the opponent the full points they would have received for beating you normally. While I will not criticize anyone for legitimately
forfeiting, speaking as someone that enjoys battle for its own sake, I
prefer to play out each match to its conclusion even when my defeat
seems inevitable; I want to see it through myself, without any
particular regard for my win or loss. In my view, the goal of the battle is to learn from one's
opponent, even when the outcome is unpleasant.
Final Notes on Raising Rank
Your rank will only increase from beating opponents that have a comparable or greater number of points to you. Approximately 10% of the difference in point value is added to your score if they're above you. If they're below, then you only get +1 point. Beating those of identical point value gives you +10 points. For this reason, it's advised that you refuse matches with those of a much lower rank if you want to climb to the top quickly, and focus on fighting those who have similar or greater scores to you.
There is nothing at the end of being strong. The pursuit of the title of Tamer King is its own ethos; a constant polishing of one's proficiency and skill, improving as a tamer, and struggling in order to engage in the struggle. While this guide can state the fundamental characteristics of the
Sleuth metagame, what it cannot teach is execution. Being defeated, making mistakes, and failing to predict the oppostion are all necessary components of improving as a tamer, and memorizing this rote knowledge alone won't be enough. Truly surpassing your mutual competitors will require playing hundreds of matches before you can finally stand in the top 100.