

In the west, the various Digimon trading card games have an entirely different Monopoly-like reputation as slow and boring affairs determined wholly by chance. Back when TV Tropes had its Trading Card Lame page, they were prime targets for derision. This is at least in part a result of Bandai choosing to reimagine the core mechanics used in the Japanese games for western release, almost always with disastrous results. The first English card game, Digi-Battle, built itself on a principle of taking everything designed for the first Japanese game and inverting it, right down to the win condition being to gain 1000 points rather than reduce the opponent's points from 100 to 0. Many effects were either not adjusted in translation to account for these differences, or were outright mistranslated with no errata given to correct them, resulting in a catastrophic mess of a game that quickly collapsed only a few sets into its life.

In compiling the history and strategies below, I referred to a number of Japanese-language resources written by players and organizers that were there at the time, and to certain blogs in various languages. I owe much to Parabellum's Digimon Card Historic Chronology, NaCl's Japan Digimon Science, the Internet Archive, (as always) V-Tamer's Residence, Wikimon, and DIGIMADO, among others that I'm likely forgetting.
The Digital Monster Card Game
1999~2006: Directed by Tanukikouji Kaneki, designed by Ōnami
 |
| "That game they played in Digimon Tamers." |
Its historic influence in Japan can be quite shocking to behold. At the height of DigiCa's popularity, more than five hundred hobby shops nationwide carried the game as official stores and local tournaments for it were held almost every day of the year, with most events scaling between 8 and 24 players and Bandai's own regional competitions involving hundreds of participants. In fact, following the massive financial losses incurred by Toei's 23rd Summer Anime Fair in 2002 and Digimon Frontier's associated film, and the subsequent shuttering of the Digimon anime as a whole, it wouldn't be inaccurate to say that the card game became the Digimon brand for Japanese audiences. Sparse video game releases, the end of its serialized manga V-Tamer, and the general radio silence from Bandai until 2005-2006 gave the TCG a rough two to three year period in which it was the primary means through which audiences experienced Digimon.
 |
| More than 160 people gather for the 2003 Digimon Chronicle tournament in Ōsaka. |
With its final set scheduled for October 1998, Bandai was well aware of how valuable the Yu-Gi-Oh! intellectual property had been for its licensed merchandise, and was left looking for where to invest a suddenly-free chunk of its budget. At this time the theatrical film used to debut the Digimon Adventure anime would have been nearing the middle of its production cycle, set to premier in March 1999. The Digital Monster virtual pets had already been successful in building a new market out of the Tamagotchi craze, while the manga Digimon Adventure V-Tamer 01 had been running in V Jump magazine since November '98. For Toei and Bandai, the Digimon IP was already in the early stages of replacing the lost Yu-Gi-Oh! IP--and so the decision came quite naturally to substitute one for the other, producing a new TCG to invest in and fill out a gap in their revenue lineup.
The timeline where Bandai kept the Yu-Gi-Oh! license is much darker. The resulting Digimon card game did more for Bandai and for its audience than anything they had ever done with Yu-Gi-Oh!, and more than they realistically ever could. So how was this game played, and why was it so well loved?
 |
| Compared to the games Bandai could draw inspiration from, the Digital Monster Card Game was visually and mechanically distinct: no resource markers or Toughness/Hit Point count, plaintext card effects that referred to other cards by name, minimal keywording, and a consistent rock-paper-scissors weakness system set it apart from its contemporaries. The illustration's background also played an important role in gameplay, something no other game had attempted at the time. |
The Digital Monster Card Game's core win condition was to reduce the opponent's "Score" from its starting value of 100 down to 0. "Score" in this case was essentially a pile of Hit Points, but rather than being an abstract life system as in Magic or the Yu-Gi-Oh! manga's Duel Monsters, it was a fixed gauge that existed on the playmat and was counted by placing a card face-down onto it from the top of the deck at the start of the game. A player would lose points every time their Digimon lost a battle, moving the card down the gauge as they did so, with all losses being divisible by 10. Level difference was an important factor in calculating points lost: the higher the level of the opposing Digimon the more points you would take away from the opponent when they lost a battle, with the minimum being 10. By design, every turn would progress the game further, as ties resulted in both players losing points. (The turn player would win if they both hit 0 simultaneously--DigiCa was designed so that turns were essentially shared instead of alternating, but whoever won the previous turn's battle was nonetheless considered to be the "turn player" who carried out their phases first, and declared the winner in case of a tie.) Actual points lost were listed on each individual Digimon card, with the "Lost Points" field specifying how much the player would lose. For example, Bo-1 Metal Greymon lost its player 30 points if it was defeated by a Level III Digimon, 20 by a Level IV, or 10 if defeated by a Perfect or Ultimate.
(One interesting development is how Hyper Colosseum adjusted its language used. While Perfects and Ultimates were still referred to as such, Child and Adult Digimon were generally called "Level III" and "Level IV." This was likely because even when the game was in its planning stages in '98, Armor evolution was still on the horizon. Nonetheless, it gave rise to the use of numbered levels to refer to stages, which can sometimes be handy for communication--e.g. instead of getting confused over Perfect/Ultimate and Ultimate/Mega, saying "Level V" and "Level VI.")
 |
| Japanese Trading Card Games in the late 1990s were moving towards increasingly visual life systems that made games more legible to players and spectators, both for practical (tabletop) and entertainment (anime and manga) purposes. |
Digimon met these three games in the middle by having a semi-abstract life system that was counted with a physical card. Having the amount of points lost vary depending on the opponent's power was a brilliant design choice, as it rewarded players for pulling off more difficult knockouts and stagnated the winning player's momentum if their opponent wasn't getting to play the game. The more powerful your monster the more times you had to win, and the weaker your monster the fewer times you had to win. It was a built-in comeback mechanic, and the only real design failing of the Point Gauge system was how it tethered the game to specially-designed playmats.
Another major departure between past TCGs and Digimon was the total elimination of any kind of resource system. (In fairness, this one was probably inspired by the Yu-Gi-Oh! manga, where cards did stuff because they could rather than because their players paid an appropriate cost.) Every card in Magic had a mana cost that had to be paid by "tapping" lands, and if the player didn't have enough lands (or enough untapped lands) they couldn't use the card. Similarly, every attack in Pokémon had an Energy cost and players had to attach enough Energy cards to their Pokémon to use those attacks, while in Mon-Colle the monster cards themselves each had a given number of spell icons of different elements that could be collectively spent each turn to cast particular spells. The player's ability to do stuff in Digimon was instead limited by their monster's level, with higher-level Digimon having more powerful effects, and the relative cost being the amount of deck space and turn-by-turn investment the player put into getting access to that effect. While in the early days of the game this made it refreshingly intuitive, over time the lack of a resource system would seriously hurt the game's overall balance as the same actions began to give players much more power than they had in prior sets.

This was a hard break from contemporary games. Magic had Power/Toughness, Mon-Colle and Yu-Gi-Oh! had Attack/Defense, and Pokémon had Power/Hit Points. Digimon opted to forgo the entire idea of an endurance stat and instead had three different attacks per Digimon, with the primary gameplay revolving around modifying yours or the opponent's attacking type to win across multiple turns.
Of note is that while Takahashi's Yu-Gi-Oh! originated the idea of having to set non-monster cards in advance in order to use them later on, Hyper Colosseum developed the idea in parallel to Konami's interpretation of the game that players would have a limited number of zones to do it with. Instead of Instants, Trainers, Spells, or Traps, Digimon had the aforementioned Option cards, which were further subdivided into Programs, Items, and (eventually) Fields. Both players possessed three Option slots, and had to set any Options they were going to use face-down in those slots at the beginning of the turn before resolving them during the appropriate phase.
 |
| Hyper Colosseum playmat structure. |
1. Setup
Both players use a 30-card deck containing at least one Level III (Child/Rookie) Digimon. They begin the game by choosing a level III Digimon from their deck and placing it face-down in their Digimon Boxes. At the start of the game, both players shuffle their decks to form the Net Ocean, then place the top card of the Net Ocean into their Point Gauge, removing that card from play.
Both players draw a hand of 6 cards, and randomly determine who will attack first. (Sometimes colloquially called "priority," or "being the turn player.")
2. Preparation Phase
The player who goes first completes their Preparation Phase first, followed by the player who goes second. During the Preparation Phase, a player may first discard as many cards as they like (placing them face-down in the Dark Area) and move any set cards between their three Option Slots or send cards from the Slots to the Dark Area. Then they draw cards from the Net Ocean until they reach the upper limit of their hand size. (Normally 6, but this can be changed by card effects.) If the Net Ocean runs out, they may not replenish their hand.
After this, they may switch out the Level III Digimon in their Digimon Box as long as the box contains only a Level III Digimon. (In other words, Level IV+ Digimon may not be switched out for Level IIIs.) If they intend to evolve their Digimon, they place the target evolution into the Evolution Box face-down, and place the cards specified in its evolution requirements face-down into the Evolution Requirements Box. Evolution Requirements vary between Digimon--some require a specific Digimon be placed from the hand while another specific Digimon is in the Digimon Box, others require a Option Card like "Win Ratio 60%," and some even require you to remove cards from the top of the deck. These last ones are specified by circle or x symbols in the evolution requirements--a circle means the card has to be placed vertically in the Evolution Requirements Box, and an x requires they be placed horizontally. (Yes, really. There are a few card effects that exploit the horizontal/vertical position, so it does matter.)
Abilities or Option cards with an activation timing of "during the Preparation Phase" are then resolved, then the player sets any Option cards they like face-down from their hand onto one of their three Option Slots. After this point in the turn, Option cards can no longer be voluntarily sent to the Dark Area.
Option cards themselves are divided into three types; Program, Item, and Field, and are turned face-up to resolve their effects at the timing stated on the card. (e.g "Evolution Phase," "Battle Phase," "Point Calculation." )
3. Evolution Phase
The player with priority completes their Evolution Phase before the other player. First, they switch their Level III Digimon if they already chose to do so during the Preparation Phase; if the second player also announced a switch during the Preparation Phase, they may then choose to not go through with it after seeing what the first player switched in. The first player then carries out any regular evolutions they announced and prepared for during the previous phase, and the second player chooses whether or not to carry out any evolutions they did the same for. This means turning any face-down cards in the Evolution Box face-up, then turning cards in the Evolution Requirements box face-up in order to meet the conditions for evolving, then moving the evolved Digimon into the Digimon Box. Cards used for Evolution are then sent to the Dark Area.
After evolving, all Digimon cards from prior to the evolution except for the Level III Digimon card are sent to the Dark Area. Only the most recent evolution and base Digimon remain in the Digimon Box; so even with a Level VI Digimon in play, the IV and V it evolved from do not stick around beneath. Abilities or Option cards that activate during the Evolution Phase can be resolved any time during this Phase, while on-evolution abilities resolve the moment the Digimon has evolved. Unused cards in the Evolution Box and Requirements Box are sent to the Dark Area.
For evolution from III to IV, removing cards from the deck is the standard requirement. For V and VI, Winning Percentage Option cards are typically sacrificed as a prerequisite.
4. Battle Phase
As stated previously, each Digimon card has a Battle Type of A, B, or C. Your opponent's Battle Type determines which of your Digimon's three attacks you use, and vice-versa. So if you have an A-type Digimon, your opponent uses their A-Attack, and if you have a B-type Digimon, they use their B-Attack. Both players use any Options or abilities that require use in the Battle Phase, after which their final attack power is determined. Additions and subtractions from attack power stack, while multiplications replace one another--only the last multiplier is applied. The higher attack power wins; equal creates a draw.
Additionally, players may send a Digimon with a Support Ability from their hand to their Support Box during this phase. Digimon placed in the Support Box cannot attack with their normal attacks, but instead use the Support Abilities (marked with a square symbol in the ability field) to assist your battling Digimon.
Some effects, abilities, and Digimon Appearance Requirements resolve "At the start of the battle," these are resolved beginning with the player second to attack.
5. Point Calculation Phase
The loser of the battle determines how many points are subtracted from their score by calculating it form their Digimon's Lost Points field, moving the card on their Point Gauge down to the necessary marker. All Digimon cards greater than Level III are sent from the loser's Digimon Box to their Dark Area. In case of a draw, both players lose 10 points, and their Digimon remain play. The winner of the battle, if any, becomes first to attack next turn, and in the event of a draw the turn order remains the same.
Both players' Support Digimon go to the Dark Area. If either player ran out of cards in their Net Ocean at any point in the turn, at this time the Dark Area is shuffled and becomes the new Net Ocean. (This means that unlike almost every other TCG under the sun, players cannot "deck out" in Hyper Colosseum. In fact, players are expected to go through their entire decks multiple times in one game.)
Play continues until one player hits 0 Score.If you're having trouble visualizing how this all plays out, this 5-minute video guide from a Bandai VHS shows all of the phases being executed in order, though it's in Japanese:
The actual rulebook for Hyper Colosseum is overly obtuse. Essentially, Option cards and abilities can resolve at any time in the game--they just have to say so in their Activation Timing. "During Point Calculation" resolves during the Point Calculation Phase, "During the Battle Phase" resolves during the Battle Phase, and so on. The rulebook takes pains to point out each and every instance where an ability can activate, but if you just remember that cards resolve during the phase they specify, the flow of the game is simple: first you set your Options for the turn and put everything down you need to evolve with, then you evolve, then do battle, and then determine how many points you (or they) lost. And it continues on and on until somebody's
Unfortunately, the game is somewhat inaccessible even in translation. Hyper Colosseum tries to cultivate its flavor with some strange names for the play area's various zones; the deck is called the Net Ocean, the discard pile is called the Dark Area, and your hit points are called the Point Gauge. There's also an excess of information on the Digimon themselves. In addition to basic stuff like Card Name, Number and Level, you have the Battle Type, Type, Attribute, Group, Field, Information/Coordination Field (separate from Field) Attack Type, Lost Points, Abilities Field, and even Frame Color to familiarize yourself with. It's a beautiful game in action, but first you have to spend years training with the DigiMonks in the Far East End to get there.
The end result is a game fully representative of Digimon's ethos. In fact, better than any of the RPGs or raising sims, I think Hyper Colosseum gets at what the exact relationship is between tamer and Digimon is supposed to be. Because of the Battle Type mechanic, your Digimon essentially fight for themselves and act independent of how you would like them to, but you can assist and even modify that behavior with Option cards. (Standing in for commands and item support, and thus representing how well you're currently commanding your Digimon.)

 |
| Tanukikouji in V Jump magazine. |
Tanukikouji's relationship to the game was complicated, as he was responsible both for its overall direction and for advertising it in V Jump. For example, in the March 2003 issue Tanukikouji directly introduced the four pages covering content from then-upcoming booster sets 19 and 20. At major events Tanukikouji would host the TCG content, while Volcano Ōta handled the virtual pets, similar to how Ōyama Kouichi and Ishihara Tsunekazu were used in the early days of Pokémon's Trading Card Game. And just as Ōta was given guest appearances in V-Tamer 01, Tanukikouji would later cameo in both the Digimon Tamers anime and manga, handing Makino Ruki her first-place trophy while wearing the gladiator costume he used at official events. In Digimon Frontier he even briefly voiced Kanbara Takuya's father, giving him a small audio cameo in the franchise.
 |
| Leftover Booster 6 and 15 Carddass kiosks, alongside Zatch Bell! and Data Carddass machines, in 2016. |
(The name was inspired by the AMeDAS meteorological system, and so a more equivalent English name would be CardDAS, but Carddass is what Bandai officially brands it as.)

 |
| Exterior & interior of a Booster 9 vending machine box. |
The paper strips prevented the Carddass' sliding mechanism from damaging the cards themselves, but because they were distributed effectively unsealed instead of in booster packs, "mint condition" product for Digimon became very rare. Each store manager would individually load a Carddass kiosk when it went empty, filling the mechanism with the contents of one of the long boxes, and rather than needing to install a new kiosk for every booster set they would simply change out the cardboard flier behind the machine's glass front. This meant that there were no actual "Digimon kiosks"--there were just blank Bandai kiosks loaded with Digimon cards and fliers, with many of those machines being leftover from previous intellectual properties that had collectible Carddass of their own installed in them. Occasionally one can still find leftover machines from twenty years ago, their stock never changed out, but it's understandably rare because stores would prefer to swap out old unsold stock for newer properties. (There's probably at least one vending machine out there carrying Yo-kai Watch that used to carry Digimon.)
 |
| Booster 2 sealed booster box, intended for store distribution rather than Carddass machines. |
 |
| Sealed booster packs from sets 1 and 24, the first and final numbered expansions. |
Digimon fell somewhere in-between. Although there were 60 cards in its setlist--13 Level IIIs, 21 Level IVs, 11 Perfects, 3 Ultimates, and 12 Option cards--each "Starter Set" was slightly different in that it contained 38 individual cards. This made it closer to the Ice Age-era Magic Starter Decks from before they began producing Theme Decks, or to Pokémon's Japanese Starter Pack which consisted of random cards. Each box of Starter Set 1 contained one holographic and one hot-stamped card: the possible holographic cards were Herakle Kabuterimon, Pukumon, and Aim For the Strongest Evolution!, while the possible hot-stamped cards were Saber Leomon, Chimeramon, and Were Garurumon. Holos were similar to Pokémon Holofoil Rares where the illustrated portion of the card had a reflective sheen over it, while hot-stamped cards had the Digimon's name written in gold leaf. The remaining 36 cards included 8 Option cards in every deck, with at least one of each Plug-In card being guaranteed.
While Pokémon had pioneered the practice of foiled rares in '96 and Magic had just begun emulating it in February '99, hot-stamped cards were completely new to the TCG market. Digimon's example would later be imitated by Duel Masters, Weiss Schwarz, Victory Spark, Cardfight!! Vanguard, and Fire Emblem Cipher, among others, though to much gaudier effect.
.png)
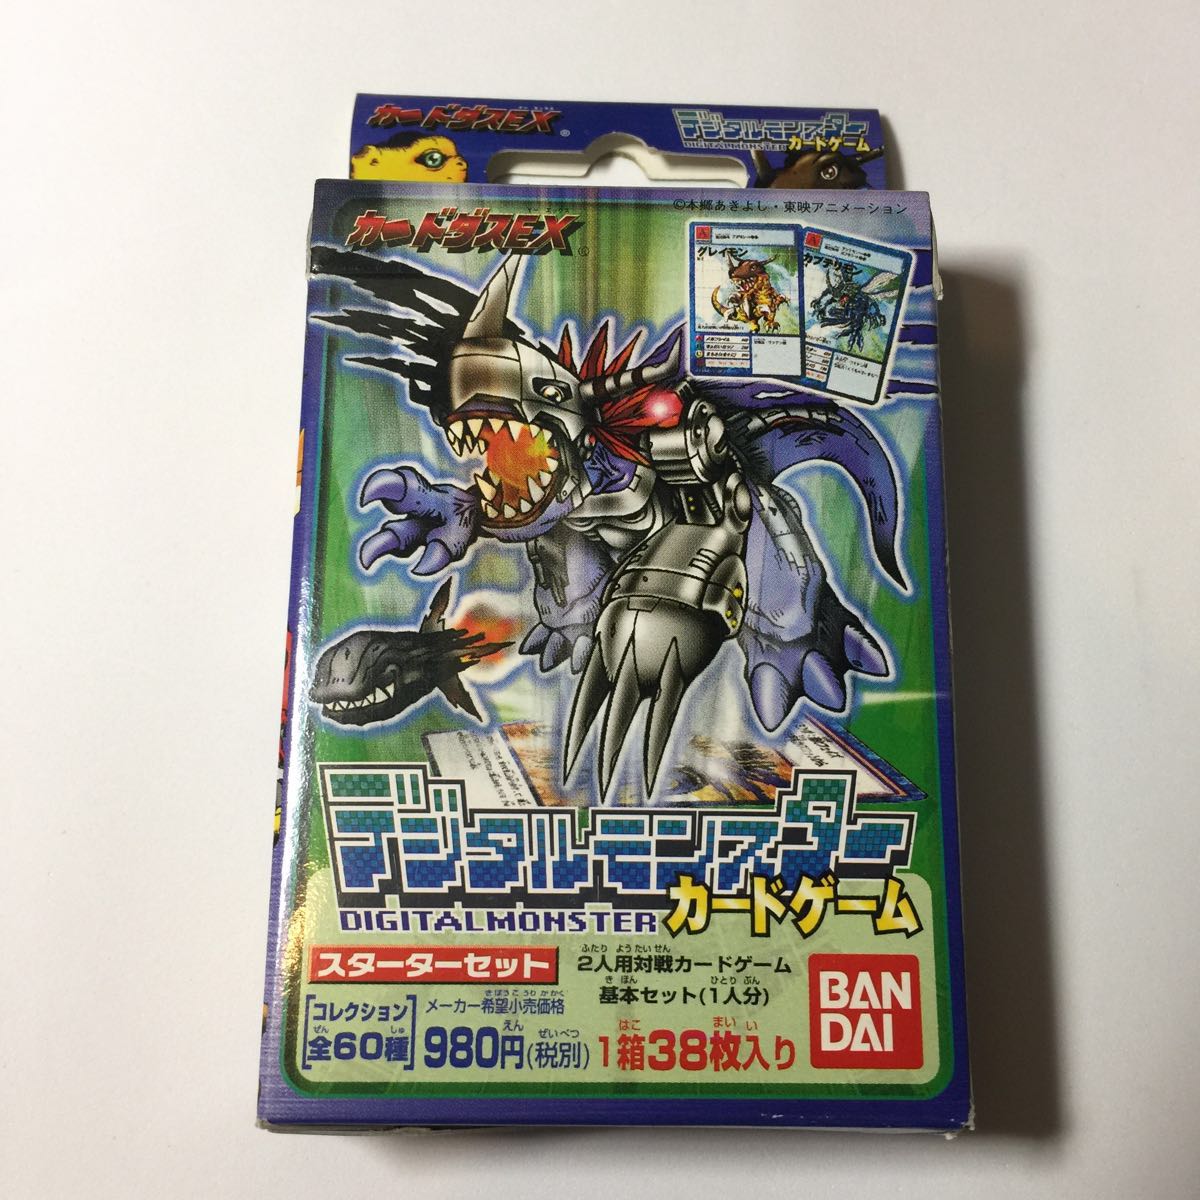 |
| A sealed Starter Set Ver. 1, originally launched late June 1999. |
The cost of a split could be divided evenly, or weighted based on the market value of the cards being claimed by each player, and the cost could be further offset by selling extras back to hobby shops at below-market-value. While booster packs in general can be an exploitive business model, and people knew this even in the nineties, the overall cost of DigiCa product was priced lower by Bandai compared to Magic, Pokémon, Mon-Colle, and Yu-Gi-Oh!, and players had the same tools at their disposal to further lower the cost of entry in 1999 as they have today.

 |
| Interior & exterior of a carton of twelve Starter Set Ver. 2. These were priced slightly lower than V1, at 800 yen apiece instead of 980. |
First off you had the trifecta of Ultimates: Herakle Kabuterimon, Saber Leomon, and Pukumon. Each of these represented one of the three attributes of Digimon lore, Vaccine, Data, and Virus, and each of them had a different Battle Type. Although never explicitly stated, Vaccine in the TCG mostly corresponded to Battle Type A, Data to B, and Virus to C. (This is one rule which had to be inevitably broken for gameplay reasons.) Each of these Digimon also had the ability to recover 30 Score when evolving into them, while Herakle and Puku possessed the Sky and Underwater abilities, respectively. Having these keyword abilities was both a blessing and a curse: they did nothing on their own, but made the user targetable by the Option cards Mega Hand and Coral Charm, while also able to use the Options Nose Dive From the Sky! and Attack From Underwater!. As the game progressed and continued to develop, keywords would gain further advantages and disadvantages, some of them more damning than others.
 |
| The three evolution trees from Starter Set 1, with additions from Booster Set 1 for Pukumon's sake. There were other ways to evolve up into these Digimon, but early on keeping the Battle Type the same was a desirable strategy to avoid devoting too much deck space to Plug-Ins. |
Which Plug-Ins were the "right" Plug-Ins depended on your Battle Type: Defense Plug-In C for A-type Digimon, Offense Plug-In A for B-types, or High Speed Plug-In B for C-types. The reason was that because your own Battle Type determined which attack the opponent used, changing to the Battle Type that trumped your own would cause you to win the exchange. Thus if you were an A-type the opponent would be forced to use their A-attack, so you would want to use your C-attack to reduce their A to 0 and win the battle.


And on that note, actually evolving your Digimon required additional cards to support it. While evolving from Level III to IV only required what was essentially a mill two, evolving from Level IV to Perfect generally required the card Win Ratio 40%!. Win Ratio 40%! was based on (of course!) the virtual pets requiring certain win ratios to achieve evolution. (In Bandai's short-lived attempt at localizing the game, the card was changed to a Digivice.) Meanwhile evolving from Perfect to Ultimate required either the card Win Ratio 60%! or a Jogress ("DNA Digivolution") evolution, performed by having one of the Jogress components in the Digimon Box and placing the other component in the Evolution Requirements box. Jogressing can sound complicated to new players just because it requires two Digimon, but in practice it just uses another Digimon card in the way that you would use a Win Ratio card. Win Ratio 60% could also fulfill the Evolution Requirements if a Digimon only required 40%, but the trade-off was that you had to discard a card when using 60%.

Then there was The Battle I Staked My Pride On!, which doubled the opponent's lost points by milling the user three cards. Bearing in mind that the opponent would generally lose more points for being defeated by a lower-level Digimon in the first place, Counterattack and Pride in combination could win games at the right moment--but they were difficult to use together like that, especially because milling all those cards hastened the rate at which the player would have to start their Digimon's evolution over from zero.
With the basics in mind, we can really dig into each individual set's contributions and the development of the metagame one card at a time. The explosion in Japanese TCGs was just about to begin in 1999, with games like Leaf Fight TCG (January) Gundam War (February) and Aquarian Age (July) all arriving to take a cut of the Pokémon/Mon-Colle pie. Even Wizards of the Coast was licensing a new manga series by the name of Duel Masters to promote Magic to Japanese children, recognizing they were on the precipice of a major boom. Konami's version of Yu-Gi-Oh! was coming and being previewed in V Jump, and Digimon needed to be ready and waiting at the starting line if it was going to get ahead of the rest of the market.
The Recover 30 Block: June 1999~January 2000

Booster Set 1 simultaneously introduced seven Digimon with the same Score +30 ability, comprising 3 A-types, 2 B-types, and 2 C-types. Take Starter Set 1 into account, and there were ten general deckbuilds at launch: Holydramon, Metal Etemon, Marine Angemon, Mega Seadramon, Skull Mammon, Boltmon, Piemon, Herakle Kabuterimon, Saber Leomon, and Pukumon. The differences between them were minor and hard to take advantage or disadvantage of, making it a "play what you like" format. The set's holos were Metal Greymon, Devimon, and Piemon, while its hot-stamped cards were Leomon, Tailmon, and Lady Devimon.
 |
| No Items Allowed! and Emergency Program Halt! |

For this reason, it was entirely possible that you would only need to win a single battle to take the whole game—or if you started as the turn player, potentially never need to win in the first place, just force ten draws. No Items Allowed!, Emergency Program Halt!, and Let's Stop Fighting would go on to become game-defining for much of the Digital Monster Card Game's life, being specifically shut down by later effects.
Let's consider what a sample decklist might look like around the era of Booster 1.
Sample Decklist
Digimon (15 cards)
x3 Metal Etemon (Bo-27) [main evolution]
x3 Ookuwamon (St-31) [main evolution]
x3 Tonosama Gekomon (Bo-8) [Jogress filler]
x3 Kuwagamon [main evolution]
x2 Gekomon [alternative evolution]
x1 Tentomon (St-7) [Starter]
Options (15 cards)
x3 Win Ratio 40%! (St-59) [evolve from Kuwagamon to Ookuwamon)
x3 High Speed Plug-In B (St-51) [win condition while on any evolved Digimon in this deck]
x3 No Items Allowed! (Bo-49) [opposing Plug-In counter]
x3 Emergency Program Halt! (Bo-50) [opposing No Items Allowed! counter]
x3 Let's Stop Fighting (Bo-51)
The reason the deck is built this way is that Metal Etemon evolves from a Jogress of Tonosama Gekomon or Ookuwamon with any other Perfect-level Digimon. While either Digimon can be used to reach him, Tonosama Gekomon's line is so cumbersome that it would more than double the number of Digimon in the deck, which isn't good for consistency. Thus we're really only running Tonosama as a vanilla Perfect-level to Jogress with. (There isn't a better option.) Ookuwamon evolves from either Kuwagamon or Gekomon with Win Ratio 40%!, while Kuwagamon and Gekomon can both evolve from Tentomon by offlining cards from the Net Ocean.
The reason the deck doesn't run Tonosama's line is because Tonosama Gekomon evolves from a Jogress of Starmon + Kuwagamon or Gekomon + Monochromon—Starmon and Monochromon would be 6 dead weight slots, as they don't evolve from Tentomon and running Gottsumon just to switch it in would mean dedicating even more slots in the deck for it. That would leave almost no room for Option cards.
So the basic game flow would look like this: you set Tentomon in play before the match begins, and try to evolve at least one stage per turn while using High Speed Plug-In B to win battles and steadily deal 10 points of damage to the opponent each round. Your ideal slot set-up is High Speed Plug-In B, Emergency Program Halt! & Let's Stop Fighting, so that you can 1.) create a winning game state, 2.) counter the opponent when they try to change that state by changing their attack type, and 3.) end the match in a draw should they counter your counter. Evolving to Metal Etemon every life cycle recovers the damage incurred from using Let's Stop Fighting, turning a neutral exchange into a positive one.
 |
| Your game can't be unbalanced if all your characters do the exact same thing, right? |

These cards did not immediately leap to the forefront of competitive play, but hung around the fringes of the metagame pressuring players to make their counters omnipresent. Is it True...You Can't Fly? could be countered with Emergency Program Halt!, and Speed Sevens by No Items Allowed!, which made at least one of them mandatory in every deck even in formats where Battle Phase counters were otherwise not called for.
 |
| Mugendramon, Hououmon, Griffomon, and Pinocchimon. |
The Ultimates that Booster 2 added to the pool were Mugendramon, Hououmon, Griffomon, and Pinocchimon, pulled from Pendulum 4.0 and 5.0. It also reprinted the Win Ratio cards, introduced the Item cards Black Gear (+100 Attack on a Perfect or lower) Digivice (ignore evolution requirements to go straight to level IV and gain 50 attack, one per slot) Tag (ignore evolution requirements for evolving to Perfect, only on the turn it was activated) and a set of Crests inspired by the anime series that gave various minor Attack boosts and added effects if they were stacked on top of a Tag item. The most significant was the Crest of Friendship, which added 10 to the opponent's lost points when they lost a battle. The Options from Booster 2 were mostly underwhelming, with only Black Gear finding an enduring place in tournament play.

 Return Match! allowed players to "reroll" the results of the previous battle by starting it over from the beginning rather than sending their Digimon to the Dark Area, though since it activated during the Point Calculation Phase it couldn't actually stop any points lost. But with this timing, the Option cards from the previous battle would already be in the discard pile, so it made it possible to retaliate against an opponent after the tools they had just used were discarded.
This card actually remains controversial due to its ambiguous wording and the multiple rulings that came out of it. As explained in NaCl's Japanese-language paper, Return's "Activation Timing" is "Point Calculation Phase," but the effect text states "After your Digimon loses a battle, instead of sending it to the Dark Area, you and your opponent both return to the start of the Battle Phase." Later cards with similar effects more cleanly divide their descriptions into costs, requirements, and effects, but Return Match! predates this division and puts the text "your Digimon loses a battle" in the effect box instead of under "Activation Timing," which actually makes it not a requirement to play the card.
Official rulings determined that the later-released Bo-305 Cracker!! and Bx-169 Thirst For Power could be used even if the opponent/player had less than 3 cards in their Net Ocean, and Bx-148 Gate of Deadly Sins could be resolved even if the Digimon couldn't be sent to the Point Gauge. This is because all of these actions are not part of the "cost" nor "requirements" (条件 conditions) of these cards, but are "effects" like "your Digimon loses a battle" is on Return Match!. And effects under Hyper Colosseum's rules are fulfilled as much as is possible. This means that Return Match! could actually be used even if you didn't lose the battle as part of resolving effects as much as possible, allowing you to freely reverse the Battle Phase regardless of whether you're winning or losing.
Now why would players want to do this? Because it allowed them to use once-per-battle abilities on their Digimon a second time in the same turn, and allowed battle to be redone without the Options the opponent used that turn. (It was officially ruled that these Options discarded themselves before cards like Return or Moon Millenniumon returned to the Battle Phase.) This knowledge did not become widespread for quite some time, but it was one small way DigiCa's design space gradually outgrew itself as it aged.
Counter Attack! potentially allowed the user to win an A-vs-A or B-vs-A matchup by doubling their attack power against A-attackers, at the cost of losing 10 points, and An Unquestionably Strong Attack! likewise changed type matchups by negating the A-to-0 property of opposing C-attacks. Both cards were somewhat cumbersome to use because of their conditions, requiring the user be Perfect or higher. Meanwhile Vaccines Are Our Rivals! acted as lower-costed version of The Battle I Staked My Pride On! exclusively for Perfect-level Data- and Virus-attributes, and I'll Pull You Down to the Bottom of the Ocean!! offset big losses with high-level Digimon by making the opponent lose the same amount. Unfortunately, many of the other Option cards in this set were gimmicky and strictly worse than going for a tie with Let's Stop Fighting, and only a few of these cards would ever show up in tournament decks--generally as one-card techs rather than as playsets in a big strategy.

While the first three Booster Sets generally stuck to the template introduced in Starter Set 1, Set 3 introduced the game's first vanilla Ultimates. Bo-145 Jijimon and Bo-146 Babamon must have seemed like a strange step back for the player base of the time; compared to Metal Garurumon and the new Mugendramon print introduced in the same set (who both had the Recover 30 property) all of their attacks were lower in power, and they lacked any special abilities to make up for these deficiencies. What's disappointing is that the cards in question were also the only Ultimates at the time for Etemon and Monzaemon, two Digimon that had been key mascots for the franchise up to then. Their only redeeming factor was being A-type Ultimates without Sky/Land/Grappling/etc. abilities that could render them vulnerable to certain Option card effects, but they were already beaten to the punch by Skull Mammon back in Booster 1, who at least came with the recover 30 property. It was the first time the game had deck types that were objectively inferior to every other option. When the game would revisit vanillas in Booster 4, they would be Digimon with much more raw power than their recovery counterparts.
However, Set 3 did experiment with giving effects to lower-level Digimon, with Vegiemon, Geremon, and Platina Scumon, all having the ability to further decrease the opponent's points by 10 during a win, while Vademon simply milled them for 2. The lack of full evolutions for these Digimon lines held them back, and Vademon's effect in particular just wasn't worth specifically building toward. In general it wasn't a very impactful set, with Plug-In S, Devil Chip, and I Take That Back After All! being its "big hit" cards. Unlike past sets, there were no hot-stamped cards in this one. Instead there were six possible holos: Metal Garurumon, Metal Greymon (Vaccine), Metal Tyrannomon, Mugendramon, Holy Angemon, and Aim for the Strongest Evolution!.
The License System
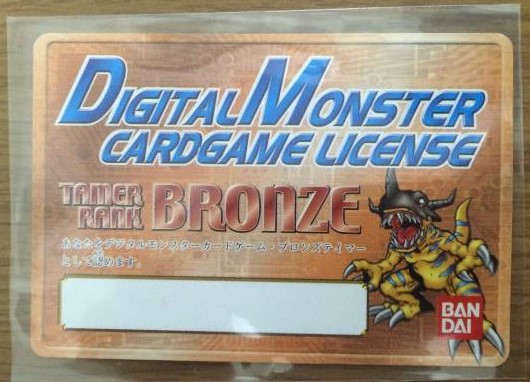 |
| A 2002 Bronze Tamer license for Hyper Colosseum. |
In the v-pet format, a tamer would have to beat one of the shop's staff in a best-of-three Digimon battle, with stores being distributed special .8 model (1.8, 2.8, 3.8...etc.) Pendulums that let them manually select their Digimon in order to carry out the evaluation. Each person could only be challenged a maximum of three times per day. This system went from Grade 3 (yellow card, the human equivalent of Child and Adult level Digimon) to Grade 2 (blue, Perfect level) to Grade 1 (red, Ultimate level) and then they would earn Gold. In 2002 the system was revamped to go from Bronze to Silver, Gold, and ultimately Platinum, and in 2005 the earning structure was modified so that tamers would have to earn a certain number of stamps to qualify for each license: 10 for Bronze, 50 for Silver, and 100 for Gold. Licenses from Silver rank on up were mailed directly from a committee at Bandai rather than given to stores, and those that achieved Silver or higher were listed on Digimon Web as elite tamers. It's for this reason that Silver, Gold, and Platinum Tamer licenses are so rare in the collectors' market, to the point that there are no images of the Platinum license on the web--it's believed that there are only six Platinum licenses in existence, because only that many people ever made Platinum.
This system later became the basis for the tamer ranking system used in the first three Digimon Story (Digimon World DS in the west) games. Exactly how it was applied to the TCG is not well documented, but it's worth noting that Bandai's tamer license structure has some general similarities to the Badge Books and scorecards employed by The Pokémon Company for marking player progress in their Pokémon Leagues. At this time Bandai, TPCi, and Wizards of the Coast (through their DCI numbers) were the only TCG companies attempting large-scale organized play, while it would be years before Konami established their COSSY system to rank players. Having a system of player tracking and progress helped set these early games apart from their contemporaries and keep players invested in both local and regional events, and one of Bandai's fundamental missteps with succeeding games like Appmon was their lack of player organization. The Tamer License system would later influence Broccoli's system of pro play in their Dimension Zero TCG from 2005 to 2014, in the form of "Professional Players Cards" used to certify a player for receiving prize money.
Recover 20: February 2000~March 2000


Set 4 also had some laughably impractical Digimon that existed largely to play on the anime's hype, as Adventure was at the end of its run while the Anode Tamer/Cathode Tamer video game duology starring Akiyama Ryo had just come out. In order to capitalize on the general excitement surrounding both series before going ahead with promoting 02, the TCG featured the nearly-impossible-to-play Apocalymon and Millenniumon, Digimon with impressive base numbers on their attacks but no real special abilities to speak of and so no reward for meeting their incredibly convoluted evolution criteria. Bo-163 Apocalymon required a Jogress between two of the four Dark Masters: Metal Seadramon and Pinocchimon or Mugendramon and Piemon, Jogresses of Digimon that were already Jogressed. This required an absurd amount of deck space to pull off, as you needed room both for Apocalymon, the component that wasn't your main evolution line, and all of the ordinary pieces, and the lack of an adequate reward ensured it was little more than a collector's item. Bo-193 Millenniumon was in a similar position of requiring the player to first build up a Mugendramon and then Jogress to Kimeramon, effectively adding another stage of evolution on top of the existing chain, but it at least had the benefit that Mugendramon could be raised using Win Ratio 60% instead. Again, it wasn't worth the effort: the card sat in players' binders while Ultimates with recovery abilities cleaned house.
The final thing Set 4 brought to the table was the D-3 Digivice, a new means of bypassing evolution requirements. This was another way to get to Level IV, and as a trade-off it wiped out the user's Option Slots at the end of the turn. Initially it wasn't worth it--the mill cost on evolving to Adult was negligible in the first place. The card only became important with the introduction of a new mechanic in Starter Set 3 and Booster 5. The six holos for this set were Apocalymon, Goddramon, Metal Garurumon, Millenniumon, War Greymon, and Demon.
 |
| Public interest in TCGs was booming in '99, well outside the demographics we usually associate with hobby gaming. Tateno Makoto's shōjo manga The King of Cards is perhaps the most bizarre symptom of the public's fascination; a card battle manga published in a women's magazine written by an author with no practical experience in the genre, using Poker as her primary influence. Accounting for all the perils of the mainstream, actual game designers had to hook players with novel mechanics or see potential players slip through their fingers. |
Meanwhile the Japanese Pokémon TCG had entered its second generation with its seventh and eighth major expansions, but the pool of competitive decks was still very narrow thanks to "Big Basics" from the game's early days still dominating its standard format. Pokémon had just introduced Baby Pokémon in an attempt to slow down the early game by requiring all attacks against them to win a coin flip before they could hit, but Media Factory was struggling to reign in the game's power level, and hand-destruction cards like Rocket's Sneak Attack and The Rocket's Trap were running rampant over the metagame. Further holding Pokémon back was how Media Factory and The Pokémon Company of Japan mandated that all official tournaments be in a best-of-one games 25-minute single or double elimination format, a ruleset they brought to Japan's Challenge Road '99 national championship qualifiers and never budged on for the next twenty years. This left competitively-minded players moving towards Digimon, Magic, and Yu-Gi-Oh!. (Mon-Colle was already struggling in 1999 despite being pushed heavily by big name card shops, with publisher Fujimishobo putting out a revised edition called Monster Collection 2 in 2000.)
Despite its growing pains, the Pokémon Trading Card Game was already showing signs of deeper strategy with plays like Donphan Rapid Spinning to switch its own Cleffa in, or Feraligatr using Misty's Wrath with its Riptide to play out of the discard pile--at the same time that Digimon was printing its fortieth cards to recover Score on-evolution. Compared to Pokémon, both Bandai's Digimon and Konami's Yu-Gi-Oh! had very little complexity in terms of card interactions, and tournaments were somewhat monotonous because of how identically each game flowed, but there was more support from both companies for a competitive format. Digimon's appeal lay in how everyone's favorite Ultimate was a viable core for a competitive deck, but if you didn't already have a favorite Digimon then you lacked a reason to play. Bandai was likely taking this into account when designing the following booster sets, which sought to redefine the game with a deluge of card effects and break away from its slow start...in the process sweeping away everything that came before.
The Armor Block: April-November 2000
 |
| Dozens of unopened Starter Set 3 decks leftover from the early 2000s. |
While Armor-level Digimon were weaker than Ultimates by the numbers, the range of their special abilities was much more vast: all of the Ultimates up to this time had been some combination of Recover 30/Recover 20 and a keyword ability like "Grappling" or "Sky." The very first Armor, St-120 Lighdramon, possessed the ability that if it lost a battle, its owner could discard their entire hand to send the opponent's non-level III Digimon to the Dark Area. (This ability was shared with Holsmon, Shurimon, Yaksamon, Togemogumon, and Owlmon.) St-122 Fladramon halved the opponent's final attack power after taking into account effects and abilities. (Shared with Submarimon, Pegasmon, Drimogemon, Shadramon, Setmon, Nohemon, and Honeybeemon.)
 |
| Fladramon clones defined tournament play for the first four months of the Armor block. |
This wasn't helped by how the Ultimates introduced in the same Starter Set as the Armors were themselves underwhelming. Even the much-hyped first print of Black War Greymon was a total vanilla, while Black Metal Garurumon was another Recover 20 Digimon. The only one with a unique effect was Seraphimon, who gained 100 attack when battling a Virus-attribute on top of his standard Recover 20. Yay.

 |
| Submarimon became one of the most important Fladramon clones of the block. |
While Armors were the focus of the set and were hard to put up a fight against, traditional evolution was not totally left out to dry. Booster Set 3 broke with the established convention of recovery-centric Ultimates by introducing King Etemon and Diablomon; the former being a B-type that added an additional 30 lost points to what the opponent was already losing when they were defeated, and which could not receive effects which would cause the battle to end in a draw, being one of the first of many Ultimates to block Let's Stop Fighting outright. The latter was able to invalidate the opponent's Program Option cards during the Battle Phase before they could take effect by discarding a card from hand, acting as a built-in Emergency Program Halt!, and could do so as many times per battle as Diablomon's tamer wished. Unfortunately for them, Armors had essentially brought to Digimon what Big Basics had to Pokémon four years earlier: fast powerful attackers on par with fully-evolved ones that could shut down their big brothers before the battle ever really began. Their sole weakness was their vulnerability to That Was a Good Time, which was more a temporary inconvenience than anything else.
The following lower-level Digimon also gained King Etemon's immunity to LSF:
And these ones gained Diablomon's inherent Emergency Program Halt effect, sans the discard cost but with the trade-off of only being once-per-battle:
These Digimon retained the discard cost and the once-per-battle condition:
And these Digimon could invalidate Options only at the end of the turn by discarding:
Finally, Bo-233 Dagomon could invalidate face-down Option cards but only as a result of losing a battle. Not great.
Organizing a Tournament Scene
The first and second sanctioned Digital Monster Card Game tournaments were both held in Tokyo on May 3rd, 2000. These were preceded by smaller local events at dedicated hobby shops, but none of those had been organized by Bandai directly. With Starter 3 and Booster 5 launching together in late April, there was precious little time to pick up singles from the new expansions and test decks so close to the competitions, and as a result use of the new cards was very limited. Two very different results came out of these simultaneous tournaments: the first was won by 12-year-old Watanabe Takuya using a Recover 30 Plesiomon deck built around a branching Gomamon evolution line, brimming with the old staples Defense Plug-In C, High Speed Plug-In B, Black Gear, Let's Stop Fighting, and numerous one-off cards. The second place decklist was kept private at the request of second-place competitor Yamazaki Akihiko (13) but third and fourth place were similarly taken by players also running Recover 30 decks. (Mugendramon/War Greymon and Metal Garurumon/Holydramon.)
Meanwhile the second tournament was won by 14-year-old Kaifu Shuichi with the Armor deck we would expect from the period: an Armadimon starter that evolved directly into either Submarimon or Digmon depending on the situation, using Defense Plug-In C and High Speed Plug-In B to change types, Transform to Level IV! to bypass evolution requirements, That Was a Good Time to reverse opposing evolutions, No Items Allowed! and Emegency Program Halt! to disable opposing Option cards, Black Gear to win mirror matches/Field-supported Ultimates, and Let's Stop Fighting to force draws. Just about the only thing you could potentially criticize in his deck is the choice to only run 2 Digmon instead of 3, and the inclusion of Win Ratio 40%! which seems to have been either a typo or a mistake--the card can't do anything in this deck due to none of his evolutions requiring it in their evolution text. Runner-up Tabata Kouji also used a Submarimon/Digmon deck, with the addition of Mega Seadramon as a potential Perfect. The only non-Armor deck to top was third place Tamura Osamu's Skull Satamon deck, which was a desirable rogue deck for its anti-Let's Stop Fighting special ability: "When the battle ends in a draw, further reduce the opponent's points by 10."
Raw numbers for the first tournament were never presented by Bandai, possibly because it was smaller than originally envisioned, but the second tournament was impressive enough. Of the 100 people invited by lottery, 80 participants arrived to compete from 10 AM to 5 PM in five rounds of Swiss draw. Under this system, players in the preliminaries were randomly paired and then matched against opponents with similar win-loss records in future rounds, until the end of round 5 when the sixteen players with the best overall records would be seeded against one another in a single-elimination tournament bracket. The players with the top thirty best scores at both tournaments were certified as Gold Tamers, entering them into Bandai's online registry of top players.
 Kaifu Shuichi's 1st-place deck
 Tabata Kouji's 2nd-place deck
 Tamura Osamu's 3rd-place deck
The third and final tournament of the Booster 5 format was held on June 18th at the now-defunct card shop Ōsaka Pangaea. Pangaea was a particularly important store in Japan's TCG scene because it was instrumental in the rise of early Magic, with many of the game's original fans having traveled long distance there just to buy cards and compete in tournaments. Pangaea profited immensely from its early adoption of Magic, at one point having seating for over two hundred players in the store, and was a popular hang-out for middle school students between 1998 and 2001. Likely aware its value as a centralized location, Bandai hosted several major Digimon events at the shop, though ironically DigiCa never found its way into Pangaea's regular weekly tournament lineup. Unfortunately the store closed down in late June of 2003, just a month after hosting a Dungeons & Dragons event.
It's unclear exactly how Pangaea went down; most card shop managers only stay in the business for three or so years because of the labor associated with buying singles low and selling high in multiple games simultaneously. In Pangaea's case, it may be that there was simply no buyer, or perhaps the store really did hit rock bottom. However things went, the only thing that stands there now is a bicycle shop and liquor store.
Similar to the previous two competitions, 54 participants were recruited through V Jump magazine and the Digimon Web homepage for a Swiss-format tournament. First place was taken by 14-year-old Ono Kazuki, who built his deck around Patamon's Armor evolution Pegasmon, which could naturally evolve into Holy Angemon and then Seraphimon. He was joined by Hino Yoshiaki with a familiar Digmon/Submarimon deck, Kubo Tomoya in third with a Fladramon/Sethmon Armor deck, and Touguchi Katsuhiro in fourth with a Rosemon deck.
 Ono Kazuki's first-place deck
 Hino Yoshiaki's second-place deck
 Kubo Tomoya's third-place deck

Touguchi Katsuhiro's fourth-place deck
The record on early Hyper Colosseum play is shockingly well-preserved, in large part because Bandai recognized the importance of the internet as a promotional tool for its game and adapted accordingly. By contrast, we know almost nothing about what Japanese Pokémon TCG tournaments were like prior to 2004, with all that is known being limited to a few Japanese print publications on the Mega Battles. In fact, we know much more about Digimon's early life than we do its late stages c. 2005.
"Loses Special Abilities" and the Rise of Burn: July-September 2000
 Armor evolutions would continue to see play through the end of the year, but mechanically they peaked early and their heyday ended just as quickly as it came. Booster 6 arrived in July 2000 and introduced a new ability that would forever define Hyper Colosseum: "The opponent's Digimon loses it special abilities." Nearly twenty years later there are new cards being printed with this text, as well as with its counterpart text "Cannot lose its special abilities." The poster child for negating the opponent's abilities was Bo-265 Metal Garurumon, which would enjoy a long tenure as one of the most popular deck cores around. The ability was simultaneously transplanted onto a pair of Armors, Bo-273 Rapidmon and the cover card of the set, Bo-300 Magnamon. Made to coincide with the Hurricane Touchdown!! / The Golden Digimentals theatrical film, Magnamon also possessed a second ability preventing it from receiving the effects of the opponent's Options, and both Digimon had an effect allowing their tamer to discard any number of Digimon cards from their hand to gain +50 attack power for each card discarded. Negating the opponent's Option cards was extremely powerful, as it was another way of blocking Let's Stop Fighting from creating draws.
However, these effects were in vain. If two Digimon with the property of "The opponent's Digimon loses its special abilities" were to battle, they would both become vanillas according to Bandai's own rulings, and in a straight power war Ultimates defeated Armors every time. The only real leg up Armors had was the speed with which they could be brought out, and for the next three months Ultimates would take the lead as the dominant force in the metagame.
Booster Set 6 represented a reset for DigiCa. From here on out, if your Digimon's didn't say "opponent loses its special abilities," it didn't matter. This created a metagame centered around cards with no effects at all--most of these ability-negating Digimon would never see their secondary abilities resolve in practice, as it became a choice of running a deck that could turn both players into vanillas or running a deck where only you would become one. The unfortunate thing is that this coincided with a lot more unique effects being introduced. Cherubimon (Vice) could revert the opponent's level IV Digimon to level III during battle in addition to being immune to A-to-0, Deathmon prevented the opponent from using Plug-Ins, and Cherubimon (Virtue) prevented all Digimon from receiving the effects of Option cards.
Initially only three Ultimates possessed this ability-negating property:
Metal Seadramon had the advantage of being able to use the Deep Savers card from Set 5 to rapidly reduce the opponent's points, and being able to evolve from an Armor through Mega Seadramon. (Similar to what we saw in Tabata Kouji's decklist.) War Greymon and Metal Garurumon only had the Metal Empire and newly-introduced File Island Field cards to support them, and while not as devastating, these could turn the tide in a vanilla brawl. In fact, Field cards as a whole took on a new level of importance in a format where Digimon couldn't be counted on to do anything in their own right. The simple fact that there were only three competitive decks in this format was frustrating, but it also revealed Bandai's overall strategy with Hyper Colosseum: to create a power scale Ferris wheel in which one set would introduce an insane mechanic that invalidated everything preceding it, then the next set would introduce an even crazier one that would invalidate that, cannibalizing sales from the player base by forcing them to buy a new deck every set to stay relevant instead of banking on being able to hook more and more new players over time. It was somewhat mitigated by how every deck tended to share the same pool of Option cards, but it's never fun to find out your favorite deck was just turned into a nobody. Moreover, the "loses special abilities" block in particular made the game revolve around doing nothing instead of on genuinely new mechanics.
In addition to those Ultimates, these Perfects could also negate special abilities:
Were Garurumon having this property was one of the reasons Metal Garurumon caught on as the dominant deck of Set 6, as it was just about the only Perfect that could negate abilities and then evolve into an Ultimate that could do the same. Unfortunately this format was not nearly as balanced as the Recovery 30 or Recover 20 formats, for the aforementioned reason that higher-level vanillas were inherently stronger than lower-level ones. It was more in line with what the game was supposed to be in that players had to actually engage with the evolution mechanics, but it was also a deeply centralized format that revolved around a shrinking number of dominant decks.
 In terms of the Option cards debuting in this set, Booster 6 introduced Bo-302 The Ultimate Connection!!, which allowed the player to discard all of the opponent's Options from their slots if the card's owner possessed a Data-attribute Ultimate-level Digimon, while being immune to the effects of Emergency Program Halt!. This was Bandai taking note of how dominant their own card had become and creating a powerful answer to it, and it was also one of the first instances of a card being specifically referenced by another card in-text--more cynically, you could say it was the beginning of degeneracy. The nature of Hyper Colosseum's gameplay was such that cards from later sets would have a laundry list of other cards that couldn't affect them or which were specifically targeted by their effects, building up a cruft of names that needed to be listed in order for a card to even be considered for a spot in players' decks. Several more cards within Set 6 specifically prevented Emergency Program Halt! from affecting them, and you could argue that part of the point of the set as a whole was to tone down EPH's stranglehold on the game. Not all cards are created equal though, and Ultimate Connection requiring a Data-attribute Digimon was one of the other reasons that Metal Garurumon came to dominate tournaments while War Greymon warmed the binder.
 Another popular Option was Bo-303 The Revelation of Hidden Power!!, which activated during the battle phase. At the owner's discretion, either player could be forced to evolve their Digimon to the next level while ignoring the evolution requirements. However, if the player chosen could not carry out the evolution, they would reveal their hand to the opponent to confirm it and then lose 20 points. Thus Revelation of Hidden Power could be used either to quickly skip to the next level irrespective of requirements, or to burn the opponent when it was clear they wouldn't be able to evolve while also gaining information about their hand's contents.
Continuing with the burn theme, Bo-304 Firewall!! hit the opponent for 10 every time they used Emergency Program Halt! or No Items Allowed!, and the card itself could not receive the effects of EPH As it required an Ultimate-level Vaccine-attribute Digimon to use, it was essentially just support for War Greymon at launch.
 Bo-305 Cracker!! was a not-actually-random burn that hit the opponent for 10~30 points depending on how many of the top 3 cards of their deck were Option cards, exploiting how players built their decks towards having very few Digimon and a huge number of Options. (It's actually similar in design concept to Lass and Rocket's Sneak Attack from the Pokémon TCG, made to punish over-reliance on Trainers, but in execution Cracker!! is far less balanced--imagine if Pokémon had a Supporter that let you take a Prize card for every two Trainers in the opponent's hand.)
Cracker!! went on to become one of the defining cards of the game both on the player and development side, being a mandatory 3-of in most decks and specifically blocked by many future cards. Almost every deck was made better by having copies of Cracker!! in it, and almost every deck was made worse by not.
Bo-306 File Island was a brand-new Field Option Card activated during the Evolution Phase. If the opponent did not switch their Level III Digimon within 5 turns of the card being played, they would be burned for 30 before the card offlined itself. As the majority of decks only ran a single Level III Digimon, this card could be used to push them into a loss, putting a time limit on the match. And as File Island was a Field card and so couldn't be removed by Emergency Program Halt! or No Items Allowed!, it could only be countered by (at the time) cards that affected Option cards as a whole, namely The Ultimate Connection!!. It was accompanied by Bo-307 Folder Continent, which activated during the Evolution Phase. During battle, Folder Continent would cause all Plug-Ins to affect both players' Digimon instead of just one, essentially guaranteeing a win if you knew that your Digimon had (for example) the highest A-attack in the game and ran the appropriate Plug-In to force both Digimon to use the same attack type. Neither card gained much usage however, as The Ultimate Connection!! quickly became the big name on the block for Metal Garurumon decks.
 Finally there was Bo-270 Evil Spiral, which became an uncommon tournament pick for being able to conditionally inflict multiple unavoidable burns for 10 points every time the opponent's Digimon evolved. All three of the big decks were vulnerable to it, and in fact the only part of the metagame that wasn't at risk was the niche Skull Satamon deck. Across subsequent set releases Virus-attribute Digimon became progressively more common as deck options, which turned Evil Spiral into a dead card in those matchups and consequently turned players away from running it.
Aside from these Set 6 introduced a handful of minor effects on other miscellaneous Digimon, like Bo-284 Seraphimon and Bo-285 Holydramon both being immune to A-to-0 effects and gaining +200 versus Digimon with specific names. ("Dramon" for Holydramon like Mugendramon, and the kanji character 魔 ma for Seraphimon.) These were generally low-impact filler used to pad space in the setlist.
The Fourth and Fifth Tournaments
The fourth sanctioned Digital Monster Card Game tournament took place in Tokyo on August 6th, 2000, and introduced the world to the mascot character Tailmon-Betsu (テイルもんべつ "Other Tailmon") which would later become the basis for the Digimon Betsumon. 48 participants took part in 5 rounds of Swiss draw, with the top 16 being awarded Gold Tamer status.
The tournament was won by 16-year-old Senda Hayato using a Boltmon/Metal Seadramon deck that defied most of the conventions typically associated with competitive decks of the day. For one, it ran a huge amount of Digimon as a counter to Cracker!!, and numerous singleton cards. The deck was also greatly reliant on Super Evolution Plug-In S to evolve into specific Digimon. In reality, many of those singleton cards were interchangeable with one or more other cards; Senda's deck wasn't just a pile of random techs, but a carefully-composed assortment of cards with different names that did the same thing.
 Senda Hayato's first-place deck
Aside from negating special abilities and reducing his opponent's ability to burn him through Cracker!!, Senda's deck primarily used burn damage to gain an advantage: Cracker!!, The Revelation of Hidden Power!!, and Evil Spiral could all stack progressively greater damage onto the opponent over time, while Let's Stop Fighting would stall out bad matchups and his freedom to evolve into an ability-negating Battle Type of his choice gave Senda a powerful degree of control over the match. Of note is that Boltmon itself was Virus-attribute and so immune to Evil Spiral--Senda seems to have put a great deal of thought into preemptively rendering his opponent's cards useless, ensuring only he would be able to employ burn damage effectively by minimizing his reliance on Option cards and avoiding conventional deck types. To his opponents, it probably looked like Senda kept getting insanely lucky not being burned by Cracker!! again and again, when in reality it was anything but luck.
After winning the tournament, Senda also won the exhibition match with Tailmon-Betsu.
Maegawa Shouichi's second-place deck
 Obayashi Noboru's third-place deck
Ono Yuuma's fourth-place deck
 |
| Playing out top 16 at the first official tournament. |
 |
| Top 3 at the second official tournament, left to right: Tamura Osamu, Kaifu Shuichi, Tabata Kouji. |
Raw numbers for the first tournament were never presented by Bandai, possibly because it was smaller than originally envisioned, but the second tournament was impressive enough. Of the 100 people invited by lottery, 80 participants arrived to compete from 10 AM to 5 PM in five rounds of Swiss draw. Under this system, players in the preliminaries were randomly paired and then matched against opponents with similar win-loss records in future rounds, until the end of round 5 when the sixteen players with the best overall records would be seeded against one another in a single-elimination tournament bracket. The players with the top thirty best scores at both tournaments were certified as Gold Tamers, entering them into Bandai's online registry of top players.
Digimon Cards (6)Kaifu's strategy was straightforward: use Digimental of Knowledge or Digimental of Faith to evolve into Submarimon or Digmon, both of which possess the ability to halve an opponent's attack power, with Transform to Level IV! as a substitute for either card. Beating the opponent down with a fast and powerful evolution was the standard order of the day, and opposing Armor decks could be danced around with That Was A Good Time, Black Gear, and No Items Allowed! to counter other Black Gears.
x1 Armadimon
x3 Submarimon
x2 Digmon
Option Cards (24)
x3 Defense Plug-in C
x3 High Speed Plug-In B
x1 Transform to Level IV!
x2 That Was a Good Time
x1 Win Ratio 40%!
x2 Digimental of Knowledge
x3 Digimental of Faith
x1 No Items Allowed!
x3 Emergency Program Halt!
x3 Let's Stop Fighting
x2 Black Gear
Digimon Cards (9)Tabata's deck wasn't that different, but keeping Mega Seadramon around as a way to keep building momentum after Armor-evolving was an interesting choice. Mega Seadramon's special ability prevented the opponent from using Let's Stop Fighting against it, sealing the endgame by keeping them from stalling out its life cycle.
x1 Armadimon
x3 Submarimon
x3 Digmon
x2 Mega Seadramon
Option Cards (21)
x2 Defense Plug-In C
x3 High Speed Plug-In B
x1 A Counterattack From Crisis!
x3 Digimental of Knowledge
x3 Digimental of Faith
x2 No Items Allowed!
x3 Emergency Program Halt!
x2 Let's Stop Fighting
x2 Black Gear
Digimon Cards (8)Tamura's deck is easily the most interesting out of the three. Skull Satamon is only a Perfect-level and yet it's designed in such a way that it encourages the player to spam Let's Stop Fighting while punishing the opponent for doing the same by inflicting them with an additional 10 damage every time a battle ends in a draw. Furthermore, this ability causes Skull Satamon to win natural ties as well, which are rarely taken into account but aren't that uncommon. Super Evolution Plug-In S took the place of Skull Satamon's normal evolution requirements, while Devil Chip helped him overcome the power-halving effect of opposing Armors by boosting Skull Satamon's power by 200.
x1 Pico Devimon
x2 Devimon
x3 Soulmon
x2 Skull Satamon
Option Cards (22)
x3 High Speed Plug-In B
x3 That Was a Good Time
x3 Super Evolution Plug-In S
x2 An Unquestionably Strong Attack!
x3 Emergency Program Halt!
x3 Let's Stop Fighting
x3 Devil Chip
x2 D-3
 |
| Judges manage the tournament proceedings at Ōsaka Pangaea, 1999. |
It's unclear exactly how Pangaea went down; most card shop managers only stay in the business for three or so years because of the labor associated with buying singles low and selling high in multiple games simultaneously. In Pangaea's case, it may be that there was simply no buyer, or perhaps the store really did hit rock bottom. However things went, the only thing that stands there now is a bicycle shop and liquor store.
 |
| Card Shop Pangaea's former location in Ōsaka. |
Digimon Cards (6)Like the other popular Armors of the time, Pegasmon halved the opponent's attack power during battle. Holy Angemon gained 80 attack when facing a Perfect-level or lower Virus-attribute, and Seraphimon gained 100 against Virus Digimon while also recovering 20 Score on-evolution. Ono also teched the Wind Guardians Field Option card in as a way to invalidate A-to-0 effects on his Digimon, but the rest of the deck is standard for the time period.
x1 Patamon
x2 Pegasmon
x2 Holy Angemon
x1 Seraphimon
Option Cards (24)
x2 Digimental of Hope
x3 That Was a Good Time
x1 Wind Guardians
x2 No Items Allowed! (St-162)
x1 No Items Allowed! (Bo-49)
x2 Defense Plug-In C
x2 Emergency Program Halt! (St-163)
x1 Emergency Program Halt! (Bo-50)
x2 Win Ratio 60%!
x1 Win Ratio 40%!
x1 I Take That Back After All!
x3 Black Gear
x3 Let's Stop Fighting
Digimon Cards (7)
x1 Armadimon
x3 Submarimon
x3 Digmon
Option Cards (23)
x2 Defense Plug-In C
x2 High Speed Plug-In B
x1 A Counter Attack From Crisis!
x1 That Was a Good Time
x3 Digimental of Knowledge
x3 Digimental of Faith
x2 No Items Allowed!
x2 Emergency Program Halt!
x2 Let's Stop Fighting
x1 Surprise Attack From Underground!
x1 Being Underwater Feels Great!
x3 Black Gear
Digimon Cards (7)
x1 V-mon
x3 Fladramon
x3 Sethmon
Option Cards (23)
x3 Digimental of Courage
x3 Digimental of Love
x3 That Was a Good Time
x2 Let's Stop Fighting
x1 No Items Allowed! (Bo-49)
x2 No Items Allowed! (St-162)
x1 High Speed Plug-In B
x3 Defense Plug-In C
x3 Emergency Program Halt!
x2 Black Gear
Touguchi Katsuhiro's fourth-place deck
Digimon Cards (4)By now several trends had emerged in competitive deck building. The game's primary audience was in the 12~14 age range, and they were old enough to be thinking critically about the decks they were building. Every competitive deck ran Plug-Ins, Emergency Program Halt!, at least one buff card, and Let's Stop Fighting, and most of them ran Transform to Level IV!, No Items Allowed!, and That Was a Good Time. It wasn't a hard format to solve: Fladramon clones made up the top tier of competitive play, and everything else hovered below it. But all this was about to change, as Bandai sought to shake up a stagnant metagame.
x1 Plotmon
x1 Pidmon
x1 Lillymon
x1 Rosemon
Option Cards (26)
x1 Win Ratio 40%! (Bo-104)
x1 Win Ratio 40%! (St-164)
x2 High Speed Plug-In B
x3 Defense Plug-In C
x3 Black Gear
x2 That Was a Good Time
x3 Seed of Strength
x1 Seed of Durability
x2 If I Lose I'm Taking You With Me!
x2 Let's Stop Fighting
x2 Surprise Attack From Underground!
x2 No Items Allowed!
x2 Emergency Program Halt!
The record on early Hyper Colosseum play is shockingly well-preserved, in large part because Bandai recognized the importance of the internet as a promotional tool for its game and adapted accordingly. By contrast, we know almost nothing about what Japanese Pokémon TCG tournaments were like prior to 2004, with all that is known being limited to a few Japanese print publications on the Mega Battles. In fact, we know much more about Digimon's early life than we do its late stages c. 2005.
However, these effects were in vain. If two Digimon with the property of "The opponent's Digimon loses its special abilities" were to battle, they would both become vanillas according to Bandai's own rulings, and in a straight power war Ultimates defeated Armors every time. The only real leg up Armors had was the speed with which they could be brought out, and for the next three months Ultimates would take the lead as the dominant force in the metagame.
 |
| The first two are the equivalent of Charizard pandering, the third is like giving Base Set Hitmonchan an evolution. |
Initially only three Ultimates possessed this ability-negating property:
Metal Seadramon had the advantage of being able to use the Deep Savers card from Set 5 to rapidly reduce the opponent's points, and being able to evolve from an Armor through Mega Seadramon. (Similar to what we saw in Tabata Kouji's decklist.) War Greymon and Metal Garurumon only had the Metal Empire and newly-introduced File Island Field cards to support them, and while not as devastating, these could turn the tide in a vanilla brawl. In fact, Field cards as a whole took on a new level of importance in a format where Digimon couldn't be counted on to do anything in their own right. The simple fact that there were only three competitive decks in this format was frustrating, but it also revealed Bandai's overall strategy with Hyper Colosseum: to create a power scale Ferris wheel in which one set would introduce an insane mechanic that invalidated everything preceding it, then the next set would introduce an even crazier one that would invalidate that, cannibalizing sales from the player base by forcing them to buy a new deck every set to stay relevant instead of banking on being able to hook more and more new players over time. It was somewhat mitigated by how every deck tended to share the same pool of Option cards, but it's never fun to find out your favorite deck was just turned into a nobody. Moreover, the "loses special abilities" block in particular made the game revolve around doing nothing instead of on genuinely new mechanics.
In addition to those Ultimates, these Perfects could also negate special abilities:
- Bo-263 Were Garurumon
- Bo-264 Vamdemon
- Bo-282 Silphymon
- Bo-286 Digitamamon
- Bo-287 Tonosama Gekomon
- Bo-288 Hangyomon
Were Garurumon having this property was one of the reasons Metal Garurumon caught on as the dominant deck of Set 6, as it was just about the only Perfect that could negate abilities and then evolve into an Ultimate that could do the same. Unfortunately this format was not nearly as balanced as the Recovery 30 or Recover 20 formats, for the aforementioned reason that higher-level vanillas were inherently stronger than lower-level ones. It was more in line with what the game was supposed to be in that players had to actually engage with the evolution mechanics, but it was also a deeply centralized format that revolved around a shrinking number of dominant decks.


Continuing with the burn theme, Bo-304 Firewall!! hit the opponent for 10 every time they used Emergency Program Halt! or No Items Allowed!, and the card itself could not receive the effects of EPH As it required an Ultimate-level Vaccine-attribute Digimon to use, it was essentially just support for War Greymon at launch.
 Bo-305 Cracker!! was a not-actually-random burn that hit the opponent for 10~30 points depending on how many of the top 3 cards of their deck were Option cards, exploiting how players built their decks towards having very few Digimon and a huge number of Options. (It's actually similar in design concept to Lass and Rocket's Sneak Attack from the Pokémon TCG, made to punish over-reliance on Trainers, but in execution Cracker!! is far less balanced--imagine if Pokémon had a Supporter that let you take a Prize card for every two Trainers in the opponent's hand.)
Cracker!! went on to become one of the defining cards of the game both on the player and development side, being a mandatory 3-of in most decks and specifically blocked by many future cards. Almost every deck was made better by having copies of Cracker!! in it, and almost every deck was made worse by not.
Bo-306 File Island was a brand-new Field Option Card activated during the Evolution Phase. If the opponent did not switch their Level III Digimon within 5 turns of the card being played, they would be burned for 30 before the card offlined itself. As the majority of decks only ran a single Level III Digimon, this card could be used to push them into a loss, putting a time limit on the match. And as File Island was a Field card and so couldn't be removed by Emergency Program Halt! or No Items Allowed!, it could only be countered by (at the time) cards that affected Option cards as a whole, namely The Ultimate Connection!!. It was accompanied by Bo-307 Folder Continent, which activated during the Evolution Phase. During battle, Folder Continent would cause all Plug-Ins to affect both players' Digimon instead of just one, essentially guaranteeing a win if you knew that your Digimon had (for example) the highest A-attack in the game and ran the appropriate Plug-In to force both Digimon to use the same attack type. Neither card gained much usage however, as The Ultimate Connection!! quickly became the big name on the block for Metal Garurumon decks.

Aside from these Set 6 introduced a handful of minor effects on other miscellaneous Digimon, like Bo-284 Seraphimon and Bo-285 Holydramon both being immune to A-to-0 effects and gaining +200 versus Digimon with specific names. ("Dramon" for Holydramon like Mugendramon, and the kanji character 魔 ma for Seraphimon.) These were generally low-impact filler used to pad space in the setlist.
The Fourth and Fifth Tournaments
 |
| Left to right: Maegawa Shouichi, Senda Hayato, and Obayashi Noboru. |
The tournament was won by 16-year-old Senda Hayato using a Boltmon/Metal Seadramon deck that defied most of the conventions typically associated with competitive decks of the day. For one, it ran a huge amount of Digimon as a counter to Cracker!!, and numerous singleton cards. The deck was also greatly reliant on Super Evolution Plug-In S to evolve into specific Digimon. In reality, many of those singleton cards were interchangeable with one or more other cards; Senda's deck wasn't just a pile of random techs, but a carefully-composed assortment of cards with different names that did the same thing.
Digimon Cards (13)For Senda, Pumpmon and Death Meramon were solely ways of evolving into either of the Boltmon variants, by ignoring the evolution requirements for Perfect using The Revelation of Hidden Power!! to get from Soulmon or Wizarmon into one of those and then Jogressing into Boltmon for the recovery effect. (Or using Super Evolution Plug-In S as a substitute for a missing Jogress component, which is how he got away with only running one of each component--Plug-In S was as good as either of them but only one at a time.) Alternatively, The Revelation of Hidden Power!! could be used as a way of getting onto Metal Seadramon to negate the opponent's special abilities; the same went for Were Garurumon, Digitamamon, and Hangyomon, which were respectively C-, B-, and A-type Digimon that negated special abilities, but completely useless without Hidden Power.
x1 Pico Devimon
x1 Soulmon
x2 Wizarmon
x1 Pumpmon
x2 Death Meramon
x1 Were Garurumon
x1 Digitamamon
x1 Hangyomon
x1 Boltmon (Bo-41)
x1 Boltmon (Bo-196)
x1 Metal Seadramon
Option Cards (17)
x1 Evil Spiral
x1 Defense Plug-In C
x1 High Speed Plug-In B
x1 Super Evolution Plug-In S
x1 Emergency Program Halt!
x2 Let's Stop Fighting
x1 Win Ratio 40%!
x2 The Ultimate Connection!!
x2 The Revelation of Hidden Power!!
x3 Cracker!!
x1 An Unquestionably Strong Attack!
Aside from negating special abilities and reducing his opponent's ability to burn him through Cracker!!, Senda's deck primarily used burn damage to gain an advantage: Cracker!!, The Revelation of Hidden Power!!, and Evil Spiral could all stack progressively greater damage onto the opponent over time, while Let's Stop Fighting would stall out bad matchups and his freedom to evolve into an ability-negating Battle Type of his choice gave Senda a powerful degree of control over the match. Of note is that Boltmon itself was Virus-attribute and so immune to Evil Spiral--Senda seems to have put a great deal of thought into preemptively rendering his opponent's cards useless, ensuring only he would be able to employ burn damage effectively by minimizing his reliance on Option cards and avoiding conventional deck types. To his opponents, it probably looked like Senda kept getting insanely lucky not being burned by Cracker!! again and again, when in reality it was anything but luck.
After winning the tournament, Senda also won the exhibition match with Tailmon-Betsu.
Maegawa Shouichi's second-place deck
Digimon Cards (9)By contrast, Maegawa's deck practically wore its heart on its sleeve: it was a Metal Garurumon deck from the ground up, running practically every Garuru variant then available. There were several advantages to the way this deck was built; the St-140 print of Garurumon could negate Program option cards, while Bo-221 was immune to Let's Stop Fighting. The 263 print of Were Garurumon was the only one to negate special abilities, which was shared with the 265 Metal Garurumon that combined it with 221's LSF immunity. So on any given turn you had a Digimon that was immune to the opponent trying to stall the game out, and/or one that turned them into a vanilla, that could also wipe out the opponent's Options with The Ultimate Connection!!. Note that this deck has no copies of Let's Stop Fighting, a historical rarity for Hyper Colosseum, and that it actually runs slim on higher-level evolution cards--most of the game was spent on Were Garurumon rather than Metal.
x1 Gabumon (St-5)
x2 Garurumon (St-140)
x1 Garurumon (Bo-221)
x3 Were Garurumon (Bo-263)
x1 Metal Garurumon (Bo-192)
x1 Metal Garurumon (Bo-265)
Option Cards (21)
x2 Black Gear
x3 High Speed Plug-In B
x3 The Revelation of Hidden Power!!
x2 Win Ratio 40%! (Bo-155)
x2 Win Ratio 60%! (Bo-156)
x1 I Take That Back After All!
x2 The Ultimate Connection!!
x2 Cracker!!
x2 No Items Allowed!
x2 Emergency Program Halt!
Digimon Cards (10)Using the St-139 and 140 prints of Gabumon and Garurumon gave Obayashi a slightly different set of early game matchups thanks to being C-type, and made the deck slightly less vulnerable to Evil Spiral. (Only for one turn.) Obayashi's deck was more conventional in that it used Win Ratio cards and a single solid evolution line, maxing out The Ultimate Connection!! to capitalize on his Data-attribute Ultimates being the only attribute with access to total removal.
x1 Gabumon (St-139)
x2 Garurumon (St-140)
x1 Garurumon (Bo-221)
x2 Were Garurumon (Bo-263)
x1 Were Garurumon (Bo-191)
x1 Metal Garurumon (Bo-192)
x2 Metal Garurumon (Bo-265)
Option Cards (20)
x2 Defense Plug-In C
x2 Evil Spiral
x3 Win Ratio 40%!
x3 Win Ratio 60%!
x2 I Take That Back After All!
x3 The Ultimate Connection!!
x3 The Revelation of Hidden Power!!
x2 Cracker!!
Ono Yuuma's fourth-place deck
Digimon Cards (9)
x1 Toy Agumon (St-142)
x3 Garurumon (St-140)
x3 Were Garurumon (Bo-263)
x2 Metal Garurumon (Bo-265)
Option Cards (21)
x2 Offense Plug-In A
x3 High Speed Plug-In B
x2 No Items Allowed!
x2 Emergency Program Halt!
x1 Let's Stop Fighting
x3 Win Ratio 60%!
x2 The Ultimate Connection!!
x3 The Revelation of Hidden Power!!
x3 Cracker!!
12-year-old Ono Yuuma was the youngest out of the Tokyo top 4, the only elementary-aged student in the group, but his deck was easily on par with those of his seniors. Like the other competitors Ono clearly knew how important Cracker and Hidden Power were to the format, but didn't build his deck against them in the way that Senda had. His ratios were also geared for consistency first, which was sound enough deck building but wasn't what Set 6's game design encouraged.
 |
| Card Kingdom Nagoya, formerly Futurebee Nagoya until 2005. |
Bandai's fifth sanctioned event was held six days later on August 12th at Futurebee Nagoya, a card shop that eventually closed down in October 2005 and reopened as Card Kingdom FB Nagoya--a chain very closely affiliated with the multimedia company Broccoli, being staffed by some of their former employees. This was just one of many acquisitions made to expand Card Kingdom and establish a national supply line, through which Broccoli would later distribute both their games and those of their business partners Nippon Ichi, Bushiroad, and Silver Blitz. It was not yet apparent in the early 2000s, but Broccoli's expanding empire would come to play a key role in diminishing Bandai's power within the TCG market.
 |
| Interior of Card Kingdom FB Nagoya's play area, c. 2015. |
The fifth Digimon tournament had 35 participants once again recruited through V Jump and Digimon Web, with participants winning out through five rounds of Swiss before cutting to a tournament bracket. It may sound like the numbers for tournaments were progressively shrinking over time, but this had more to do with the venue space than the game's popularity--local card shops like Futurebee were very small spaces for a tournaments of this scale, and running the event here instead of in a convention center likely put the store at its maximum occupant capacity. The tournament was won by 12-year-old Nagasawa Yoshihiko using a standard Metal Garurumon deck, second place was taken by 13-year-old Kamiya Ryuichi with a Submarimon/Digmon Armor deck, third by 18-year-old Natame Masayuki with a Rosemon/Metal Garurumon deck, and fourth by Hamabe Hiroshi using a Shadramon Armor deck. The top three decklists were featured in V Jump magazine, and the top 12 players awarded Gold Tamer status.
Incidentally, it would be easy to mistake Natame for the first written record we have of a legal adult competing in a Digimon tournament--but Japan's age of adulthood at the time was 20, so Natame was actually a minor. (The age of adulthood was not changed to 18 until 2018, and did not become effective until 2022.) More interesting is that Natame was quoted as saying he didn't think he would place in the tournament, and implied his deck wasn't a competitive one but his "favorite Lillymon deck." He may or may not be the first instance of someone taking their waifu deck to tourney, and for some reason his face is the only image from the old webpage the Internet Archive preserved. Truly legendary.
Nagasawa Yoshihiko's first-place deck
Digimon Cards (9)
x1 Gabumon (St-5)
x3 Garurumon (St-140)
x3 Were Garurumon (Bo-263)
x2 Metal Garurumon (Bo-265)
Option Cards (21)
x3 High Speed Plug-In B
x2 Defense Plug-In C
x2 Win Ratio 40%!
x2 Win Ratio 60%!
x3 No Items Allowed!
x3 Emergency Program Halt!
x2 The Ultimate Connection!!
x2 The Revelation of Hidden Power!!
x2 Cracker!!
Kamiya Ryuuichi's second-place deck
Digimon Cards (9)
x1 Armadimon (Starter)
x3 Submarimon (St-126)
x1 Digmon (St-133)
x2 Mega Seadramon (St-149)
x1 Metal Seadramon (Bo-201)
x1 Metal Seadramon (Bo-267)
Option Cards (21)
x2 Black Gear
x2 Defense Plug-In C
x2 High Speed Plug-In B
x1 Super Evolution Plug-In S
x1 Digimental of Knowledge
x3 Digimental of Faith
x2 Win Ratio 40%!
x1 Win Ratio 60%!
x2 The Ultimate Connection!!
x1 Cracker!!
x1 No Items Allowed!
x2 Emergency Program Halt!
x1 Deep Savers

Natame Masayuki's third-place deck
Digimon Cards (12)
x1 Alraumon (Starter)
x3 Yanmamon (Bo-174)
x3 Lillymon (Bo-213)
x2 Hangyomon (Bo-288)
x1 Rosemon (Bo-192)
x2 Metal Garurumon (Bo-265)
Option Cards (18)
x1 Offense Plug-In A (St-49)
x2 Defense Plug-In C (St-50)
x2 No Items Allowed!
x2 Win Ratio 40%!
x2 Win Ratio 60%!
x3 The Ultimate Connection!!
x3 The Revelation of Hidden Power!!
x3 Cracker!!
Note that Hidden Power is the only way for Natame to evolve any of his Digimon into Metal Garurumon in this deck. By his own admission, this deck was built because he liked Lillymon.
Hamabe Hiroshi's fourth-place deck
Digimon Cards (6)
x1 Wormmon (Starter)
x3 Shadramon (St-135)
x1 Nohemon (Bo-218)
x1 Kongoumon (Bo-296)
Option Cards (24)
x2 Offense Plug-In A
x2 High Speed Plug-In B
x2 No Items Allowed! (St-162)
x1 No Items Allowed! (Bo-49)
x1 Emergency Program Halt! (Bo-50)
x2 Emergency Program Halt! (St-163)
x1 Let's Stop Fighting
x3 Black Gear
x2 Seed of Strength
x1 That Was a Good Time
x1 A Counterattack from Crisis!
x1 Devil Chip
x3 Digimental of Courage
x1 Digimental of Purity
x1 Digimental of Miracles
Like with the Submarimon/Digmon decks we observed previously, this is an Armor deck built around a pair of Fladramon clones: Shadramon and Nohemon. Kongoumon acts as its means of disabling the opponent's special abilities, but it's also the only one Devil Chip can't be used on.
The Terror of The Dragon Emperor: October-November 2000

At the same time, ingenuity and good play had their part in Senda Hayato's first-place win, and no one could say there was no skill in the game. Looking back on Tokyo's first-place deck list, if I hadn't explained it to you, would you have been able to work out on your own what he was doing? The game was reaching the point where decks could have higher execution ceilings beyond the basic interaction of playing out type matchups and Plug-Ins.
 It was in this context that Starter Ver. 4 cracked the lid on two different Pandora's boxes: Infinity Mountain and the Sevens cards. The former was likely created in an effort to repair the damage dealt by Booster 6 while pulling the plug on Fladramon clones, as it gave any Ultimate-level Digimon the special abilities "The opponent loses its special abilities" and "During battle, add 200 to your attack power." Infinity Mountain effectively turned all fully-evolved Digimon into Metal Garurumon, at the expense of being forced to dedicate deck space and an Option Slot to Infinity Mountain while Digimon that had the ability naturally could use another Field Option card like Deep Savers, File Island, or Metal Empire.
The card was notable enough that when Bandai created its first rules-accurate digital conversion of the game, Digital Monster Card Game Ver. WSC, Infinity Mountain was the Field Option used to teach the player Field mechanics, and handed to them as part of the storyline to ensure they couldn't get stuck.
More pressingly was the previously-discussed Speed Sevens-Is it True...You Can't Fly? combo. With this, Cracker!!, and The Revelation of Hidden Power!!, there were now multiple ways to consistently burn the opponent in a very small number of turns, to the point that trying to play File Island would actually be suboptimal even if it were possible to get off without staring down The Ultimate Connection!!.
It would be unfair to blame the Sevens as a whole for this, as the issue was really that Bo-108 wasn't written with the maximum design space of the game in mind. Each of the Sevens were created to continuously add one keyword ability to either the user or the opponent's Digimon for as long as they remained in play, so that any associated Option cards could target them, and having the capacity to add "Sky," "Underground," "Grappling," et al. to cards was a natural evolution of having keyworded abilities in the first place. The Sevens were just as inevitable as Flight or Mark of Fury in Magic; what was not inevitable was a card that could kill the opponent outside the Point Calculation Phase. It was time for Bo-108 to find itself on a banlist--but there was no banlist for Hyper Colosseum, nor would there ever be. Bandai instead sought to control the usage of powerful burn cards through the introduction of other cards that did counter them, obligating players to upgrade to keep their local metagame from being consumed by burn.
It was for this reason that the combo was rarely seen in top cut despite how damaging it was. Option removal was the name of the game, with Emergency Program Halt!, No Items Allowed!, and The Ultimate Connection!! going from commonplace to mandatory, and for all the democratization Infinity Mountain was supposed to do, the Metal Garurumon line was a stronger core than ever before because of its access to Connection. Set 7 would introduce some Option removal of its own, but more than any of that, the "loses special abilities" property was the chief thing holding Bo-108 back. If your Digimon removed the opponent's special abilities then it would also remove the "Sky" keyword Speed Sevens added on, preventing Bo-108 from taking effect.
Starter 4 introduced a number of Options designed with mitigating burn's overall impact on the meta. The Item card Jureimon's Mist helped to delay the impact of burn damage on the game by negating all other Option cards for the turn Mist was played, and thanks to this effect was also immune to No Items Allowed!. Timing one's use of Mist effectively could keep Bo-108 or Cracker!! out of play for an entire life cycle, though not both. A Truce Agreement further bypassed the Battle Phase, giving its player a chance to stall for a turn while they fished for an Emergency Program Halt! or No Items Allowed! to counter Bo-108 or Speed Sevens.
The final Option card of note out of Ver. 4 was The Time Shock, which further pushed Fladramon clones out of the mainstream by allowing players to directly manipulate any text that said "half" to become "double." Now instead of crippling their Digimon's attack power, Armors actually enhanced it. Any future effects of this type that Bandai wanted to be strong enough to see play would be designed with Time Shock specifically negated by their text. (e.g. Bo- 430 Armagemon.)
The Armor hate in Set 4 wasn't exclusive to the Option cards. The cover card of the set, St-169 Imperialdramon, doubled its attack power versus any Digimon that evolved through Armor evolution, in addition to bringing back the Recover 20 ability. These ability sets were shared by Valkyrimon and Gran Kuwagamon. Armor evolutions were nowhere near as centralizing by this point as they had been just four months prior, but these effects were not entirely misplaced. Fast powerful Digimon were inherently appealing, and certain cards to come would provide a niche for specific Armors to continue thriving for a long time yet.
Of note is that the Starter Set became available in late October 2000, between episodes 28 and 30 of Adventure 02. Imperialdramon didn't debut in the anime until more than two months later in episode 39, and previews for Starter V4 would have been out in V Jump as early as September--the TCG was playing into the hype cycle of the anime series as best it could, revealing things in advance to get audiences excited for a new Digimon's debut.
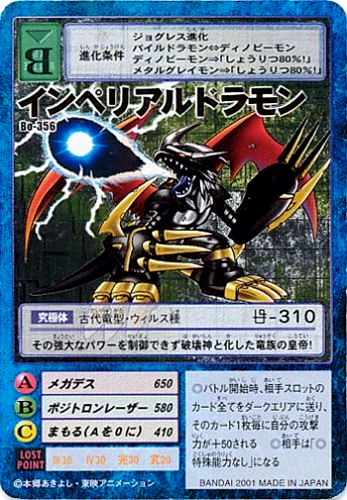 Starter Set 4 coincided with the introduction of Booster 7, the first expansion to have a proper name: Terror of the Dragon Emperor. The titular Dragon Emperor was a Virus-attribute Imperialdramon: Dragon Mode eventually renamed Imperialdramon (Black), and the themes of the set revolved around expanding the ability-negation mechanic while also shutting down key Option cards. The cover card itself had a built-in Ultimate Connection!! effect, sending all of the opponent's slots to the discard pile at the beginning of the battle and gaining 50 attack power per every card sent (so +150 max) while also negating their special abilities.
It was joined by two more unique cards, Moon Millenniumon and Qinglongmon, the former based on Millenniumon's appearance in the video game Tag Tamers from two months back, and the latter on the Holy Beast Digimon that was soon to play a focal role in the Adventure 02 anime. If you'll recall, Millenniumon was the hilariously impractical card from Set 4 with the awful Evolution Requirements. Moon Millenniumon went similarly unused because it required Millenniumon as a prerequisite for its Appearance Requirements: if you could actually get onto it Moon not only disabled the opponent's special abilities, but was unable to have its A-attack reduced to zero, and was functionally impossible to get rid of because it returned to its owner's hand upon defeat instead of going to the Dark Area.
 This would leave the player back at Level III (remember that all cards between III and your current level are discarded upon evolving) but without needing to fish through the deck for another copy of Moon. Since the card was normally played by losing a battle with Millenniumon and then reversing the battle phase in the style of Return Match!, it could theoretically catch the opponent unawares, except that if you were playing Millenniumon in your deck then the fact that Moon was in it was telegraphed a mile away. Not even Super Evolution Plug-In S could save it, because Moon didn't have Win Ratio 60% or a Jogress in its Appearance Requirements, and S could only partially alleviate how awkward it was to get onto Mugendramon and then Jogress away into vanilla Millenniumon.
Theoretically you could use The Revelation of Hidden Power!! to ignore Millenniumon's Evolution Requirements and evolve directly into it while on a Perfect-level Digimon, but the strength of Hidden Power was usually that it made an evolution you could carry out normally faster, not that it made impossible evolutions possible. Moreover, there was just no reason to run Moon with such a complicated setup when Imperialdramon (Black) was less work for better abilities.
 The third figure in the big three of Set 7 was Qinglongmon, first of the Four Holy Beasts. While Moon's evolution requirements could be bypassed with Plug-In S, Qinglongmon was designed to not need to be bypassed. Any Perfect-level Digimon could evolve into Qinglongmon--the cost was simply to discard a Digimon card and Win Ratio 80% to play Qinglongmon directly from the player's hand to their Digimon Box. Upon appearing Qinglongmon would then send all of the opponent's Option cards to the Dark Area just like Imperialdramon, and its second ability would continuously negate the opponent's special abilities.
Of the big three, Imperialdramon (Black) had the strongest effect on the game. The Battle Phase timing on its Option-discarding effect, and the fact that it happened every turn Imperialdramon battled, was highly disruptive and forced the opponent to essentially play without Plug-Ins, Fields, Black Gear/Devil Chip, or Let's Stop Fighting.
It also disrupted Cracker!! and Is It True...You Can't Fly?, because the Activation Timing for these cards was during the Battle Phase. However, it couldn't totally check the dominance of burn damage because Imperialdramon was just as susceptible as anyone else to losing its special abilities--when two Imperialdramon stared each other down, or Imperialdramon came face-to-face with Metal Garurumon, Cracker!! won.
 At this point any card which tried to stop Option effects in some capacity was a strictly worse version of Imperialdramon. Why run Cherubimon (Virtue) and prevent all Digimon from receiving Option effects, when you could run Imperialdramon and keep your own Option effects while sweeping away the opponent's? Why use Diablomon to discard 1~3 and negate that many Program Options when you could do it to all of the opponent's Options for free? Why use Deathmon to prevent the use of Plug-In A/B/C when you could just preemptively send the opponent's Options to the Dark Area? In fact, why play the Ultimate Connection-Metal Garurumon 2-card combo when you could get the same effect with Imperialdramon using only one card? All those cards that negated the opponent's special abilities and couldn't be hit with Let's Stop Fighting were irrelevant now, because Imperialdramon negated special abilities and couldn't be hit with anything. Even as later sets introduced effects that reduced its impact on the game, Imperialdramon decks continued to top almost into 2002.
Booster Set 7 introduced six new Digimon that negated special abilities as well as either Plug-In cards or No Items Allowed/Emergency Program Halt!, and Imperialdramon was strictly better than all of them. It was better than every other card that negated special abilities, and cards that negated special abilities were inherently superior to those that did not--and by process of elimination, this singled out Imperialdramon as the best Digimon in the game. The Terror of the Dragon Emperor was real, and it clouded the skies over hobby shops all across Japan.
If not for Imperialdramon there could have been as many as sixteen viable decks in the format thanks to Infinity Mountain, with even the likes of King Etemon having a fair shot so long as it was backed up by the Field Option. But let's not kid ourselves--cards like these are not mistakes. The game was functioning exactly as intended; the Ferris wheel was running on schedule, cycling out old expensive decks made up of rare chase cards for new expensive decks made up of rare chase cards.
 In contrast to the Digimon of Set 7, the Option cards introduced were by and large sleeper hits that took a long time to actually see play. Spiked Club gave the user's Digimon the Grappling ability and +30 attack power, while also doubling attack modifications from the user's own Option cards with the word "Metal" in them. (e.g. Just A Little Metal Enhancement goes from +50 to +100 attack power.)
It was not immediately relevant, but would become so with the debut of Turuiemon in Booster 13 a year later, who would gain +200 attack power by gaining Grappling.
 Digi Seabass was adapted from Digimon World, and like in the video game it extended the lifespan of the player's Digimon: as long as it was Ultimate level, you could shuffle your Dark Area into your Net Ocean and draw until you reached your maximum handsize. This would refresh the deck and hand, extending the time in which you could use your current evolution.
In order to prevent this effect from being recycled, Digi Seabass stacked itself onto the Point Gauge at the end of its use, which in the Digital Monster Card Game is the equivalent of being removed from play.
 Chaotic Wave was made to counter Fladramon clones, but had longevity as an enduring force in the game; any effect that halved final attack power would be negated before it could take effect, and the opponent would be burned for 20. Like Cracker!!, Chaotic Wave required future cards to be proofed against it as the card became more commonplace.
 Gold Banana could only be used while at the Perfect or Ultimate level, and allowed its user to change their Battle Type to whatever was the highest printed value, while also becoming unable to receive the opponent's A-to-0 effects. In practice, the highest value would always be A because of the way the game was designed: recall the rock-paper-scissors dynamic I described near the beginning of this piece, where A was the strongest but was negated by the weakest attack type, C.
Gold Banana changed the core dynamics of the game by making it so that A beat both B and C, and for that reason Banana immediately replaced all other Plug-In Option cards in competitive decks. Thus the card enjoyed a brief stint as the replacement "Plug-In" of choice, before further developments in Set 8 outmoded it.
 Bo-351 No Items Allowed! functioned like St-162, but activated during the Evolution Phase rather than the Battle Phase, and was limited to one copy in play at a time by its own effect. The reason for the new variant was so that it could preemptively invalidate Speed Sevens before Bo-108 could be activated during the Battle Phase, as well as for one more, frightening new possibility: voiding an opponent's evolution by negating their Super Evolution Plug-In S.
Armor and Win Ratio evolutions that actually used Digimentals or Win Ratio 40/60/80% instead of S couldn't be countered, but other methods that bypassed Evolution/Fusion/Appearance Requirements would be shot down. The only real way around this was The Revelation of Hidden Power!!, which as a Program Option was immune to No Items Allowed! and resolved in the Battle Phase besides.
Freeze!! trapped the opponent's A B and C at their fixed values during the time it was activated. Since Freeze!! couldn't be affected by Option cards it was an easy way of preventing the opponent from making further changes, but it wouldn't save you from them just switching their attack type outright.
 All of these new Options paled in comparison to the defining control card of the format, Dark Tower. Based on the Digimon Kaiser's evolution-blocking spires from Adventure 02, it was a Field Option card that stopped the opponent from performing all evolution other than Armor or Jogress, and further stopped them from ignoring Evolution Requirements with the likes of Plug-In S and Hidden Power!!. However, if the opponent were to somehow evolve to Perfect or Ultimate the card would be automatically discarded, and whenever it was sent to the Dark Area (by its effect or otherwise) its owner would lose 20 points. Dark Tower was probably intended to give Armor levels a fighting chance, but instead became the cornerstone of persistent evolution locks. Getting off an early game Dark Tower was no laughing matter, as unless you were running an Armor there was no way to access Level IV. The only reliable Field removal came from Imperialdramon and The Ultimate Connection!!, and you couldn't get onto those cards without going through Level IV first.
At the same time, Dark Tower's dominance was fragile from the start. If Field Options received any kind of basic counter in the way that Programs and Items had, the card would be as easy to turn off as a Plug-In.
One of the more subtle shifts of the Set 7-on format was the emergence of Wormmon decks. Because Bo-356 Imperialdramon could evolve from Dinobeemon, and Bo-308 Dinobeemon could evolve through a Jogress of two Armor Digimon--Searchmon and Shadramon or Flybeemon and Honeybeemon--Wormmon became a very popular competing core for Imperialdramon decks, as it could bypass Dark Tower by Armor evolving and then Jogressing to Perfect to disable Dark Tower.
The Control Format
 Bandai's sixth sanctioned tournament took place on November 3rd, 2000, in the Taitou ward of Tokyo. 89 participants competed in six rounds of Swiss draw, with the tournament receiving the largest number of applicants of any up to that point. It was won by 15-year-old Ogino Shintarō, who focused on using Dark Tower and the Bo-351 print of No Items Allowed! to lock down the opponent's evolutions while setting up Lampmon to deny them both their special abilities and Plug-In cards. What made this specific tournament so fundamentally different from the one before it was the presence of a reliable way to regulate the opponent's access to basic game mechanics--Dark Tower dominated the tournament scene, finding a place in all but one top 4 deck and drawing commentary from Bandai and V Jump's copywriters on just how prevalent the card had become.
As with the previous tournament, the winner played an exhibition match with Tailmon-Betsu, while the top three winners' decks were published in an issue of V Jump magazine. The top 33 players at Tokyo were awarded Gold Tamer status.
Ogino Shintarō's first-place deck
Misoko Ryou's second-place deck
Ichizaki Masahito's third-place deck
Kobayashi Noboru's fourth-place deck
 The seventh sanctioned tournament took place two days later in Ōsaka's Chuuou prefecture. 55 participants competed in five rounds of Swiss, with the top 10 earning Gold Tamer rank and the top three decklists being published in V Jump. Digimon Web reported a diversity of decks being played at Ōsaka--V-mon, Agumon, Armadimon, and Tailmon among others. But without a comprehensive breakdown of which decks were played, it's impossible to say how much this was accurate reporting and how much it was just propaganda.
 The event was won by 12-year-old Satomura Kazuya. Much like Ogino Shintarou, Satomura's deck was build to block the opponent's evolutions with Dark Tower and No Items Allowed!, while building up to Imperialdramon to render them helpless in the endgame. Despite this standard top, the tournament scene was already experiencing a slow shift in favor of Magnamon. Dark Tower was such a powerful lock and Armor evolutions so essential to countering it that players felt compelled to pursue the strongest Armor possible. It helped that Imperialdramon (Black) naturally evolved from the same line as Magnamon, providing a solid conventional endgame if you could get it together.
 Satomura Kazuya's first-place deck
 Kanehana Yuuya's second-place deck
 Hino Yoshiaki's third-place deck
 Inoue Toshio's fourth-place deck


 At the end of the Set 7 format, the Digital Monster Trading Card Game was a fundamentally different beast than when it had first begun. The game now revolved around each player's attempt to control one another's actions; both players tried to deny their opponent the ability to naturally evolve with Dark Tower, then interrupt their attempts at Armor evolving using Bo-351 No Items Allowed!. Then they tried to deny the opponent the use of their special abilities with Sagittarimon, Magnamon, Dinobeemon, Paildramon, and ultimately Bo-356 Imperialdramon, which would also lock them out of their Battle Phase Option cards. Plug-Ins were still seeing play, but were also being edged out in importance by Gold Banana. Once an Imperialdramon lock was set it was next to impossible to break it and regain the advantage except by stalling out the opponent's lifespan until their deck (and Digimon) reset, but any attempt to do so was frustrated by Digi Seabass essentially doubling the length their Imperialdramon would be around for.
The best time to break a Dark Tower lock was in the early game, by Armor evolving to Level IV then Jogressing with a compatible Digimon to reach Perfect and shut down Dark Tower. But falling too far behind to catch up was a serious reality now, and the metagame was in desperate need of more ways to get past Dark Tower--not getting to play at all wasn't fun, nor was it good game design. Moreover, burn damage through Cracker!! was still a highly dominating force in competitive play and greatly sped up matches, to the detriment of their interactivity. The only real way to stop Cracker!! was with Imperialdramon or Qinglongmon, which just snowballed the position of the player that got into the lead first.
This was far from the end of the story. Bandai was preparing their first "Ultimate Battle Deck" for launch at this time, and the Options and Digimon introduced in the sets to come would radically redefine the metagame by providing multiple hard counters to Dark Tower, alternative deck types to the Imperialdramon terror core, and subtle boosts both to Armor decks and recovery Digimon. The Evolution Phase print of No Items Allowed! was effectively impossible to counter in Set 7, but even that would have an answer in the months to come. The Digital Monster Card Game's second season would soon be drawing to a close, ushering in the Tamers era and a new wave of effects that sought to curb the power of Option cards and make direct buffs to attack much more impactful.
Getting Started with Hyper Colosseum in 2019
 While this series is far from over, it occurred to me that after reading all that you might be interested in actually sitting down and playing Hyper Colosseum. My purpose in writing this was never to revive the Digital Monster Card Game: the game's dead as can be in Japan, there's never been a scene for it abroad, and there are better TCGs on the market today. But perhaps you want to play out one of the game's more fun formats with friends. The good news is that it's very low-cost to get into thanks to many of the older cards not retaining value over time. For learning specific card effects and making English inserts, Wikimon is the only complete resource. For buying the physical stock there's actually a fair few international sellers trying to clear out their old supply, as well as American collectors that stockpiled the game years ago and are now doing the same.
I personally recommend playing the old 1999 format, as that was HC's peak in terms of game balance, accessibility, and the play-what-you-like experience. It's fairly easy to pick up Starter Decks (especially the second Starter Deck, which is the most overstocked) or put together commons into a serviceable deck. Holographic and hot-stamped cards are the most expensive, so if you're buying singles and want to avoid being priced out of casual play you can go for the non-foil Ultimates as your deck's core. Just remember to stick to basic deckbuilding rules: 30 cards per deck, no more than 3 cards with the same name, and at least one Level III Digimon.
This article uses affiliate links. Affiliate links are hyperlinks to product listings on e-commerce websites which redirect the reader to that site; if a reader accesses one of these listings through one of the links below, and/or purchases the item listed, the editor is provided a referral fee and/or commission fee. Affiliate links are labeled when present, and the service being linked to is identified.
Right now there are four options for buying Starter Deck 2.
Up next: Bringing the Dark Towers down, and beginning the game's third season.
 It was in this context that Starter Ver. 4 cracked the lid on two different Pandora's boxes: Infinity Mountain and the Sevens cards. The former was likely created in an effort to repair the damage dealt by Booster 6 while pulling the plug on Fladramon clones, as it gave any Ultimate-level Digimon the special abilities "The opponent loses its special abilities" and "During battle, add 200 to your attack power." Infinity Mountain effectively turned all fully-evolved Digimon into Metal Garurumon, at the expense of being forced to dedicate deck space and an Option Slot to Infinity Mountain while Digimon that had the ability naturally could use another Field Option card like Deep Savers, File Island, or Metal Empire.
The card was notable enough that when Bandai created its first rules-accurate digital conversion of the game, Digital Monster Card Game Ver. WSC, Infinity Mountain was the Field Option used to teach the player Field mechanics, and handed to them as part of the storyline to ensure they couldn't get stuck.
 |
| First you add "Sky," then you draw the frown... |
It would be unfair to blame the Sevens as a whole for this, as the issue was really that Bo-108 wasn't written with the maximum design space of the game in mind. Each of the Sevens were created to continuously add one keyword ability to either the user or the opponent's Digimon for as long as they remained in play, so that any associated Option cards could target them, and having the capacity to add "Sky," "Underground," "Grappling," et al. to cards was a natural evolution of having keyworded abilities in the first place. The Sevens were just as inevitable as Flight or Mark of Fury in Magic; what was not inevitable was a card that could kill the opponent outside the Point Calculation Phase. It was time for Bo-108 to find itself on a banlist--but there was no banlist for Hyper Colosseum, nor would there ever be. Bandai instead sought to control the usage of powerful burn cards through the introduction of other cards that did counter them, obligating players to upgrade to keep their local metagame from being consumed by burn.
It was for this reason that the combo was rarely seen in top cut despite how damaging it was. Option removal was the name of the game, with Emergency Program Halt!, No Items Allowed!, and The Ultimate Connection!! going from commonplace to mandatory, and for all the democratization Infinity Mountain was supposed to do, the Metal Garurumon line was a stronger core than ever before because of its access to Connection. Set 7 would introduce some Option removal of its own, but more than any of that, the "loses special abilities" property was the chief thing holding Bo-108 back. If your Digimon removed the opponent's special abilities then it would also remove the "Sky" keyword Speed Sevens added on, preventing Bo-108 from taking effect.
 |
| A sealed box of Starter Set Ver. 4. |
The final Option card of note out of Ver. 4 was The Time Shock, which further pushed Fladramon clones out of the mainstream by allowing players to directly manipulate any text that said "half" to become "double." Now instead of crippling their Digimon's attack power, Armors actually enhanced it. Any future effects of this type that Bandai wanted to be strong enough to see play would be designed with Time Shock specifically negated by their text. (e.g. Bo- 430 Armagemon.)
 |
| You have been visited by the IMPERIALDRAMON OF HEALTHY META. Fortune will smile upon you, but ONLY if you post THANK YOU IMPERIALDRAMON in the comments. |
Of note is that the Starter Set became available in late October 2000, between episodes 28 and 30 of Adventure 02. Imperialdramon didn't debut in the anime until more than two months later in episode 39, and previews for Starter V4 would have been out in V Jump as early as September--the TCG was playing into the hype cycle of the anime series as best it could, revealing things in advance to get audiences excited for a new Digimon's debut.
It was joined by two more unique cards, Moon Millenniumon and Qinglongmon, the former based on Millenniumon's appearance in the video game Tag Tamers from two months back, and the latter on the Holy Beast Digimon that was soon to play a focal role in the Adventure 02 anime. If you'll recall, Millenniumon was the hilariously impractical card from Set 4 with the awful Evolution Requirements. Moon Millenniumon went similarly unused because it required Millenniumon as a prerequisite for its Appearance Requirements: if you could actually get onto it Moon not only disabled the opponent's special abilities, but was unable to have its A-attack reduced to zero, and was functionally impossible to get rid of because it returned to its owner's hand upon defeat instead of going to the Dark Area.

Theoretically you could use The Revelation of Hidden Power!! to ignore Millenniumon's Evolution Requirements and evolve directly into it while on a Perfect-level Digimon, but the strength of Hidden Power was usually that it made an evolution you could carry out normally faster, not that it made impossible evolutions possible. Moreover, there was just no reason to run Moon with such a complicated setup when Imperialdramon (Black) was less work for better abilities.

Of the big three, Imperialdramon (Black) had the strongest effect on the game. The Battle Phase timing on its Option-discarding effect, and the fact that it happened every turn Imperialdramon battled, was highly disruptive and forced the opponent to essentially play without Plug-Ins, Fields, Black Gear/Devil Chip, or Let's Stop Fighting.
It also disrupted Cracker!! and Is It True...You Can't Fly?, because the Activation Timing for these cards was during the Battle Phase. However, it couldn't totally check the dominance of burn damage because Imperialdramon was just as susceptible as anyone else to losing its special abilities--when two Imperialdramon stared each other down, or Imperialdramon came face-to-face with Metal Garurumon, Cracker!! won.
Booster Set 7 introduced six new Digimon that negated special abilities as well as either Plug-In cards or No Items Allowed/Emergency Program Halt!, and Imperialdramon was strictly better than all of them. It was better than every other card that negated special abilities, and cards that negated special abilities were inherently superior to those that did not--and by process of elimination, this singled out Imperialdramon as the best Digimon in the game. The Terror of the Dragon Emperor was real, and it clouded the skies over hobby shops all across Japan.
If not for Imperialdramon there could have been as many as sixteen viable decks in the format thanks to Infinity Mountain, with even the likes of King Etemon having a fair shot so long as it was backed up by the Field Option. But let's not kid ourselves--cards like these are not mistakes. The game was functioning exactly as intended; the Ferris wheel was running on schedule, cycling out old expensive decks made up of rare chase cards for new expensive decks made up of rare chase cards.

It was not immediately relevant, but would become so with the debut of Turuiemon in Booster 13 a year later, who would gain +200 attack power by gaining Grappling.

In order to prevent this effect from being recycled, Digi Seabass stacked itself onto the Point Gauge at the end of its use, which in the Digital Monster Card Game is the equivalent of being removed from play.


Gold Banana changed the core dynamics of the game by making it so that A beat both B and C, and for that reason Banana immediately replaced all other Plug-In Option cards in competitive decks. Thus the card enjoyed a brief stint as the replacement "Plug-In" of choice, before further developments in Set 8 outmoded it.

Armor and Win Ratio evolutions that actually used Digimentals or Win Ratio 40/60/80% instead of S couldn't be countered, but other methods that bypassed Evolution/Fusion/Appearance Requirements would be shot down. The only real way around this was The Revelation of Hidden Power!!, which as a Program Option was immune to No Items Allowed! and resolved in the Battle Phase besides.
Freeze!! trapped the opponent's A B and C at their fixed values during the time it was activated. Since Freeze!! couldn't be affected by Option cards it was an easy way of preventing the opponent from making further changes, but it wouldn't save you from them just switching their attack type outright.
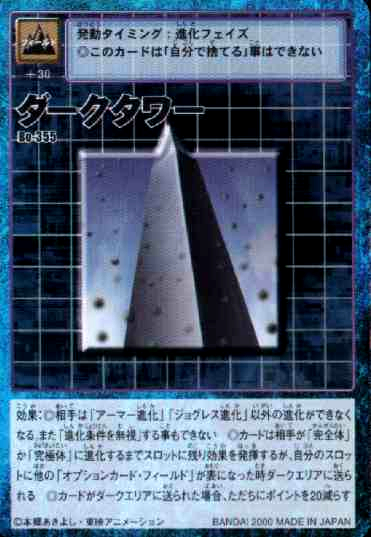
At the same time, Dark Tower's dominance was fragile from the start. If Field Options received any kind of basic counter in the way that Programs and Items had, the card would be as easy to turn off as a Plug-In.
One of the more subtle shifts of the Set 7-on format was the emergence of Wormmon decks. Because Bo-356 Imperialdramon could evolve from Dinobeemon, and Bo-308 Dinobeemon could evolve through a Jogress of two Armor Digimon--Searchmon and Shadramon or Flybeemon and Honeybeemon--Wormmon became a very popular competing core for Imperialdramon decks, as it could bypass Dark Tower by Armor evolving and then Jogressing to Perfect to disable Dark Tower.
The Control Format
As with the previous tournament, the winner played an exhibition match with Tailmon-Betsu, while the top three winners' decks were published in an issue of V Jump magazine. The top 33 players at Tokyo were awarded Gold Tamer status.
 |
| Ogino Shintarō, center. |
Digimon Cards (16)Ogino used Digi Seabass to extend the duration of his own lock while shutting down the opponent's Options with The Ultimate Connection!!. The one way to bypass Lampmon's Plug-In lock was to use Gold Banana to switch to A-attack, but this was impossible if the Digimon wasn't evolved to Perfect/Ultimate, and Connection could still shut that down. Aside from Lampmon, the individual Digimon were largely unremarkable; it was the combination of multiple overlapping locks that shut down the opponent's plays and made it so only Ogino could play the game. If you wanted to beat the deck, you had to play a long game trying to catch him when his deck refreshed and his Field Option went away, setting up a lock of your own to keep Lampmon from coming out.
x3 Bakumon (Bo-36)
x1 Garurumon (St-6)
x3 Meramon (Bo-5)
x3 Mamemon (Bo-64)
x3 Metal Mamemon (Bo-65)
x3 Lampmon (Bo-312)
Option Cards (14)
x1 Win Ratio 40%! (St-59)
x1 Win Ratio 40%! (St-217)
x1 Win Ratio 40%! (Bo-104)
x3 The Ultimate Connection!!
x1 Digi Seabass
x2 Gold Banana
x3 No Items Allowed! (Bo-351)
x2 Dark Tower
Misoko Ryou's second-place deck
Digimon Cards (14)By contrast, Misoko's deck was built to counter Dark Tower with Armor evolution and Jogress, running both the aforementioned Wormmon lines and an Owlmon + Shadramon > Were Garurumon > Boltmon line to break a Tower lock. It was notably missing Imperialdramon, with Qinglongmon filling much the same role.
x1 V-mon (St-112)
x1 Wormmon (St-114)
x1 Owlmon (St-134)
x1 Shadramon (St-135)
x1 Were Garurumon (St-141)
x1 War Greymon (Bo-266)
x1 Boltmon (Bo-41)
x1 Boltmon (Bo-196)
x1 Shakkoumon (Bo-204)
x1 Honeybeemon (Bo-219)
x1 Ankylomon (Bo-280)
x1 Dinobeemon (Bo-315)
x1 Flybeemon (Bo-316)
x1 Qinglongmon (Bo-342)
Option Cards (16)
x1 Just A Little Metal Enhancement
x1 A Counter Attack From Crisis!
x1 That Was a Good Time
x1 Digimental of Courage
x1 Digimental of Knowledge
x1 Win Ratio 80%!
x1 The Dark Lord's Mansion
x1 Let's Stop Fighting
x1 Evil Spiral
x2 The Ultimate Connection!!
x2 Cracker!!
x1 Spiked Club
x1 Gold Banana
x1 A Little Overloaded...!?
Ichizaki Masahito's third-place deck
Digimon Cards (11)Ichizaki's deck was likewise built with the Dark Tower matchup in mind, and of the top cut decks actually stands out for how well balanced it is. Wormmon has the option of either evolving normally if it gets its own Dark Tower up and through the first evolution before the opponent can get theirs out, culminating in locking the endgame in with Imperialdramon, or maneuvering around the opponent's Dark Tower with a Shadramon Armor evolution. No matter which gameplan was necessary, Devil Chip could be used to secure wins on key turns thanks to all of Wormmon's evolutions terminating as Virus-attribute. While Misoko placed higher in this tournament, Ichizaki's deck has more in common with the Dinobeemon decks to follow.
x1 Wormmon (St-114)
x2 Stingmon (St-115)
x2 Shadramon (St-135)
x2 Dinobeemon (Bo-308)
x2 Paildramon (Bo-335)
x2 Imperialdramon (Bo-356)
Option Cards (19)
x3 Super Evolution Plug-In S
x2 Digimental of Courage
x2 Infinity Mountain
x3 Devil Chip
x2 The Revelation of Hidden Power!!
x2 Cracker!!
x3 Gold Banana
x2 Dark Tower
Kobayashi Noboru's fourth-place deck
Digimon Cards (15)
x1 Candmon (St-41)
x1 Pico Devimon (St-42)
x2 Wizarmon (St-44)
x1 V-mon (St-112)
x2 Nefertimon (St-131)
x2 Silphymon (St-282)
x2 Metal Garurumon (Bo-109)
x2 Were Garurumon (Bo-300)
x2 Qinglongmon (Bo-301)
Option Cards (15)
x2 Win Ratio 80%!
x2 I Take That Back After All!! (Bo-161)
x3 The Ultimate Connection!! (Bo-302)
x3 Cracker!! (Bo-305)
x3 Gold Banana (Bo-349)
x2 Dark Tower (Bo-355)
(Note that some of the set numbers for these cards may be incorrect; Bandai repeatedly list incorrect set numbers for cards on other deck lists. In the case of Metal Garurumon the number given actually refers to a Metal Garurumon, so whether or not it being the vanilla variant is a mistake is up for debate.)
Digimon Cards (11)
x1 Hagurumon (St-171)
x1 Andromon (St-183)
x1 Knightmon (St-190)
x2 Ogremon (St-195)
x2 Golemon (St-197)
x2 Revolmon (St-203)
x1 Metal Tyrannomon (St-208)
x1 Imperialdramon (Bo-356)
Option Cards (19)
x2 Defense Plug-In C
x1 No Items Allowed! (St-162)
x1 Emergency Program Halt! (St-163)
x1 Win Ratio 40%!
x1 Emergency Program Halt! (Bo-50)
x1 Tag (Bo-98)
x1 Boost Chip (Bo-208)
x3 The Revelation of Hidden Power!! (Bo-303)
x2 Cracker!! (Bo-305)
x1 Digi Seabass (Bo-346)
x2 No Items Allowed! (Bo-351)
x3 Dark Tower (Bo-355)
Digimon Cards (13)
x1 Hawkman (St-116)
x2 Honeybeemon (Bo-219)
x3 Dinobeemon (Bo-308)
x3 Flybeemon (Bo-316)
x2 Imperialdramon (Bo-356)
Option Cards (17)
x1 That Was a Good Time
x2 Super Evolution Plug-In S (St-100)
x3 Digimental of Knowledge
x2 Let's Stop Fighting
x1 Digi Seabass (Bo-346)
x3 No Items Allowed! (Bo-351)
x3 Dark Tower (Bo-355)
Digimon Cards (13)
x1 Agumon (St-1)
x3 XV-mon (St-113)
x3 Stingmon (St-115)
x2 Dinobeemon (Bo-308)
x2 Paildramon (Bo-335)
x2 Imperialdramon (Bo-356)
Option Cards (17)
x2 Defense Plug-In C
x2 Let's Stop Fighting
x2 Super Evolution Plug-In S (St-100)
x3 The Revelation of Hidden Power!! (Bo-303)
x2 Digi Seabass (Bo-346)
x2 Gold Banana (Bo-349)
x2 No Items Allowed! (Bo-351)
x2 Dark Tower (Bo-355)
Digimon Cards (10)
x1 V-mon (St-112)
x1 XV-mon (Bo-259)
x2 Magnamon (Bo-300)
x1 Honeybeemon (Bo-219)
x1 Flybeemon (Bo-316)
x1 Paildramon (Bo-222)
x2 Dinobeemon (Bo-308)
x1 Imperialdramon (Bo-356)
Option Cards (20)
x1 Offense Plug-In A
x1 Defense Plug-In C
x1 High Speed Plug-In B
x1 That Was a Good Time
x1 Super Evolution Plug-In S (St-100)
x1 Digimental of Wisdom
x2 Black Gear (Bo-103)
x2 Digimental of Miracles
x3 The Revelation of Hidden Power!! (Bo-303)
x1 Cracker!! (Bo-305)
x2 Gold Banana (Bo-349)
x1 No Items Allowed! (Bo-351)
x3 Dark Tower (Bo-355)
 |
| The Nagoya tournament finals, between Futagi Yoshiya (left) and Taira Tetsurou (right) |
The final tournament of the Set 7 format was held in Nagoya, Aichi prefecture, on November 12th. 45 tamers competed in 5 rounds of Swiss, with the top nine players making Gold Tamer status and the top three decklists being published in V Jump. While Magnamon was extremely popular in Nagoya and Dark Tower continued to be an essential part of the metagame, only dedicated Magnamon deck made top four while the rest of the cut was made up of decks that could easily fit Imperialdramon into their evolution lines. The tournament was won by 14-year-old Taira Tetsurou, who used a mixed Magnamon/Imperialdramon deck .
Taira Tetsurou's first-place deck
"V-Impact! V-mon Deck" (ブイッと一撃!ブイモンデック)
Digimon Cards (12)x1 V-mon (St-112)x1 XV-mon (St-113)x1 Stingmon (St-115)x1 Fladramon (St-122)x1 Yaksamon (St-125)x1 Magnamon (Bo-300)x2 Dinobeemon (Bo-308)x2 Paildramon (Bo-335)x2 Imperialdramon (Bo-356)Option Cards (18)x2 Defense Plug-In C (St-50)x1 A Counter Attack from Crisis! (St-54)x1 Super Evolution Plug-In S (St-100)x1 Digimental of Couragex1 No Items Allowed! (St-162)x1 Emergency Program Halt! (St-163)x1 Black Gear (Bo-103)x1 Dimental of Miraclesx1 The Revelation of Hidden Power!! (Bo-303)x3 Cracker!! (Bo-305)x2 Gold Banana (Bo-349)x1 Freeze!! (Bo-353)x1 Dark Tower (Bo-355)
There was no way to evolve to Yaksamon in this deck, but instead Taira used Yaksamon as an alternate way to pay the cost for evolving into Paildramon. Paildramon could be made either from Jogressing XV-mon and Stingmon or from Yaksamon and Fladramon, and Armor evolving to Fladramon or Magnamon was the deck's means of bypassing Dark Tower. While Fladramon could thus get to Perfect through Jogress, Magnamon had no way of going into Dinobeemon or Paildramon naturally--it had to rely on The Revelation of Hidden Power!! if it wanted to advance towards an Imperialdramon endgame.
Futagi Yoshiya's second-place deck
"Wormmon Evolution Deck" (ワームモン進化デック)
Digimon Cards (14)x1 Wormmon (St-114)x2 Shadramon (St-135)x1 Kokuwamon (St-173)x2 Searchmon (Bo-290)x1 Dinobeemon (Bo-308)x2 Pucchiemon (Bo-323)x2 Paildramon (Bo-335)x1 Qinglongmon (Bo-342)x1 Imperialdramon (Bo-356)Option Cards (16)x1 Transform to Level IV!x2 Digimental of Couragex1 Win Ratio 80%!x2 Liquid Crystal Floppy (Bo-150)x1 Devil Chip (Bo-151)x1 Digi Seabass (Bo-346)x1 Digimon Graveyard (Bo-347)x1 Chaotic Wave (Bo-348)x2 Digimental of Kindnessx2 No Items Allowed! (Bo-351)x2 Dark Tower (Bo-355)
Asai Hiroshi's third-place deck
Digimon Cards (6)x1 V-mon (St-112)x3 Sethmon (Bo-217)x1 Sagittarimon (Bo-293)x1 Magnamon (Bo-300)Option Cards (24)x3 Defense Plug-In C (St-50)x1 High Speed Plug-In B (St-51)x1 That Was a Good Time (St-57)x3 Digimental of Lovex2 Digimental of Hopex1 Emergency Program Halt! (St-163)x2 Emergency Program Halt! (Bo-50)x1 No Items Allowed! (Bo-49)x1 No Items Allowed! (Bo-351)x2 Let's Stop Fightingx2 Black Gear (Bo-103)x1 Digimental of Miracles (Bo-301)x3 The Revelation of Hidden Power!! (Bo-303)x1 Dark Tower (Bo-355)
Suzuki Junpei's fourth-place deck
Digimon Cards (12)x1 Wormmon (St-114)x3 Shadramon (St-135)x3 Searchmon (Bo-290)x3 Dinobeemon (Bo-308)x2 Imperialdramon (Bo-356)Option Cards (18)x2 Offense Plug-In Ax3 Digimental of Couragex3 Digimental of Knowledgex2 Win Ratio 80%!x3 No Items Allowed! (Bo-49)x2 The Revelation of Hidden Power!! (Bo-303)x1 Digi Seabass (Bo-346)x2 Gold Banana (Bo-349)

The best time to break a Dark Tower lock was in the early game, by Armor evolving to Level IV then Jogressing with a compatible Digimon to reach Perfect and shut down Dark Tower. But falling too far behind to catch up was a serious reality now, and the metagame was in desperate need of more ways to get past Dark Tower--not getting to play at all wasn't fun, nor was it good game design. Moreover, burn damage through Cracker!! was still a highly dominating force in competitive play and greatly sped up matches, to the detriment of their interactivity. The only real way to stop Cracker!! was with Imperialdramon or Qinglongmon, which just snowballed the position of the player that got into the lead first.
This was far from the end of the story. Bandai was preparing their first "Ultimate Battle Deck" for launch at this time, and the Options and Digimon introduced in the sets to come would radically redefine the metagame by providing multiple hard counters to Dark Tower, alternative deck types to the Imperialdramon terror core, and subtle boosts both to Armor decks and recovery Digimon. The Evolution Phase print of No Items Allowed! was effectively impossible to counter in Set 7, but even that would have an answer in the months to come. The Digital Monster Card Game's second season would soon be drawing to a close, ushering in the Tamers era and a new wave of effects that sought to curb the power of Option cards and make direct buffs to attack much more impactful.

I personally recommend playing the old 1999 format, as that was HC's peak in terms of game balance, accessibility, and the play-what-you-like experience. It's fairly easy to pick up Starter Decks (especially the second Starter Deck, which is the most overstocked) or put together commons into a serviceable deck. Holographic and hot-stamped cards are the most expensive, so if you're buying singles and want to avoid being priced out of casual play you can go for the non-foil Ultimates as your deck's core. Just remember to stick to basic deckbuilding rules: 30 cards per deck, no more than 3 cards with the same name, and at least one Level III Digimon.
This article uses affiliate links. Affiliate links are hyperlinks to product listings on e-commerce websites which redirect the reader to that site; if a reader accesses one of these listings through one of the links below, and/or purchases the item listed, the editor is provided a referral fee and/or commission fee. Affiliate links are labeled when present, and the service being linked to is identified.
Right now there are four options for buying Starter Deck 2.
- Starter Deck 2 at $7.54
each. (eBay affiliate.)
- Starter Deck 2 at $8.99
- Starter Deck 2 at $12.99
each. (Amazon affiliate.)
- Starter Deck 2 at $11.99
- Box of 12 Starter Deck 2s at $49.95
- Box of 12 Starter Deck 2s at $69.99
- Booster 1 collection for $60 (eBay affiliate)
- Booster 2 collection
- Booster 3 collection
- Booster 4 collection
- Booster 5 collection
- Booster 6 collection
- Booster 7 collection
Up next: Bringing the Dark Towers down, and beginning the game's third season.